Every photograph is different, so we need to learn multiple methods to quickly remove the background in Photoshop. This is Part 2 of a four-part series.
How Color Range Works:
The Color Range command was introduced in Photoshop 3, and it provides vastly improved results than the Magic Wand. Color Range selects a specified range of color within an entire image or even a subset of colors within a selection. Many options are available in the drop down menu. You can select by skin tones, by certain colors like blues or greens, and by highlights, shadows or midtones. You can use Color Range to refine an existing selection, too. This command works best when there is a solid color in the background.
When to Use Color Range:
Use this command anytime when the image’s tonal range is too wide for the Blend If method.
What You’ll Need:
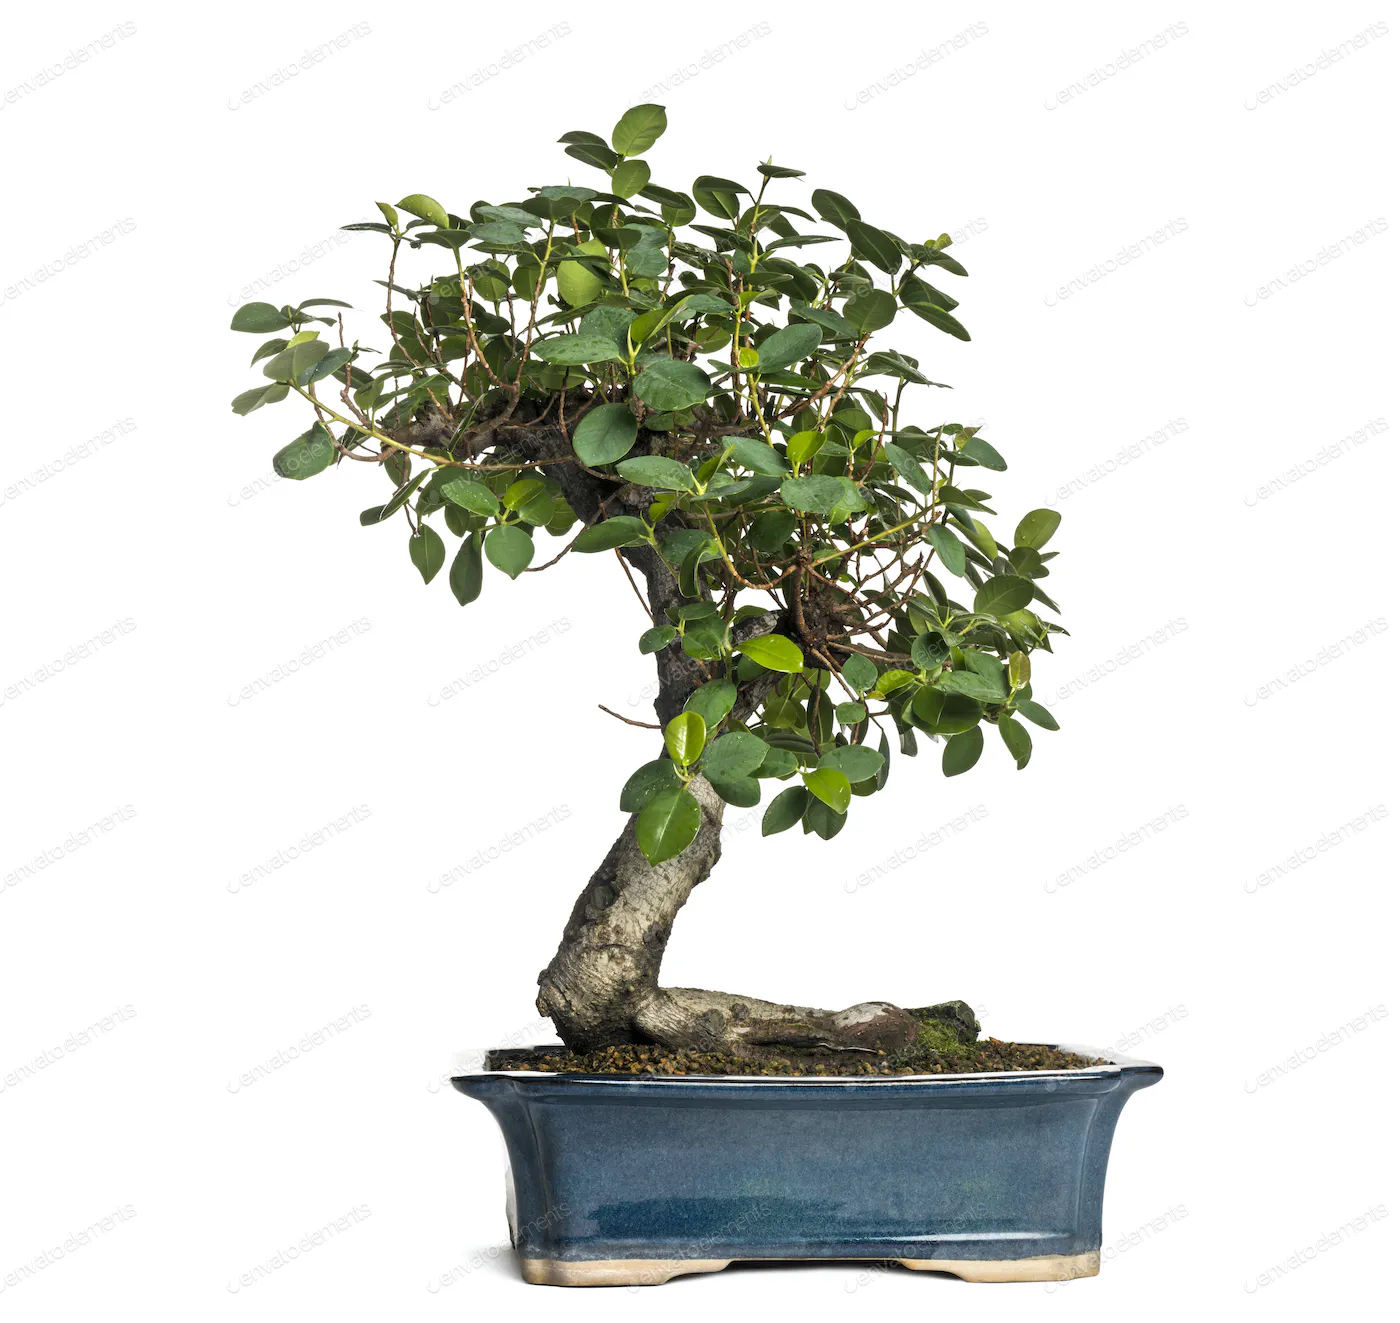
To complete this tutorial on making the background transparent in Photoshop, download this resource image: Bonsai
Directions:
Here are step-by-step instructions for removing the background using the Color Range command.
Step 1
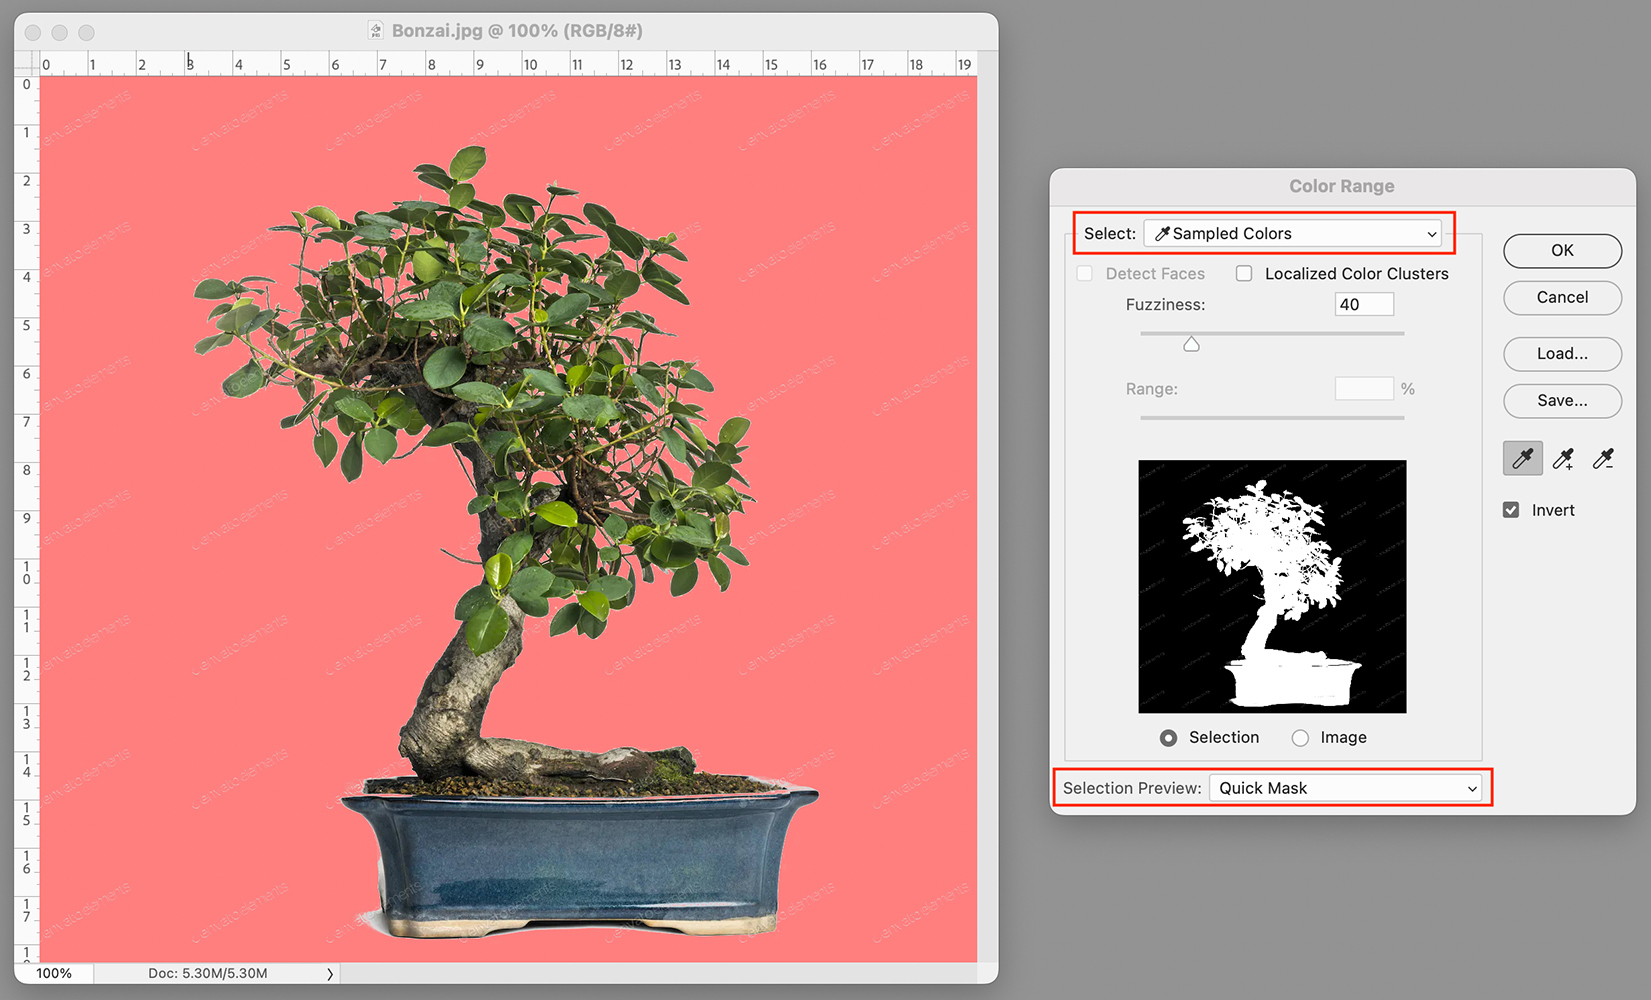
Download and open the resource file in Photoshop. Now save it as a PSD file. Next, go to the Select Menu and scroll down to Color Range. A dialog box will appear.
Choose “Sampled Colors from the drop-down menu at the top of the dialog box. Set Fuzziness to 40. Under the preview window, click the radio button for Selection. At the very bottom of the dialog box, select Quick Mask from the drop-down menu. Notice the row of eyedropper icons under the Save button on the right. The main icon of the left will be automatically selected for you. (You can select the other two to refine your selection, or you can hold down the shift key (⇧) to add to your selection or the option key (⌥) to subtract from your selection later.) Make sure that Invert is checked because we are going to select the background.
Use the default eyedropper to click anywhere on the background of the preview image or the actual photo. Notice that the preview window shows the bonsai as a white silhouette on black and the photo shows a full color image on red. The watermarks show in both places, but don’t worry about that because they will be lost when we make a mask. Click OK.
Step 2
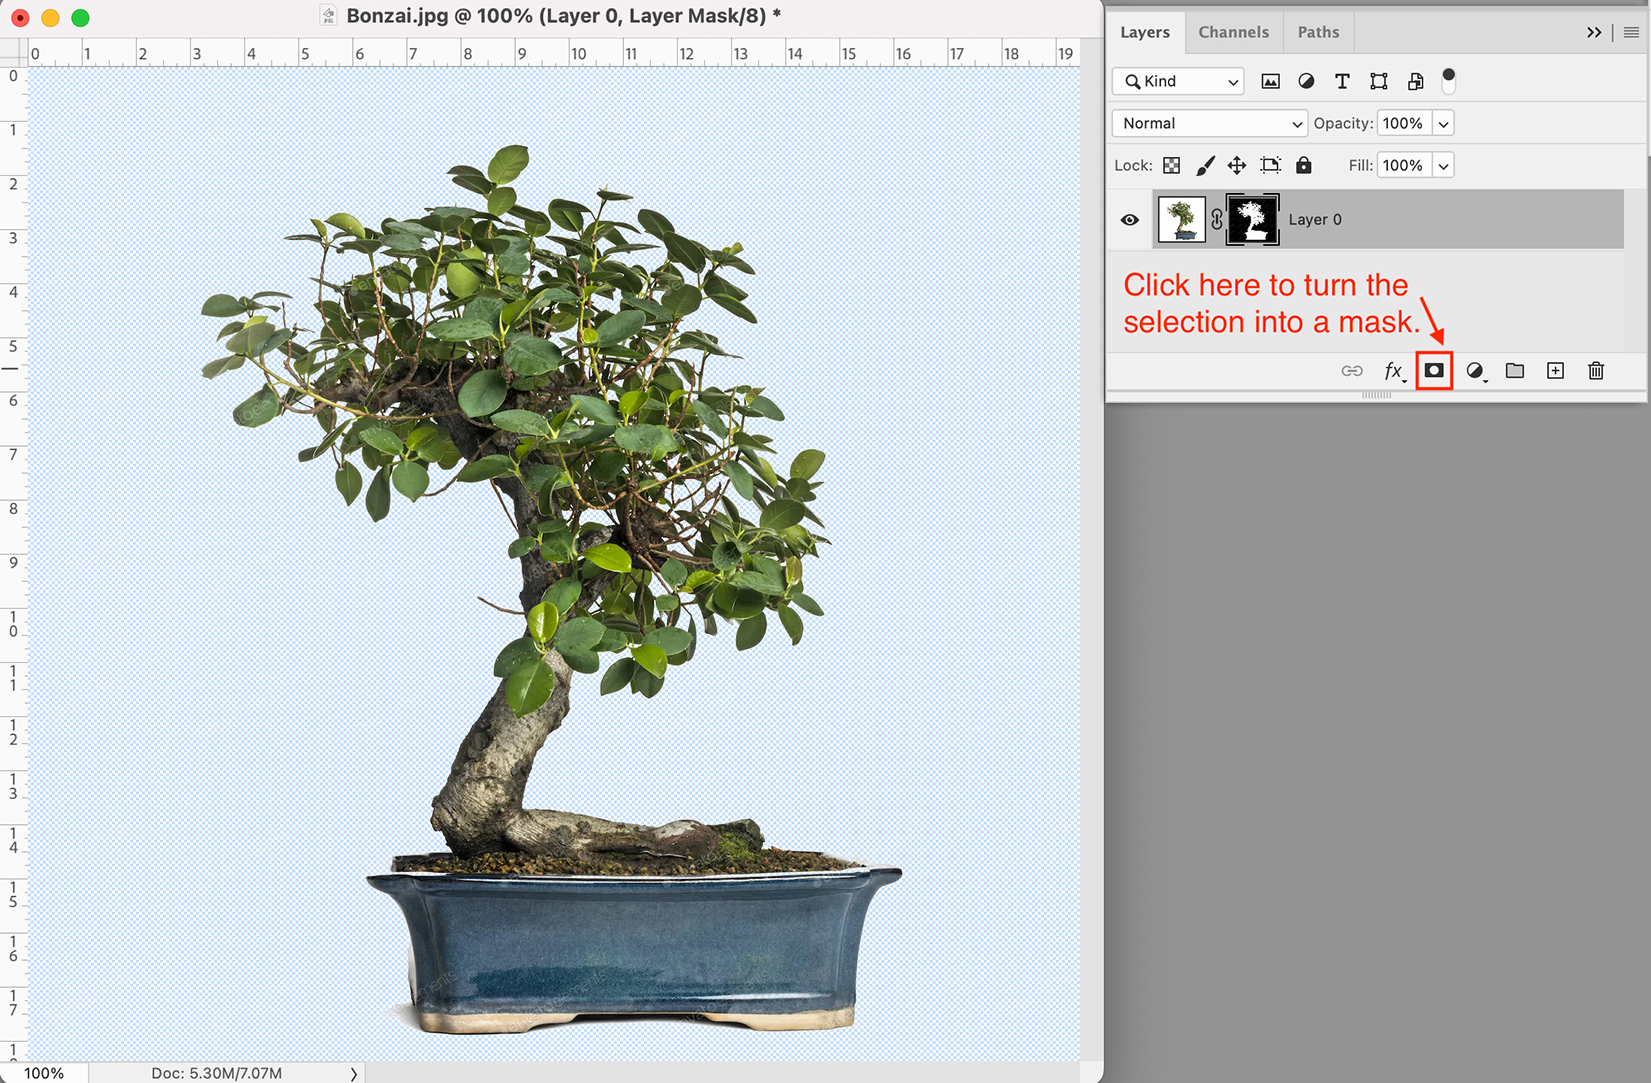
Turn your selection into a layer mask by clicking on the mask icon at the bottom of the Layer Panel. Notice how the watermarks are gone, but so are the highlights in our bonsai. We need to clean up our selection. It helps to add another layer filled with a contrasting color so that you can see everything. I chose yellow. Make sure to drag your layer of contrasting color to the bottom.
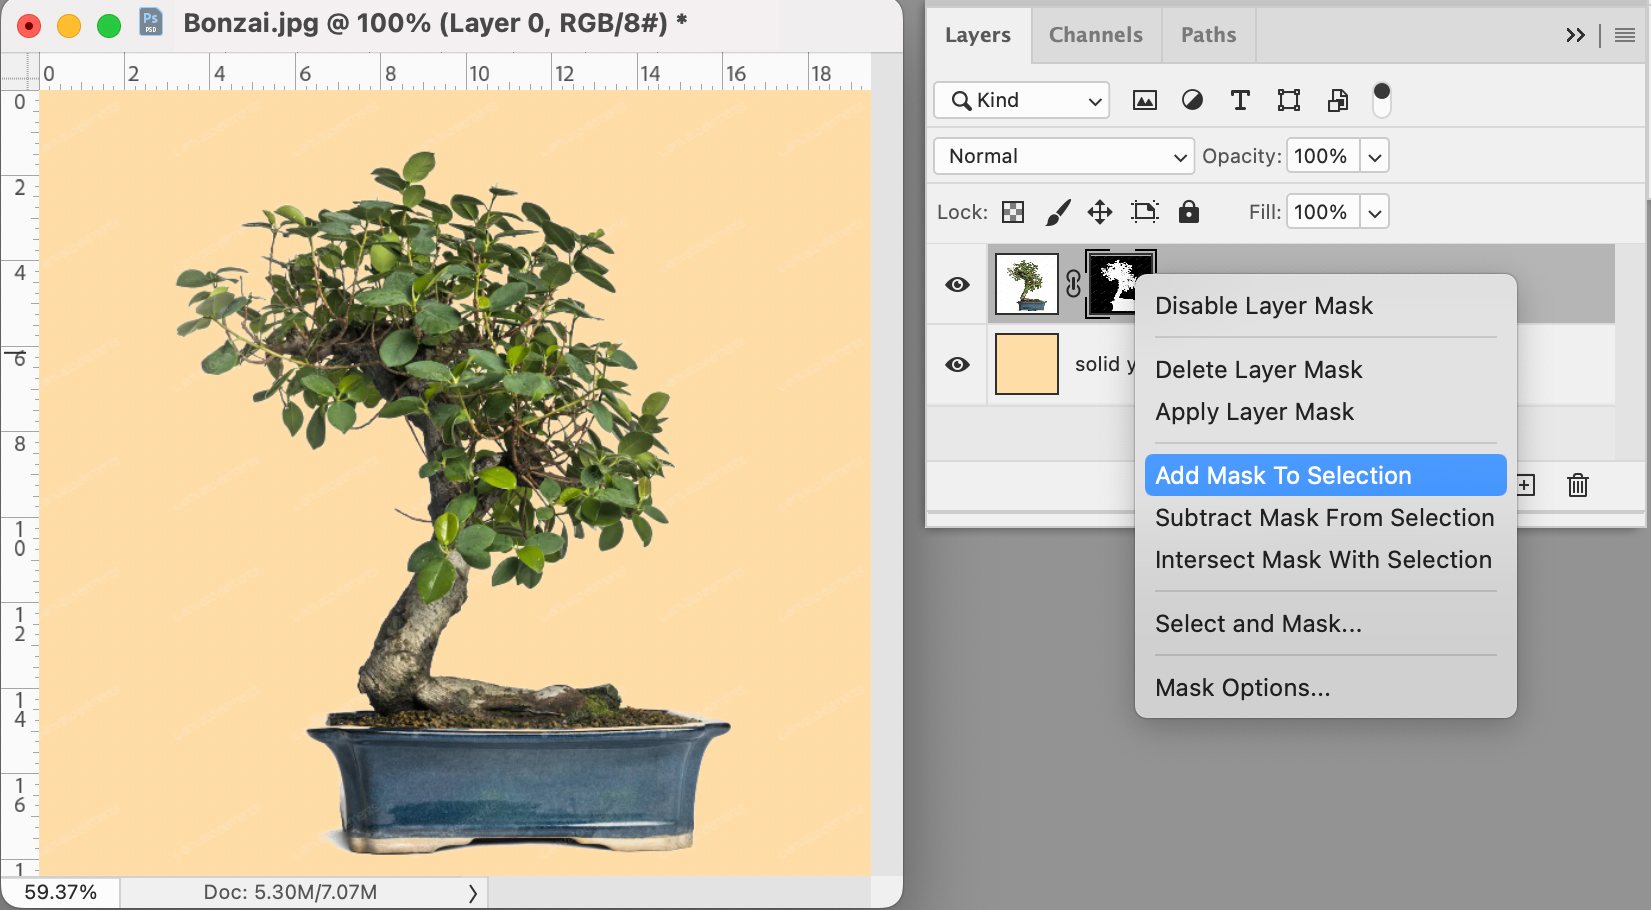
Step 3
Control-click on the layer mask to reveal a pop-up menu. Scroll down to “Add Mask to Selection”. Next, go to the Select Menu > Modify > Contract and enter 1 in the dialog box.
Step 4
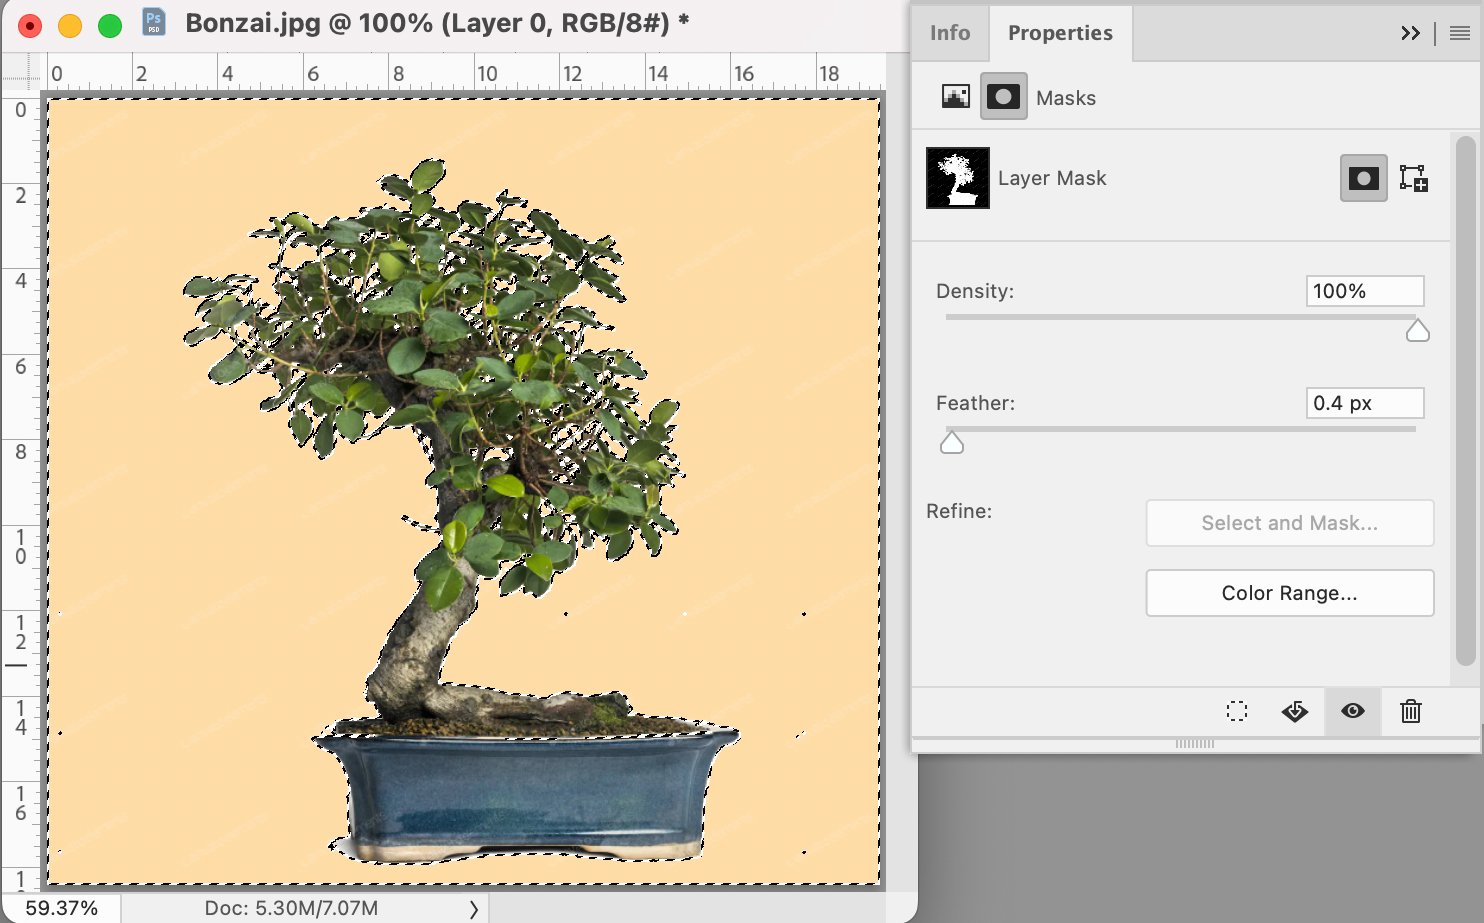
Making sure that you still have the layer mask selected, invert the selection (⇧⌘I) and fill the selection on the mask with black (⇧F5 and select black in the pop-up menu). Now all the watermarks are gone but we still have all the skinny stems. If the selection looks too harsh, go to the Windows Menu and scroll down to Properties. Add a Feather of 0.4 px. Deselect by typing ⌘D.
Step 5
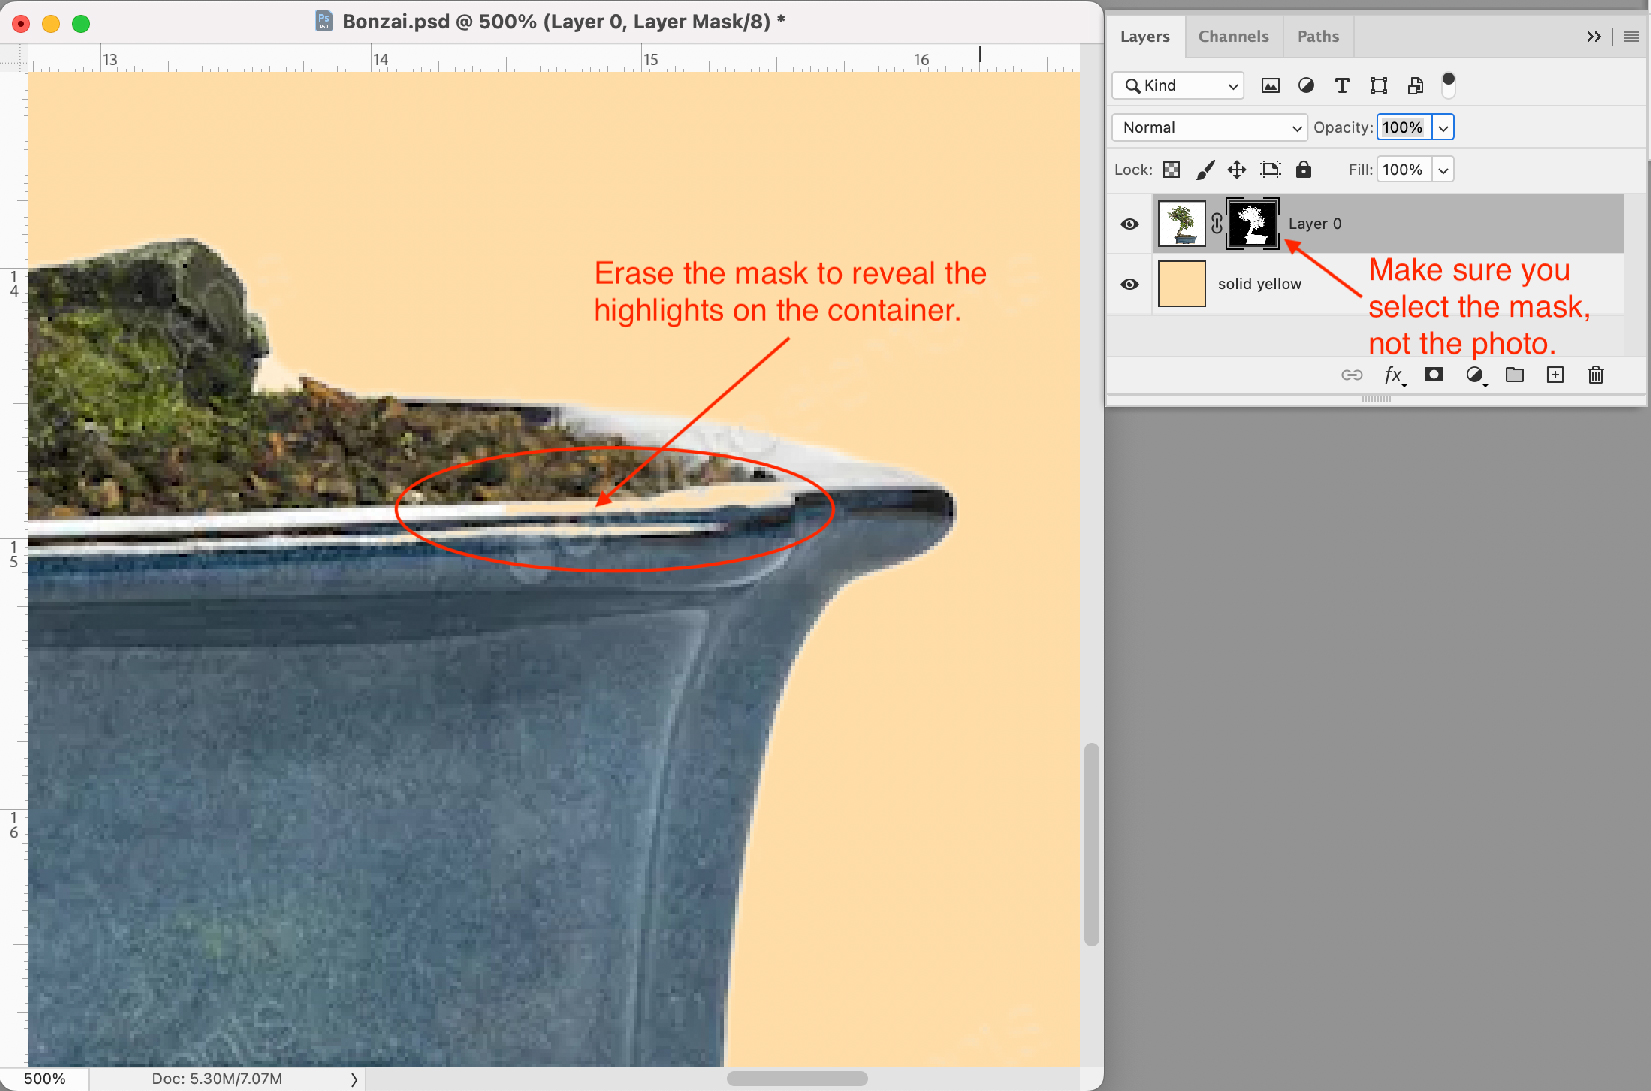
Zoom in to examine your mask in detail. I see that the bonsai looks pretty good, but the missing highlights on the container are allowing the yellow layer to show through.
If you don’t have the Options showing at the top of your open Photoshop application, go the Windows Menu and scroll down to Options. Go to the Options area, type an E to see the Eraser Tool options, and set the Eraser to 100% hard brush, type a zero to make the opacity 100%. Apply the Eraser Tool directly to the mask until everything looks right.
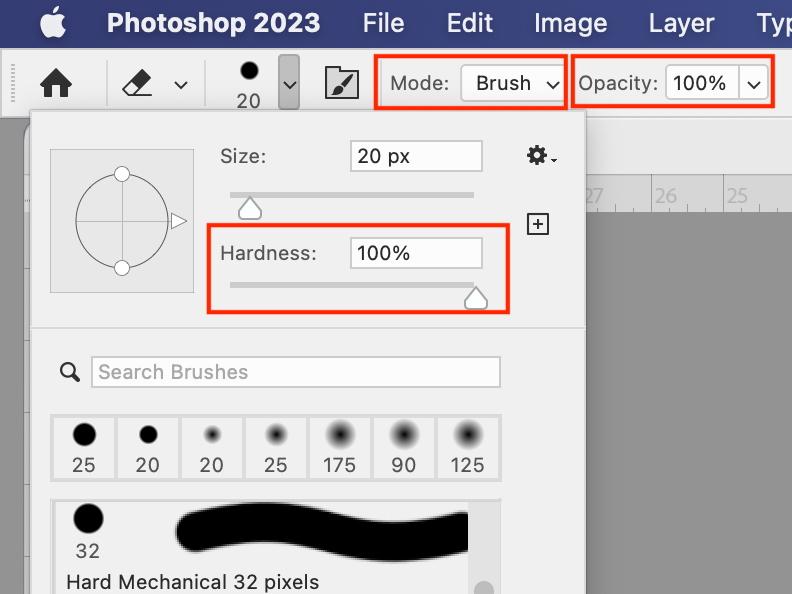
If you make a mistake, use the Brush Tool (type a B) at 100% hardness and 100% opacity to paint the mask back in. You can change the size of your Eraser or Brush on the fly as you work. To make your Eraser or Brush smaller, type a left bracket ( [ ). To make them bigger, type a right bracket ( ] ).
Work on your mask until you are satisfied. Save your project as a PSD file so that you can make changes to it later, if needed. You are done!
Envato Tuts has posted a video tutorial for all four methods on YouTube for those who learn best that way. Here is the link: https://www.youtube.com/watch?v=vunPHP99_xw Be sure to like and subscribe to their channel!
Jump to the other tutorials on how make backgrounds transparent in Photoshop:
Link to METHOD #1 - Blend If
Link to METHOD #3 - Select & Mask - Coming Soon!
Link to METHOD #4 - Combo Tools - Coming Soon!