Every photograph is different, so we need to learn multiple methods to quickly remove the background in Photoshop. This is Part 1 of a four-part series.
How Blend If Works:
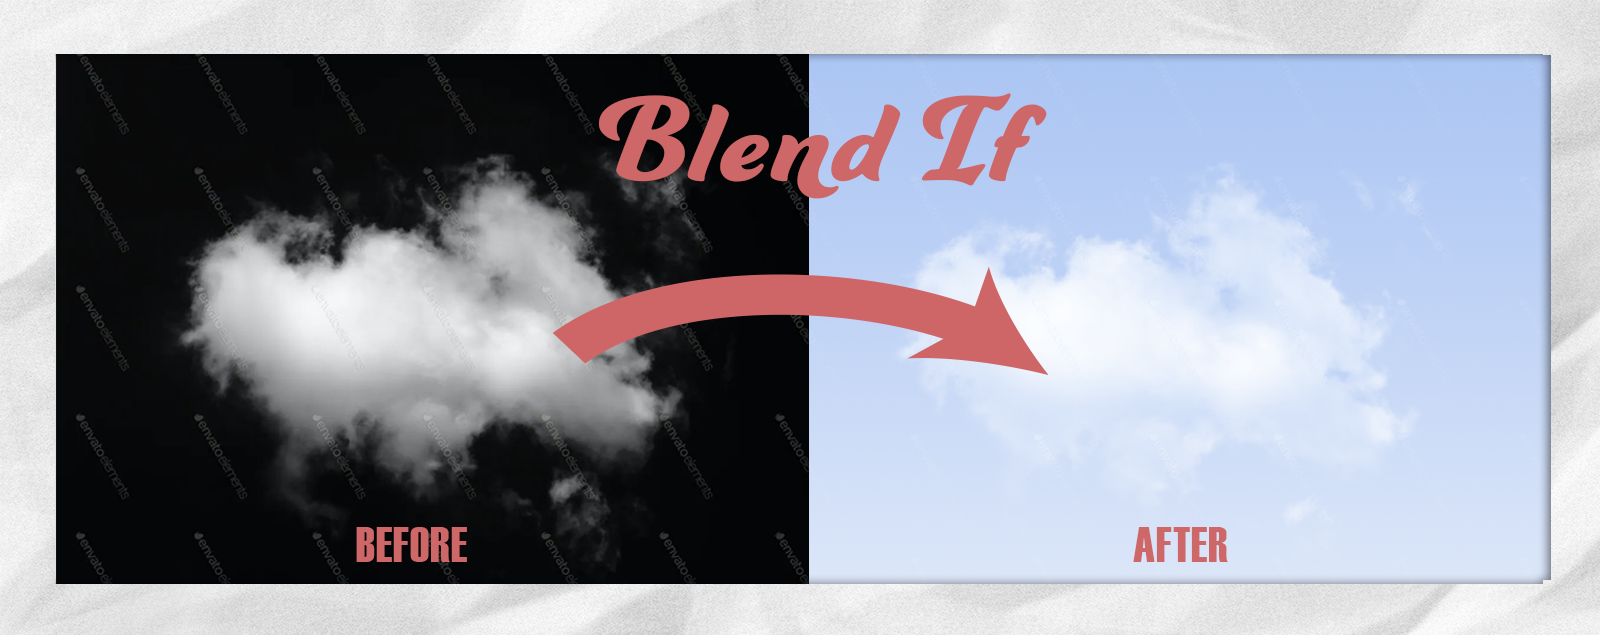
Blend If works by allowing you to blend a layer with a background layer by adjusting the opacity of the shadows, midtones, and highlights to varying degrees. It works best on images with a strong contrast in values between the subject and the background.
When to Use Blend If:
Use this method whenever you want to blend two layers together. Examples: make a text layer look like it was painted on a wall; to add a gradient layer to a photo; or to add a cloud to a background. We will add a gradient layer to a cloud photo in this lesson.
What You’ll Need:
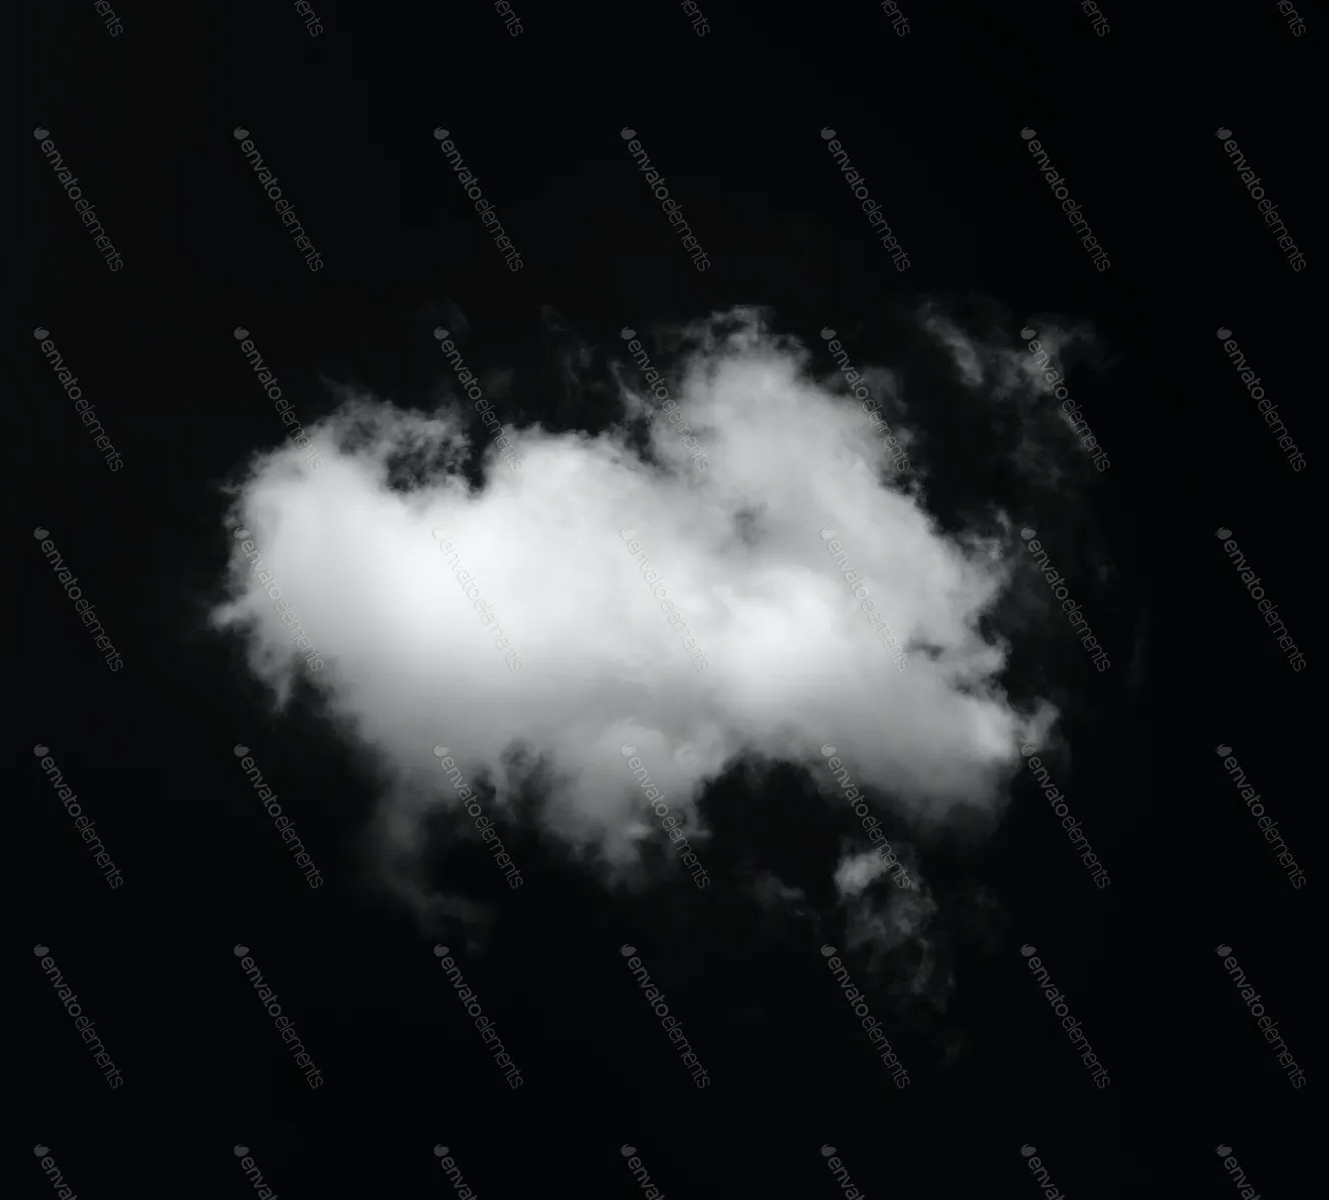
To complete this tutorial on making the background transparent in Photoshop, download this resource image: Cloud
Directions:
Here are step-by-step instructions for removing the background using the Blend If method.
Step 1
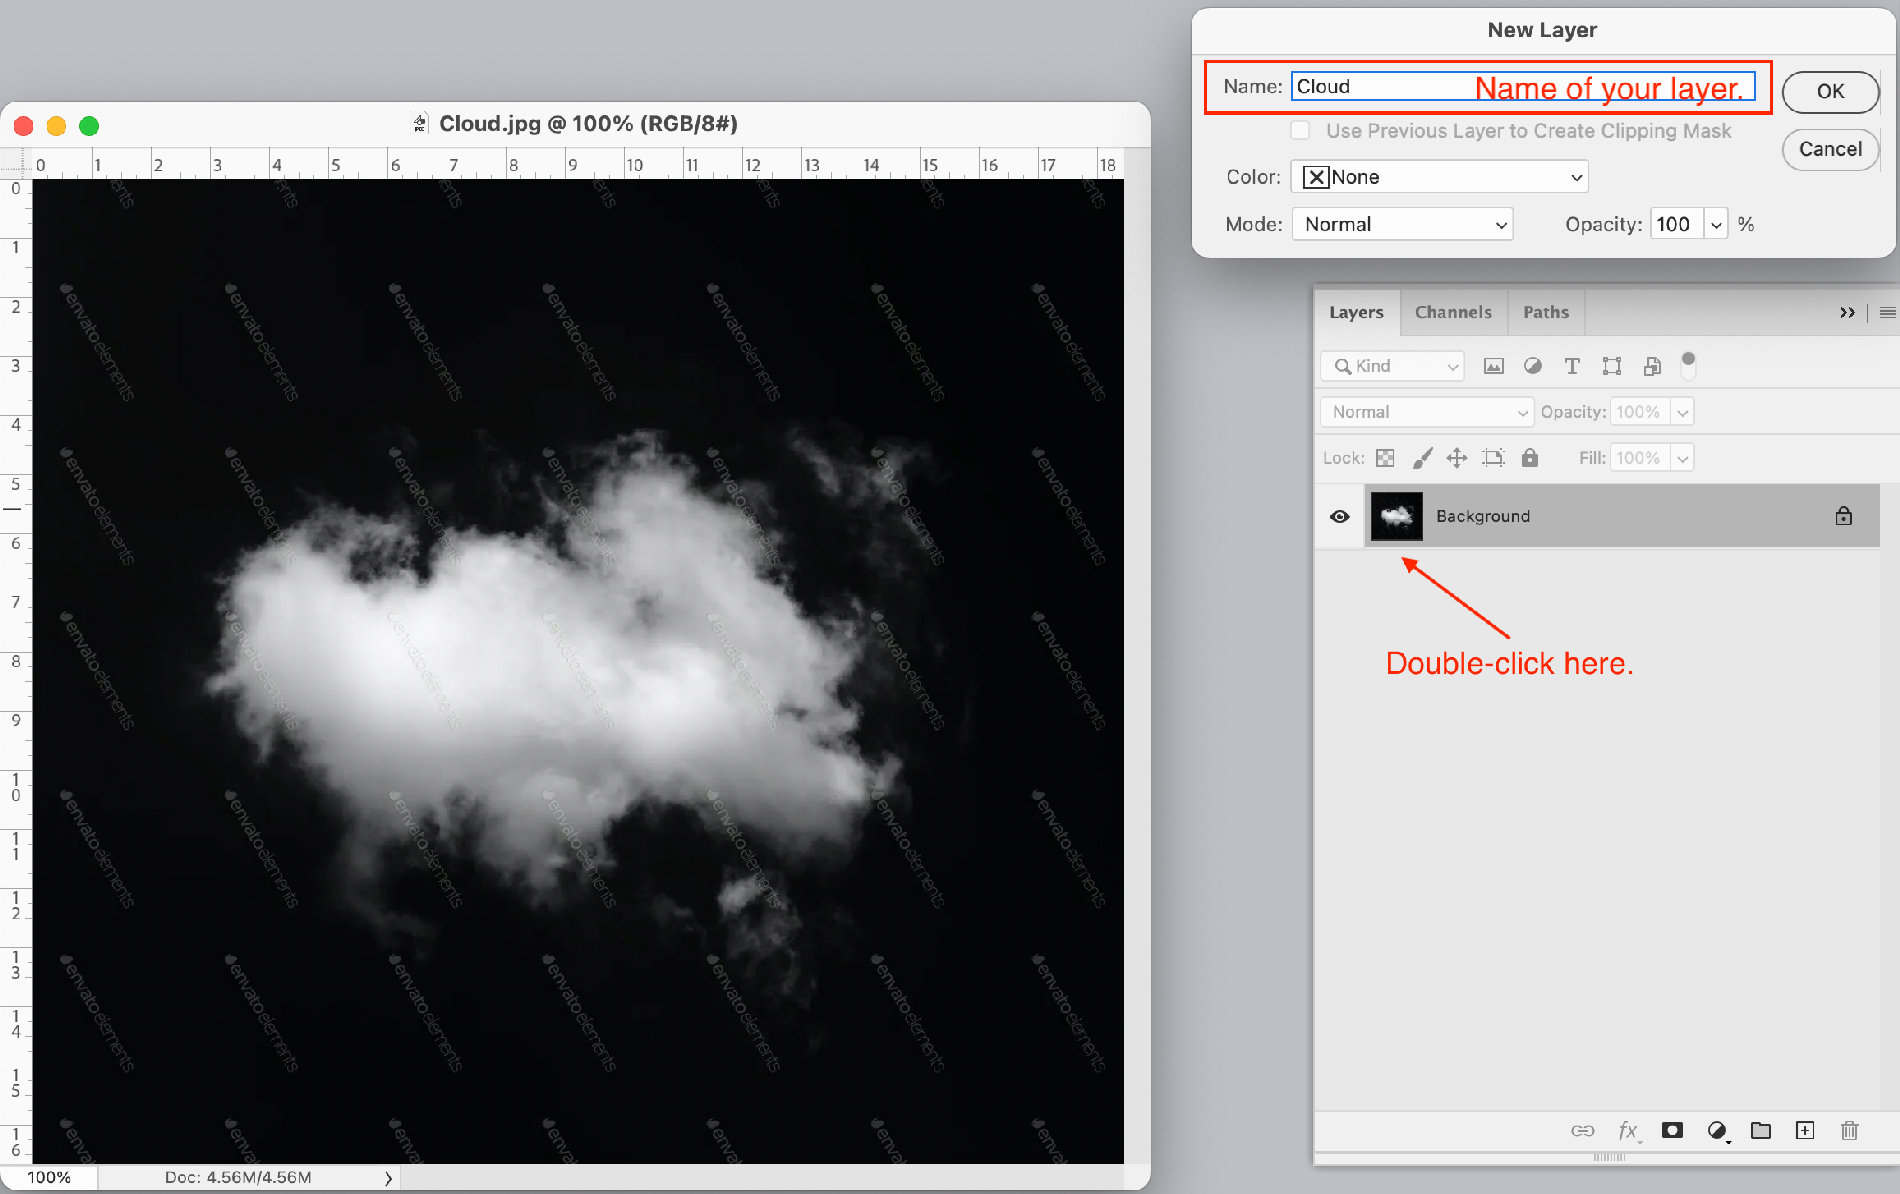
Download and open the resource file in Photoshop. Open the Layers Panel by hitting F7. Double-click on the Background layer to make a new layer and name it “Cloud”. Save your file as a .PSD file.
Step 2
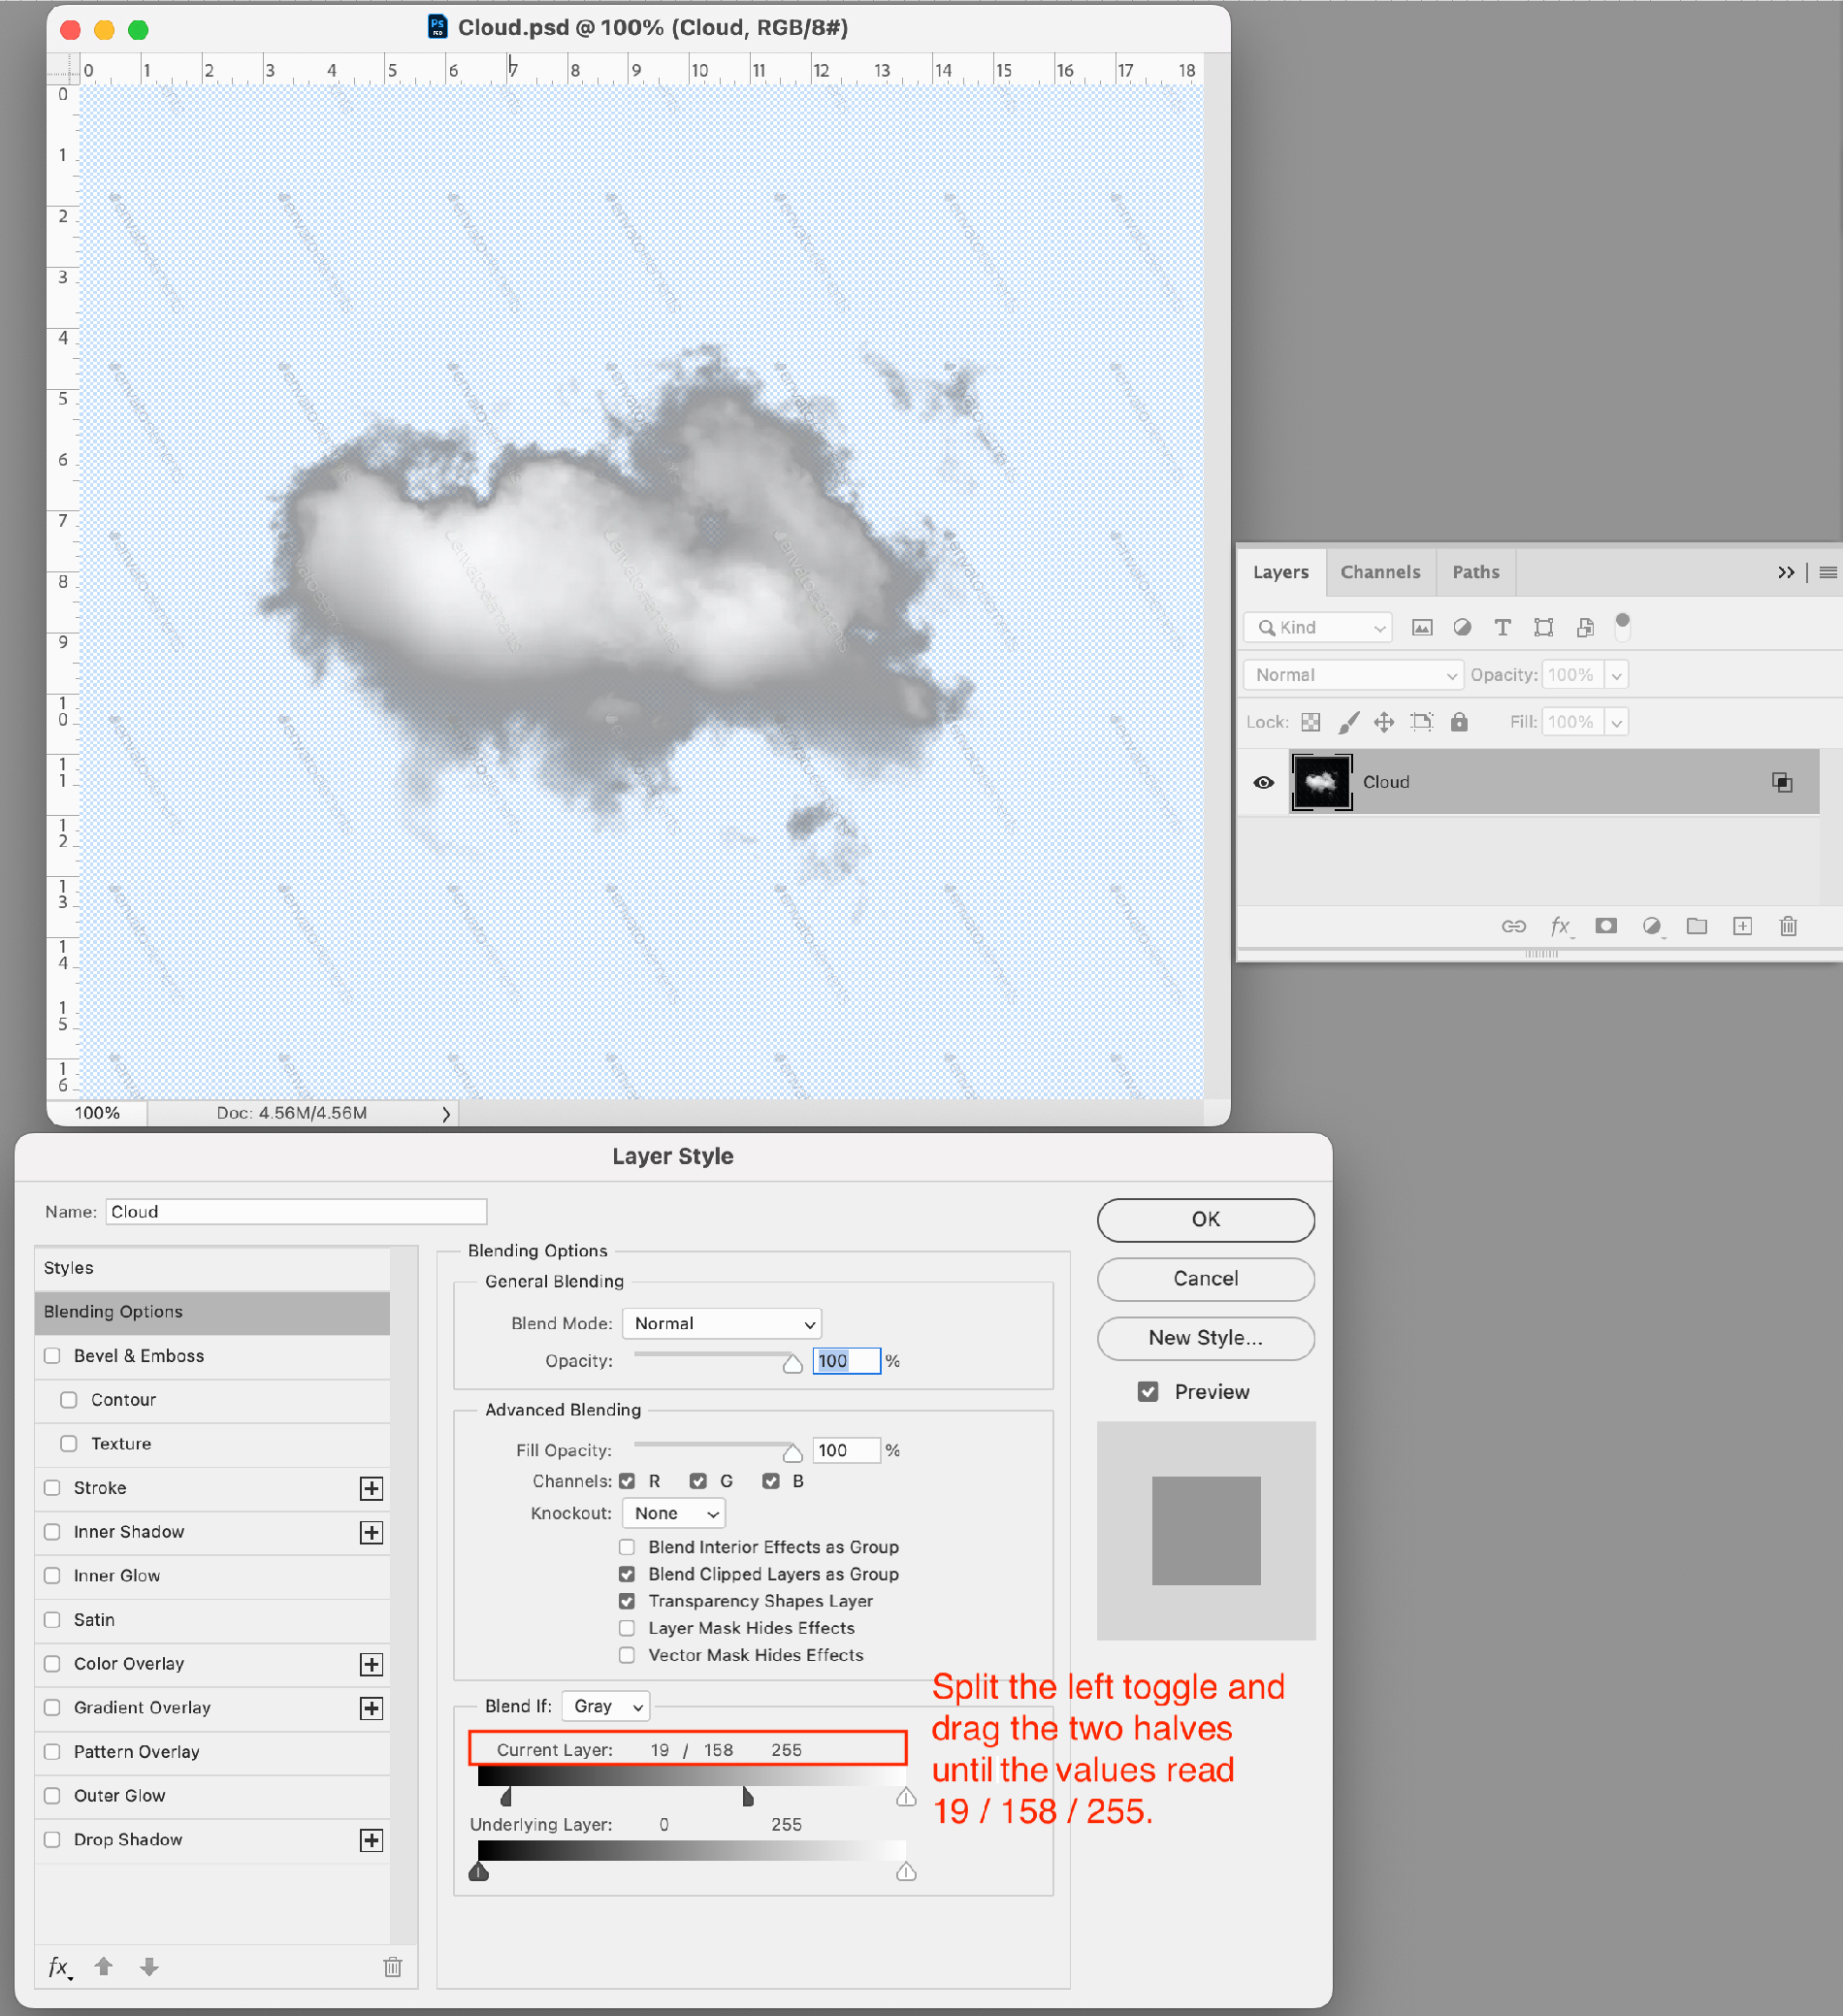
Double-click on the Cloud layer again to view the Layer Style panel. Notice the Blend If section at the center bottom of the panel. You can change the opacity of the image by sliding the toggles back and forth. The left toggle controls the dark values and the right toggle controls the light values. (Every image is different and requires different values. The values that I supply here apply to this lesson only.)
Make sure that Blend If is set to Gray. Slide the left toggle until the value reads 31.

Step 3
Now the background is gone but we have very harsh and jagged edges. To make the edges smoother, hold down the Option (⌥) key and click on the corner of the left toggle to split it into two halves. Drag the right half of the left toggle further right until the value reads 158. Then drag the left half of the toggle to the left until the value reads 19. Click OK to close the Layer Style Panel and apply your changes.
Step 4
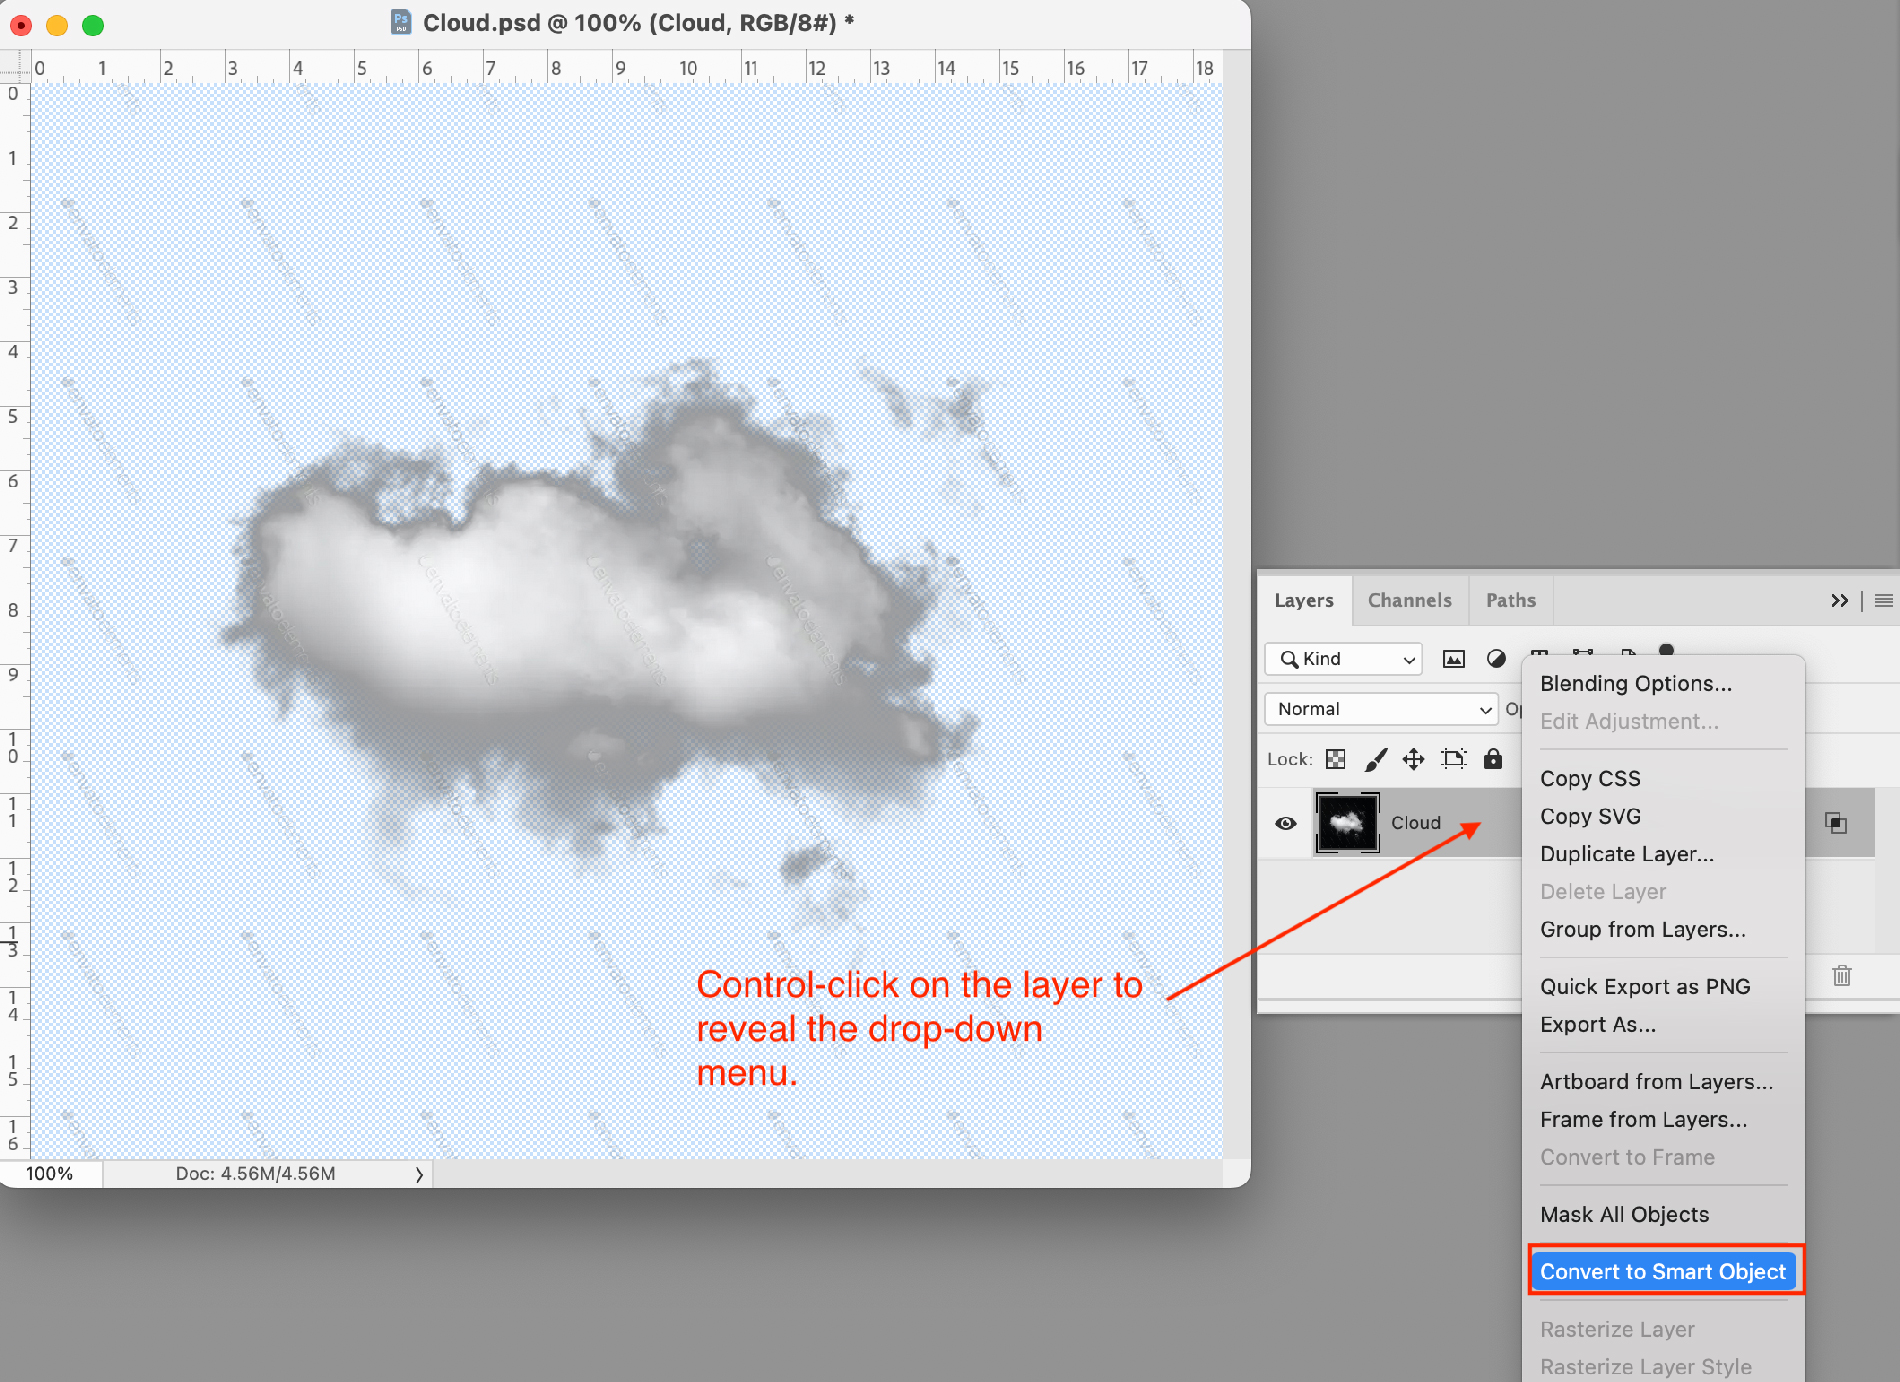
The cloud looks a lot better but the watermarks still show. We can fix that by applying an Inner Glow layer style to the cloud layer. However, the Inner Glow will affect the entire image. Remember that all the pixels are still there, they are just transparent now. And we only want the Inner Glow on the soft edges of the cloud. So, convert the Cloud layer to a Smart Object by holding down the Control Key (^) while you click on the Cloud layer and scrolling down the pop-up menu to Convert to Smart Object. The Smart Object will treat the transparent pixels as if they were deleted.
Step 5
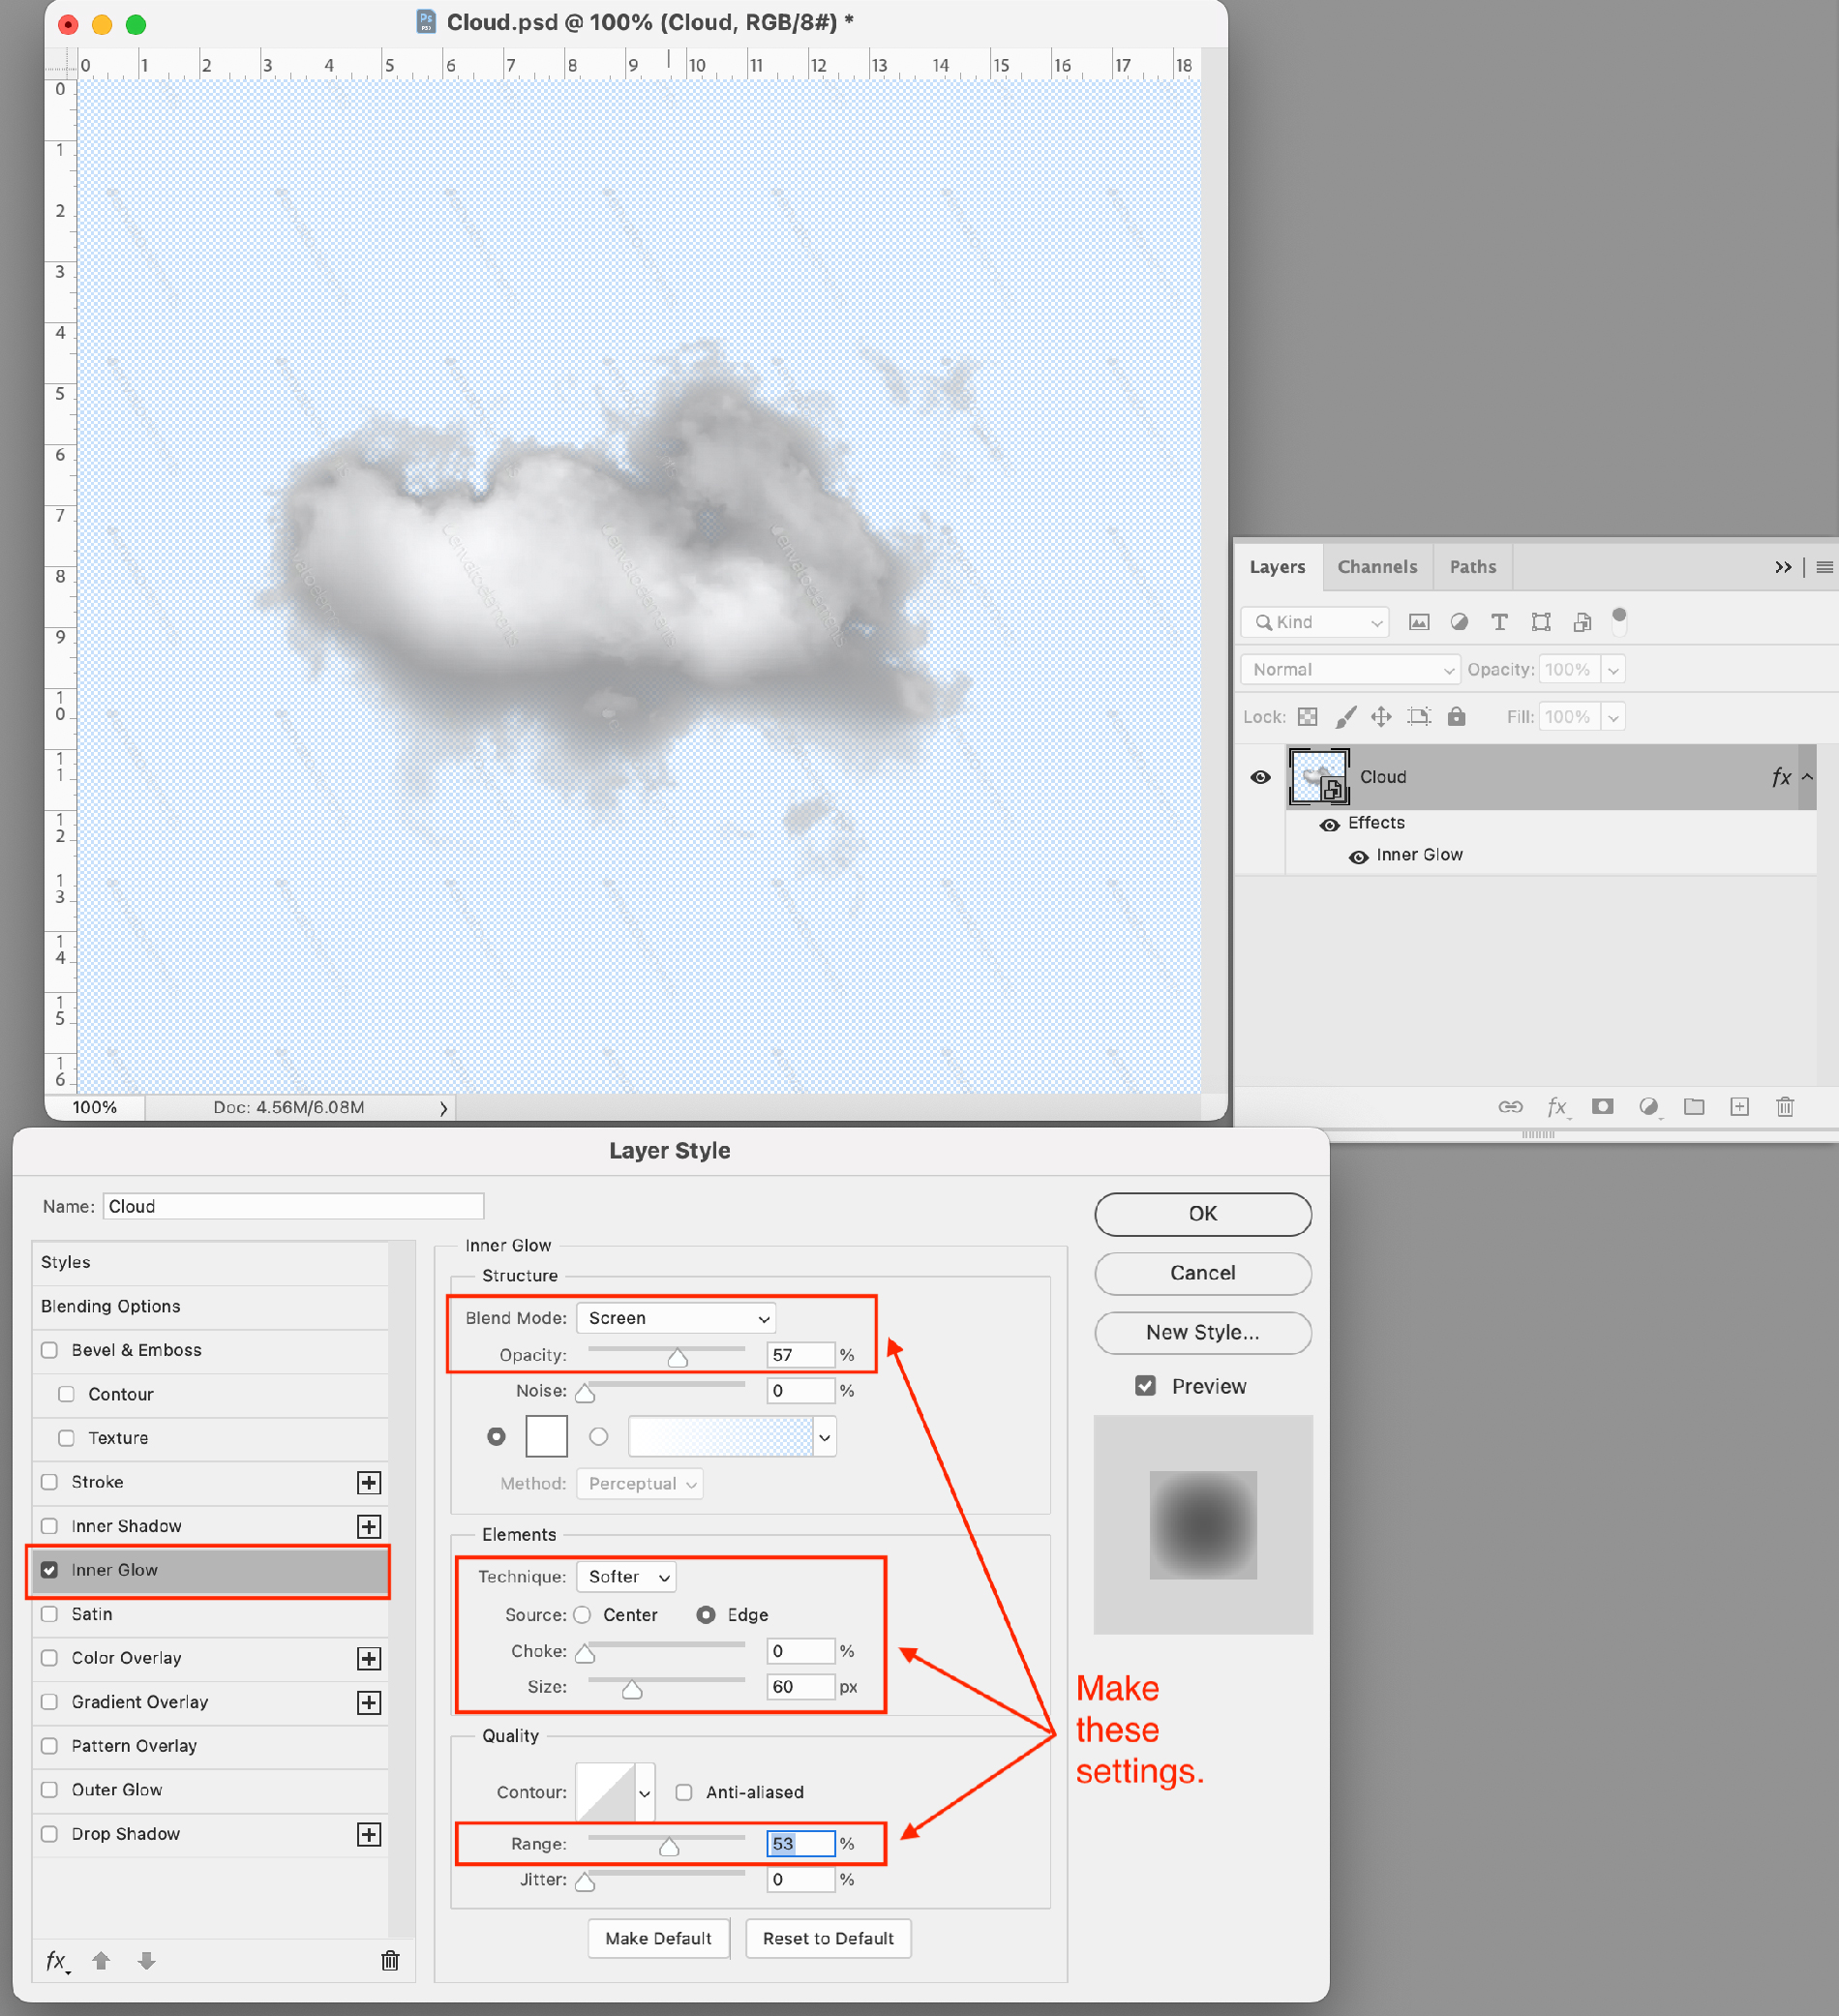
Now we can apply the Inner Glow layer style to the Smart Object. Double-click on the Cloud Smart Object to bring up the Layer Style Panel. Select Inner Glow, set the Blend Mode to Screen at 57%. Set the Elements to Softer, the source at the Edge, and the Pixel Size to 60. Set the Quality Range to 53%. Click OK to apply your changes and close the Layer Style Panel.
Step 6
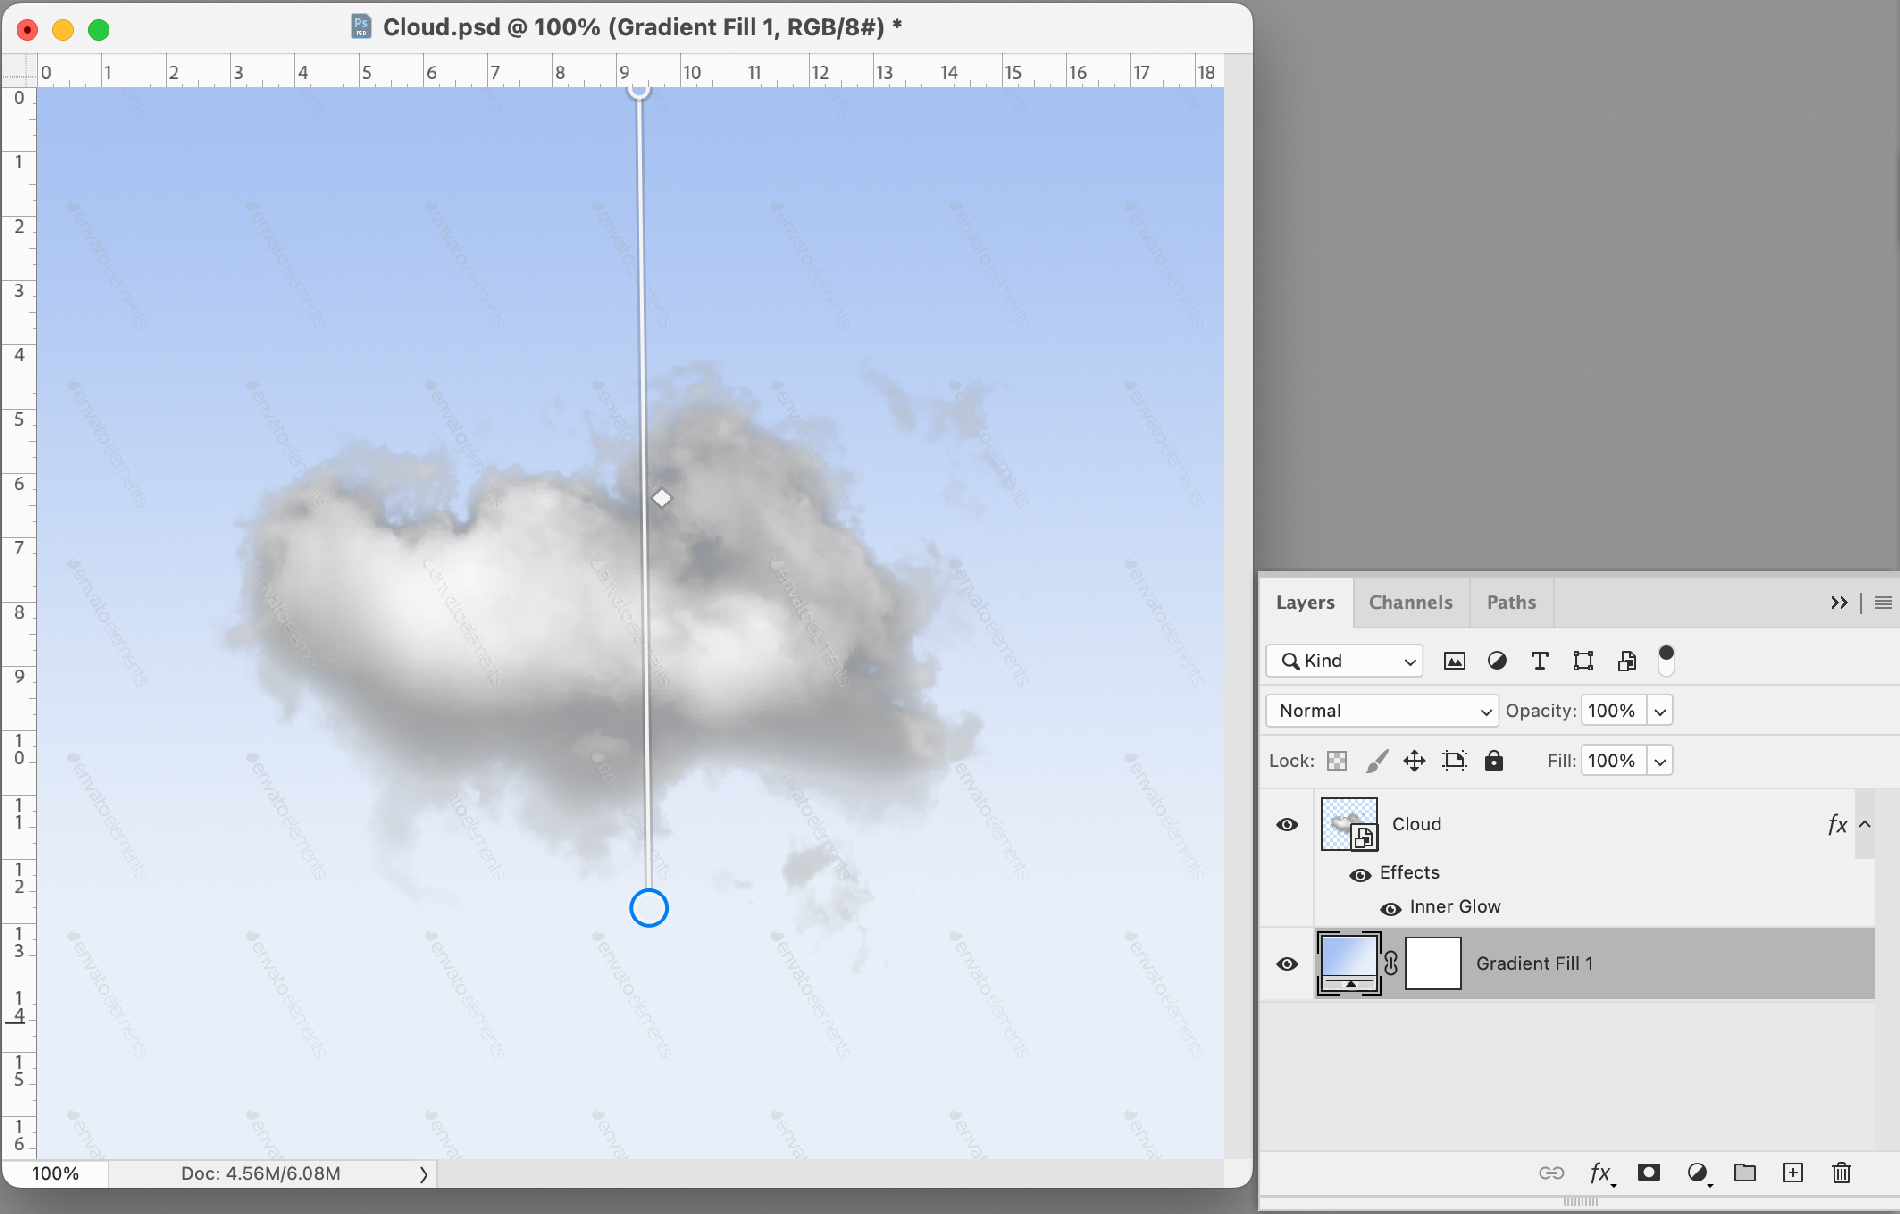
Now let’s have some fun and add a sky. Hit F6 for the Color window and select a sky blue color. I chose R 166 / G 193 / B 242. Type an X to switch the foreground color to the back and create a pale misty color. I chose R 232 / G 239 / B 249. Type another X to switch the colors again. We want the sky blue in the foreground and the mist in the background.
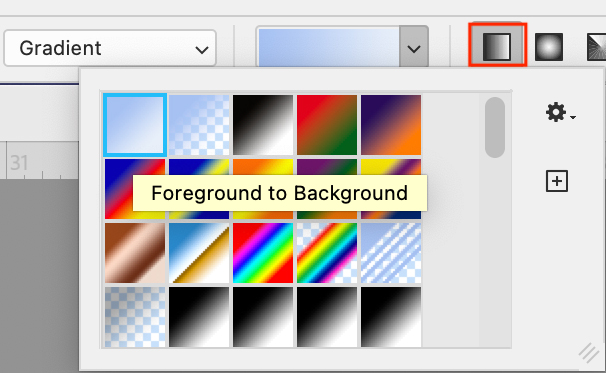
If you don’t have the Options showing at the top of your open Photoshop application, go the Windows Menu and scroll down to Options. Select the linear gradient and the foreground-to-background setting.
Type a G to select the Gradient Tool, then place the cursor at the center top of your Cloud image. Drag down to the bottom of the cloud. A new gradient layer will appear on top of your cloud layer. Drag the gradient layer underneath the cloud layer.
The cloud is still too dark and the watermarks are still showing. Select the Cloud Smart Object. Go to the top of the Layers Panel and change Normal to Overlay in the drop-down menu.
I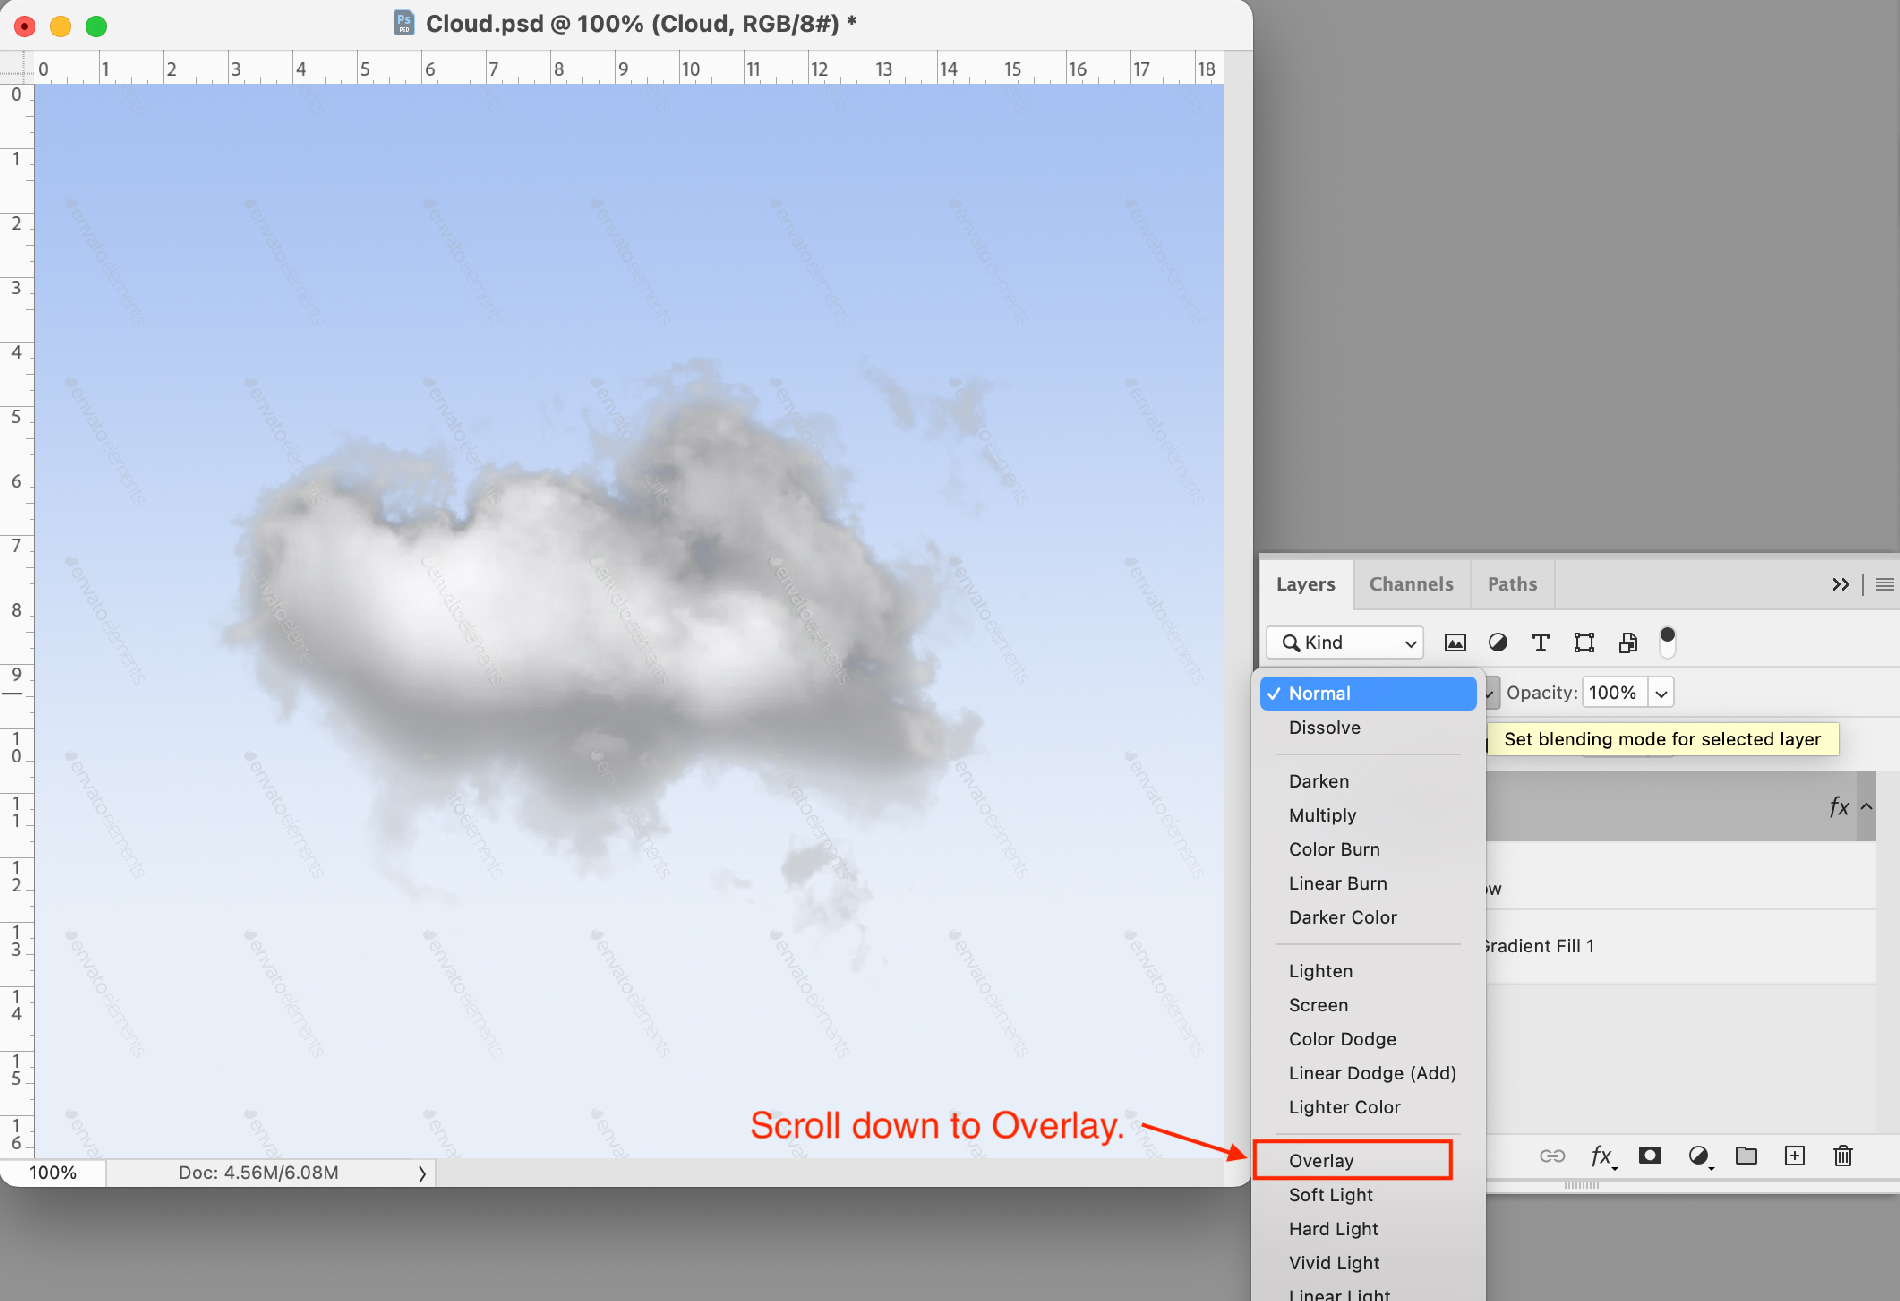
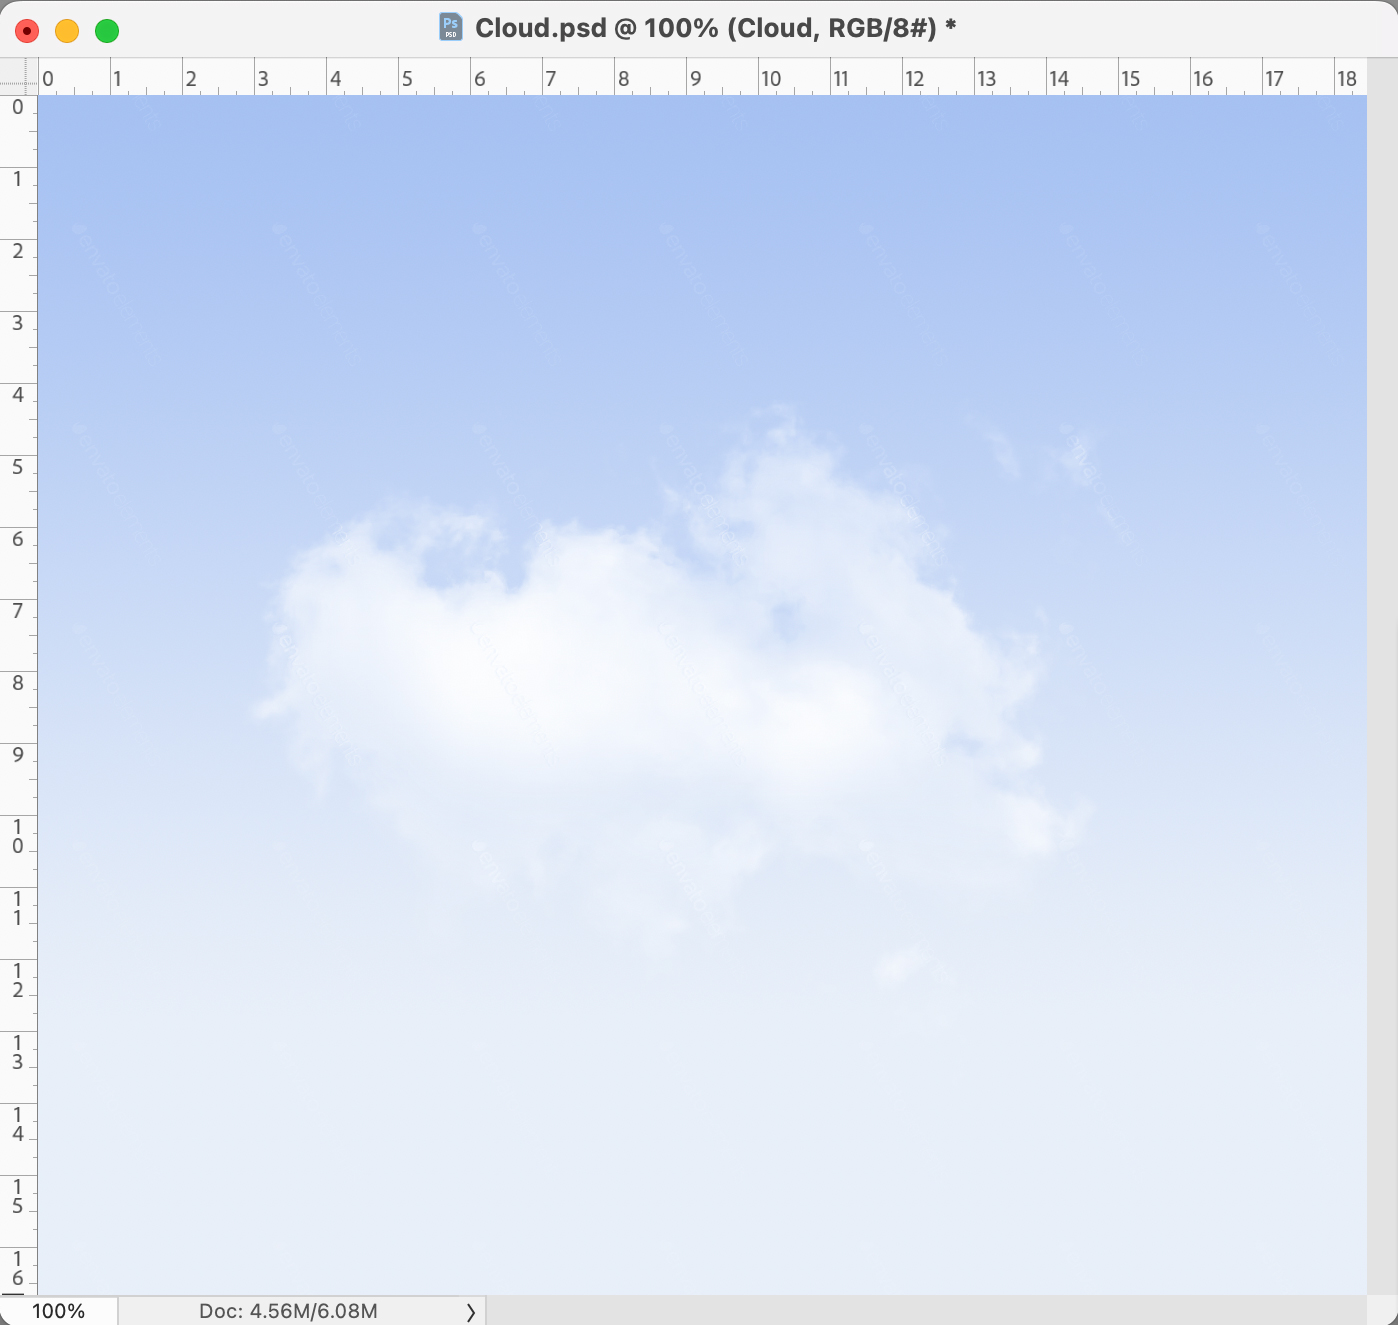
Now the cloud looks right and the watermarks are gone. You are done!
Envato Tuts has posted a video tutorial for all four methods on YouTube for those who learn best that way. Here is the link: https://www.youtube.com/watch?v=vunPHP99_xw Be sure to like and subscribe to their channel!
Jump to the other tutorials on how make backgrounds transparent in Photoshop:
Link to METHOD #2 - Color Range
Link to METHOD #3 - Select & Mask - Coming Soon!
Link to METHOD #4 - Combo Tools - Coming Soon!