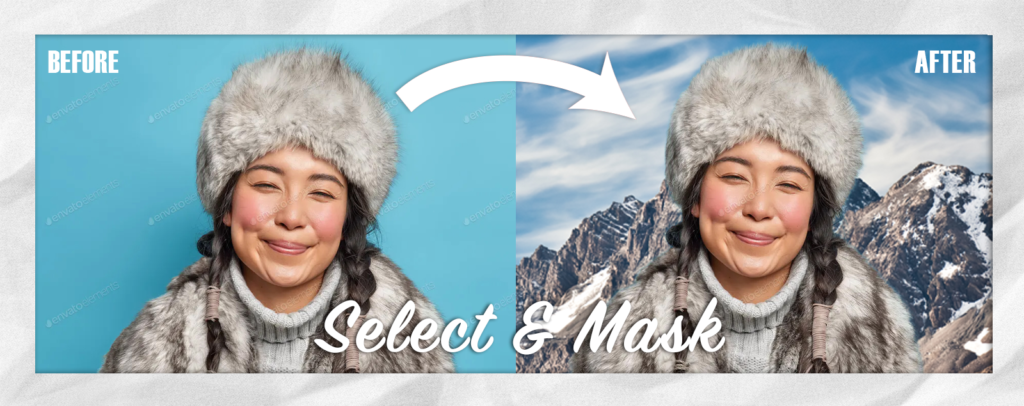
Every photograph is different, so we need to learn multiple methods to easily take out backgrounds in Photoshop. This is Part 3 of a four-part series.
How Select & Mask Works:
Select & Mask replaces the old Refine Edge tool. Select and Mask is a workspace designed to allow you to make an initial rough selection, and then refine that selection until you’re happy with the end product.
When to Use Select & Mask:
Use Select & Mask whenever you need to make a complex selection, like separating the model’s hair from a busy background.
What You’ll Need:
To complete this tutorial take out backgrounds in Photoshop, download this resource image: Woman
Directions:
Here are step-by-step instructions take out backgrounds using the Select & Mask workspace.
Step 1:
Download and open the resource file in Photoshop. Save it as a PSD file. Make a rough selection by doing one of two things.
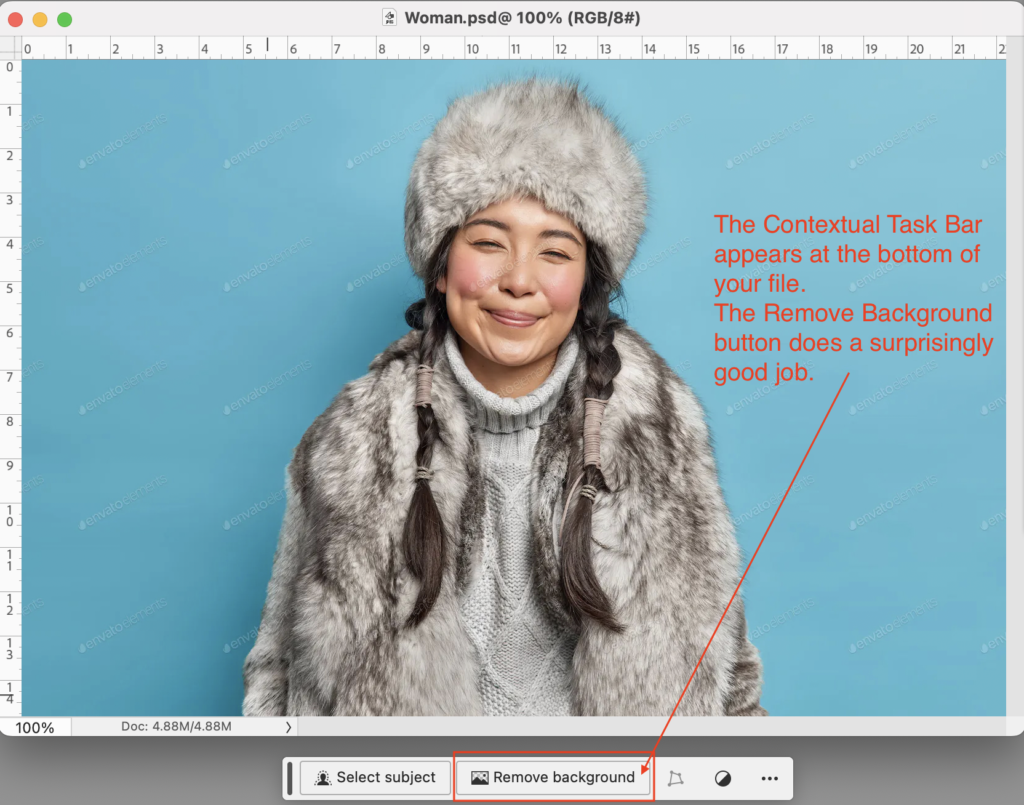
1) Go to the Select Menu and scroll down to Select Subject, then add a mask by clicking on the radio button at the bottom of the Layers Panel.
2) Or use the Contextual Task Bar and hit the Remove Background button, which will automatically add a mask. The Contextual Task Bar can be made visible by going to the Windows Menu and scrolling down to Contextual Task Bar. You can move the Contextual Task Bar out of the way when needed.
Step 2:
Notice that our rough selection left a halo around the model where the background shows through. Go to the Select Menu and scroll down to Select & Mask (or hit ⌥⌘R). The Select & Mask Properties Panel appears.
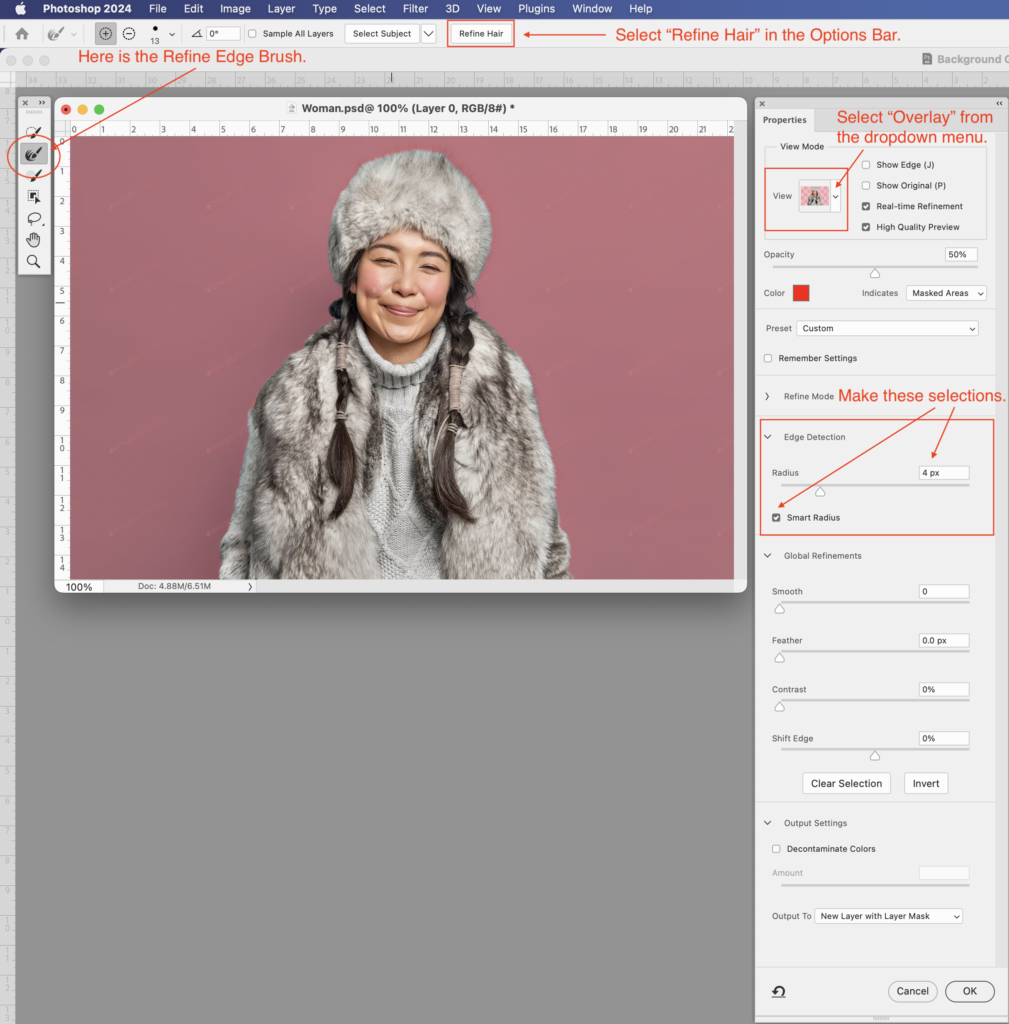
Make sure to check Smart Radius and set the Radius to 4 px. You can play around with the Radius amount, but 4 px seems to work well with most images.
You also want to make sure that the Refine Edge Brush is active. It will appear automatically on the left-hand side.
Next, hit the Refine Hair button in the Options Bar at the top. It will refine the selection around the hair, but not the fur.
Finally, select Overlay from the View drop down menu in the View Mode area of the Select & Mask Properties Panel so that you can see a contrast between the blue background and the your brushstrokes.
Step 3:
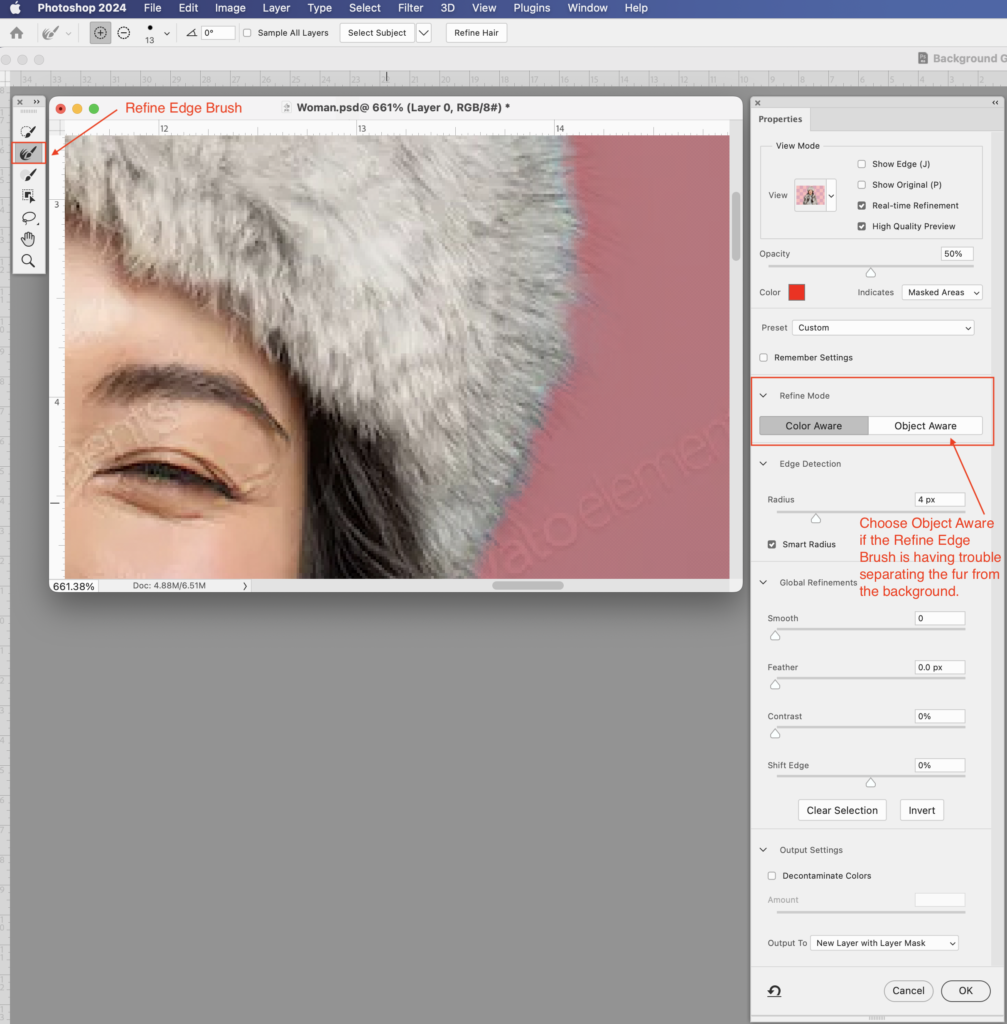
Click and drag the Refine Edge Brush across the edges of the fur. If the Refine Edge Brush is having trouble separating the fur from the background, hit the Object Aware button in the Refine Mode area of the Select & Mask Properties Panel. Once you are satisfied, click okay.
The beauty of the Select & Mask method is that you can always click the Cancel button if you mess up. Plus, you can reopen the Select & Mask workspace and make refinements later.

Step 4:
There are a few ways to refine your mask in the Select & Mask Properties Panel:
1) You can use Shift Edge by -10 to shift the edge inwards.
2) Or, you can check Decontaminate Colors, (located near the bottom of the Select & Mask Properties Panel), set the amount to 100 and select Output to New Layer with Mask. Click OK. The original layer will be hidden.
Step 5:
Now, unhide your original layer. Delete the layer mask on the Decontaminate Colors layer. Then control-click on the Decontaminate Colors layer and select “Create Clipping Mask” from the dropdown menu to clip this layer to the original layer.
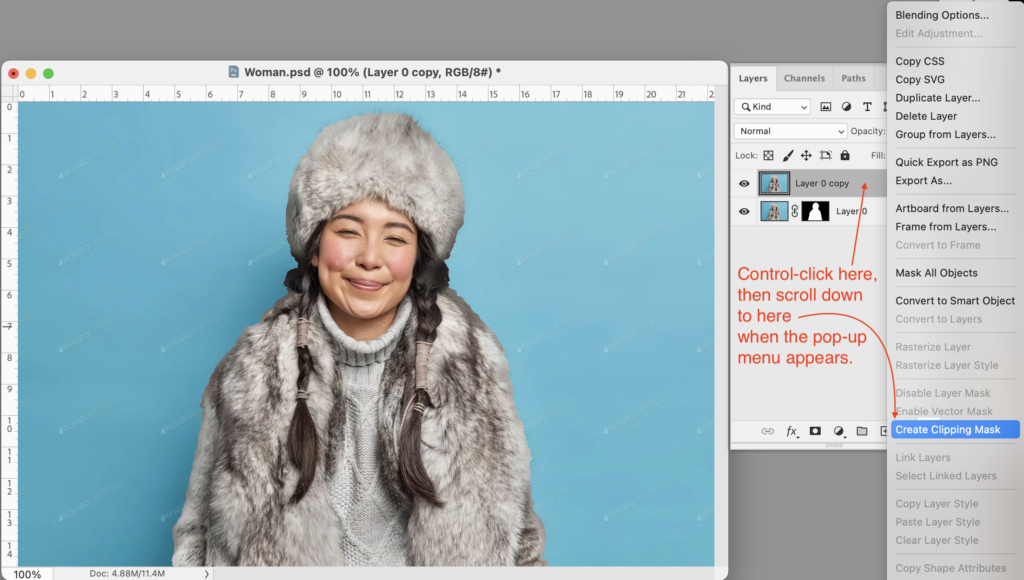
Step 6:
Create a new layer, drag it to the bottom and fill it with a contrasting color. Zoom in and carefully check everywhere to verify that you are satisfied with the results. You are done!
If you are not satisfied with your results, here is another option that you can try: change the Blending Mode of the Decontaminate Colors layer that is clipped to the original image. For this image, I changed the Blending Mode of my clipped Decontaminate Colors layer to “Color”.
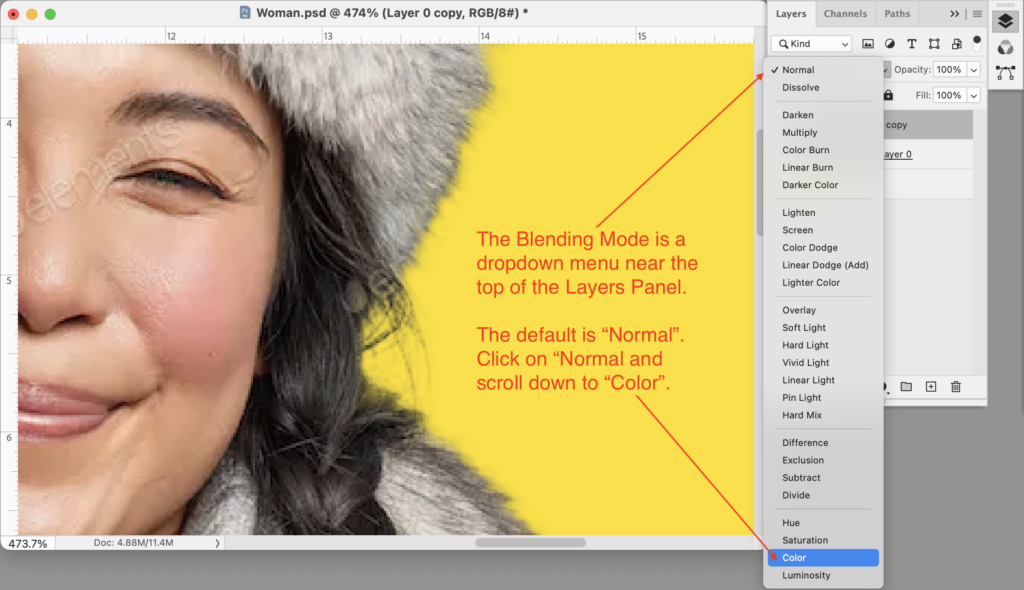
Which Blending Mode you use depends upon what you need to hide. Keep in mind that you can always duplicate your clipped Decontaminate Colors layer and apply a different Blending Mode to each one. I suggest that you experiment to see what works best for your image. Here is a list of a few Blending Modes and when to use them:
Color: Use Color to color match the fringe edge to the hair color.
Hue: Hue can also be used as an alternative to Color.
Multiply: Use Multiply to darken lighter fringes left behind by very dark hair.
Darken Color: Use Darken Color as an alternative to Multiply or to cover lighter fringes left behind by lighter hair.
Normal: Use Normal when the edge being painted on is low in detail or loses nothing from being a flat color.
Lighten: Use Lighten on lighter color hair with a darker fringe edge.
Screen: Use Screen as an alternative to Lighten or on light hair with a lighter fringe edge.
Finally…
Now you are ready to substitute the original background for one of your own. Here are some examples to get your ideas flowing.


Envato Tuts has posted a video tutorial for all four methods on YouTube for those who learn best that way. Here is the link. Be sure to like and subscribe to their channel!
Jump to the other tutorials on how take out backgrounds in Photoshop:
I hope you enjoyed this tutorial. I am a graphic designer who does a lot of Photoshop work for my customers. Please take a look at my other tutorials and resources.
Awesome Photo Mockups In 2 Easy Steps
Creating A Photo Mockup From Scratch
17 Free DIY Resources for Graphic Designers
By Martha Ridgeway, Graphic Designer
