Previously, I showed you how to make photo mockups using the Photoshop Actions that you can get for free from PSDcovers.com. If you missed it, please read 2 Easy Steps To Create Awesome Photo Mockups.
But what if you can’t find a suitable Photoshop action to mockup your project? Here’s what you do instead:
Step 1:
Make a paper mockup of your project. Acquire a blank tube, box, can or whatever is needed, print out your artwork and wrap it around your blank object. It does not have to look good, just fit. This is only a rough mockup.
Step 2:
Set up a white backdrop with white surfaces. I use large paper for this, but a white sheet or curtain would do. Place your rough mockup on the white surface and arrange your lighting for minimal highlights and shadows. I use an adjustable desk lamp and standard office lighting for this task. Take a few photos with your cell phone.
Step 3:
Transfer your cell phone snapshots to your computer and open all the photos you just took in Photoshop. On Macs, you can type (⌥↓) to view all your photos spread out across your monitor.
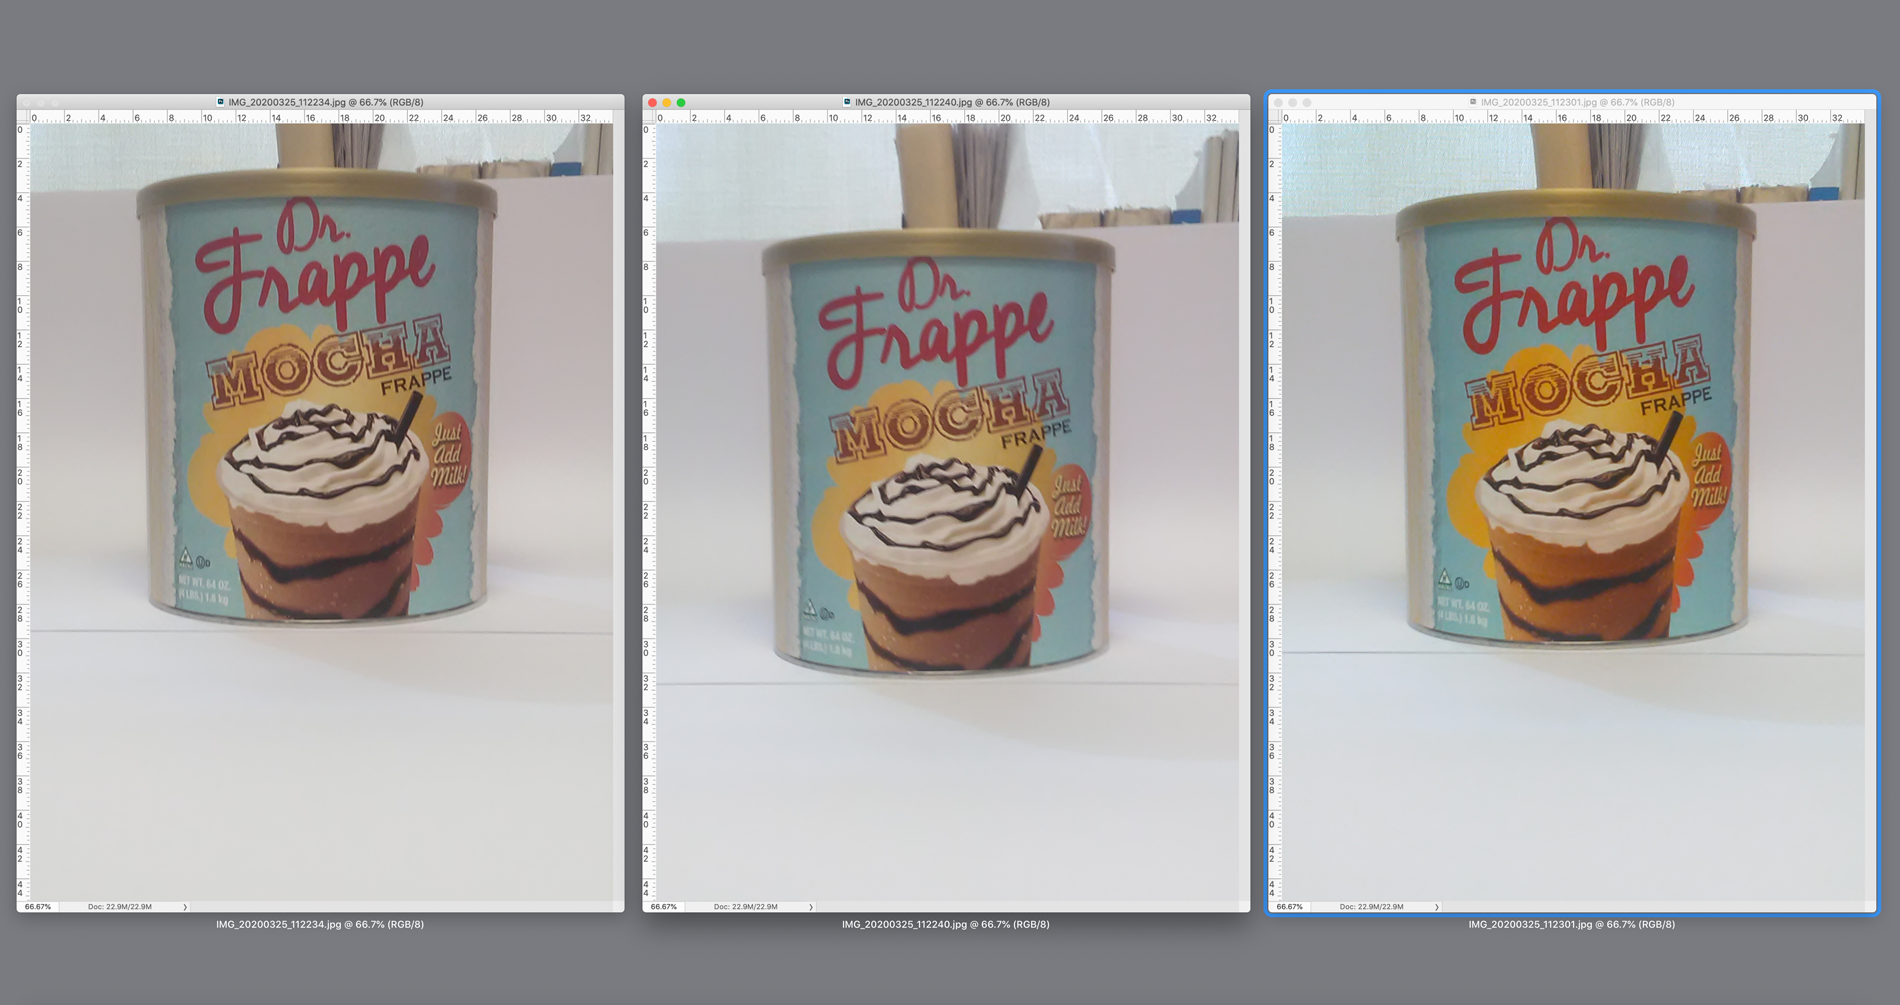
As you can see, all of my photos have flaws! But it doesn’t matter because we are going make the mockup perfect in the end.
Go to the Image Menu and apply Auto Contrast (⌥↑⌘L) and Auto Tone (↑⌘L) to them all. Pick the one that is the most centered and straight. Save the changes to the best photo and close all the rest. I think that the photo on the far right is the best one, so I will work with that one.
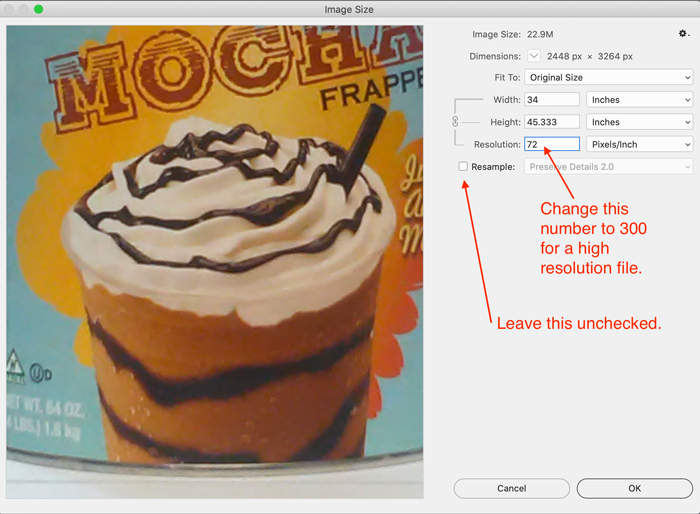
Optional But Recommended:
Go to the Image Menu and scroll down to Image Size (⌥⌘I) to change the pixels to 300 ppi without resampling the pixels. This option allows you to create a high-resolution photo mockup that is suitable for any printed promo pieces you may want later.
Step 4:
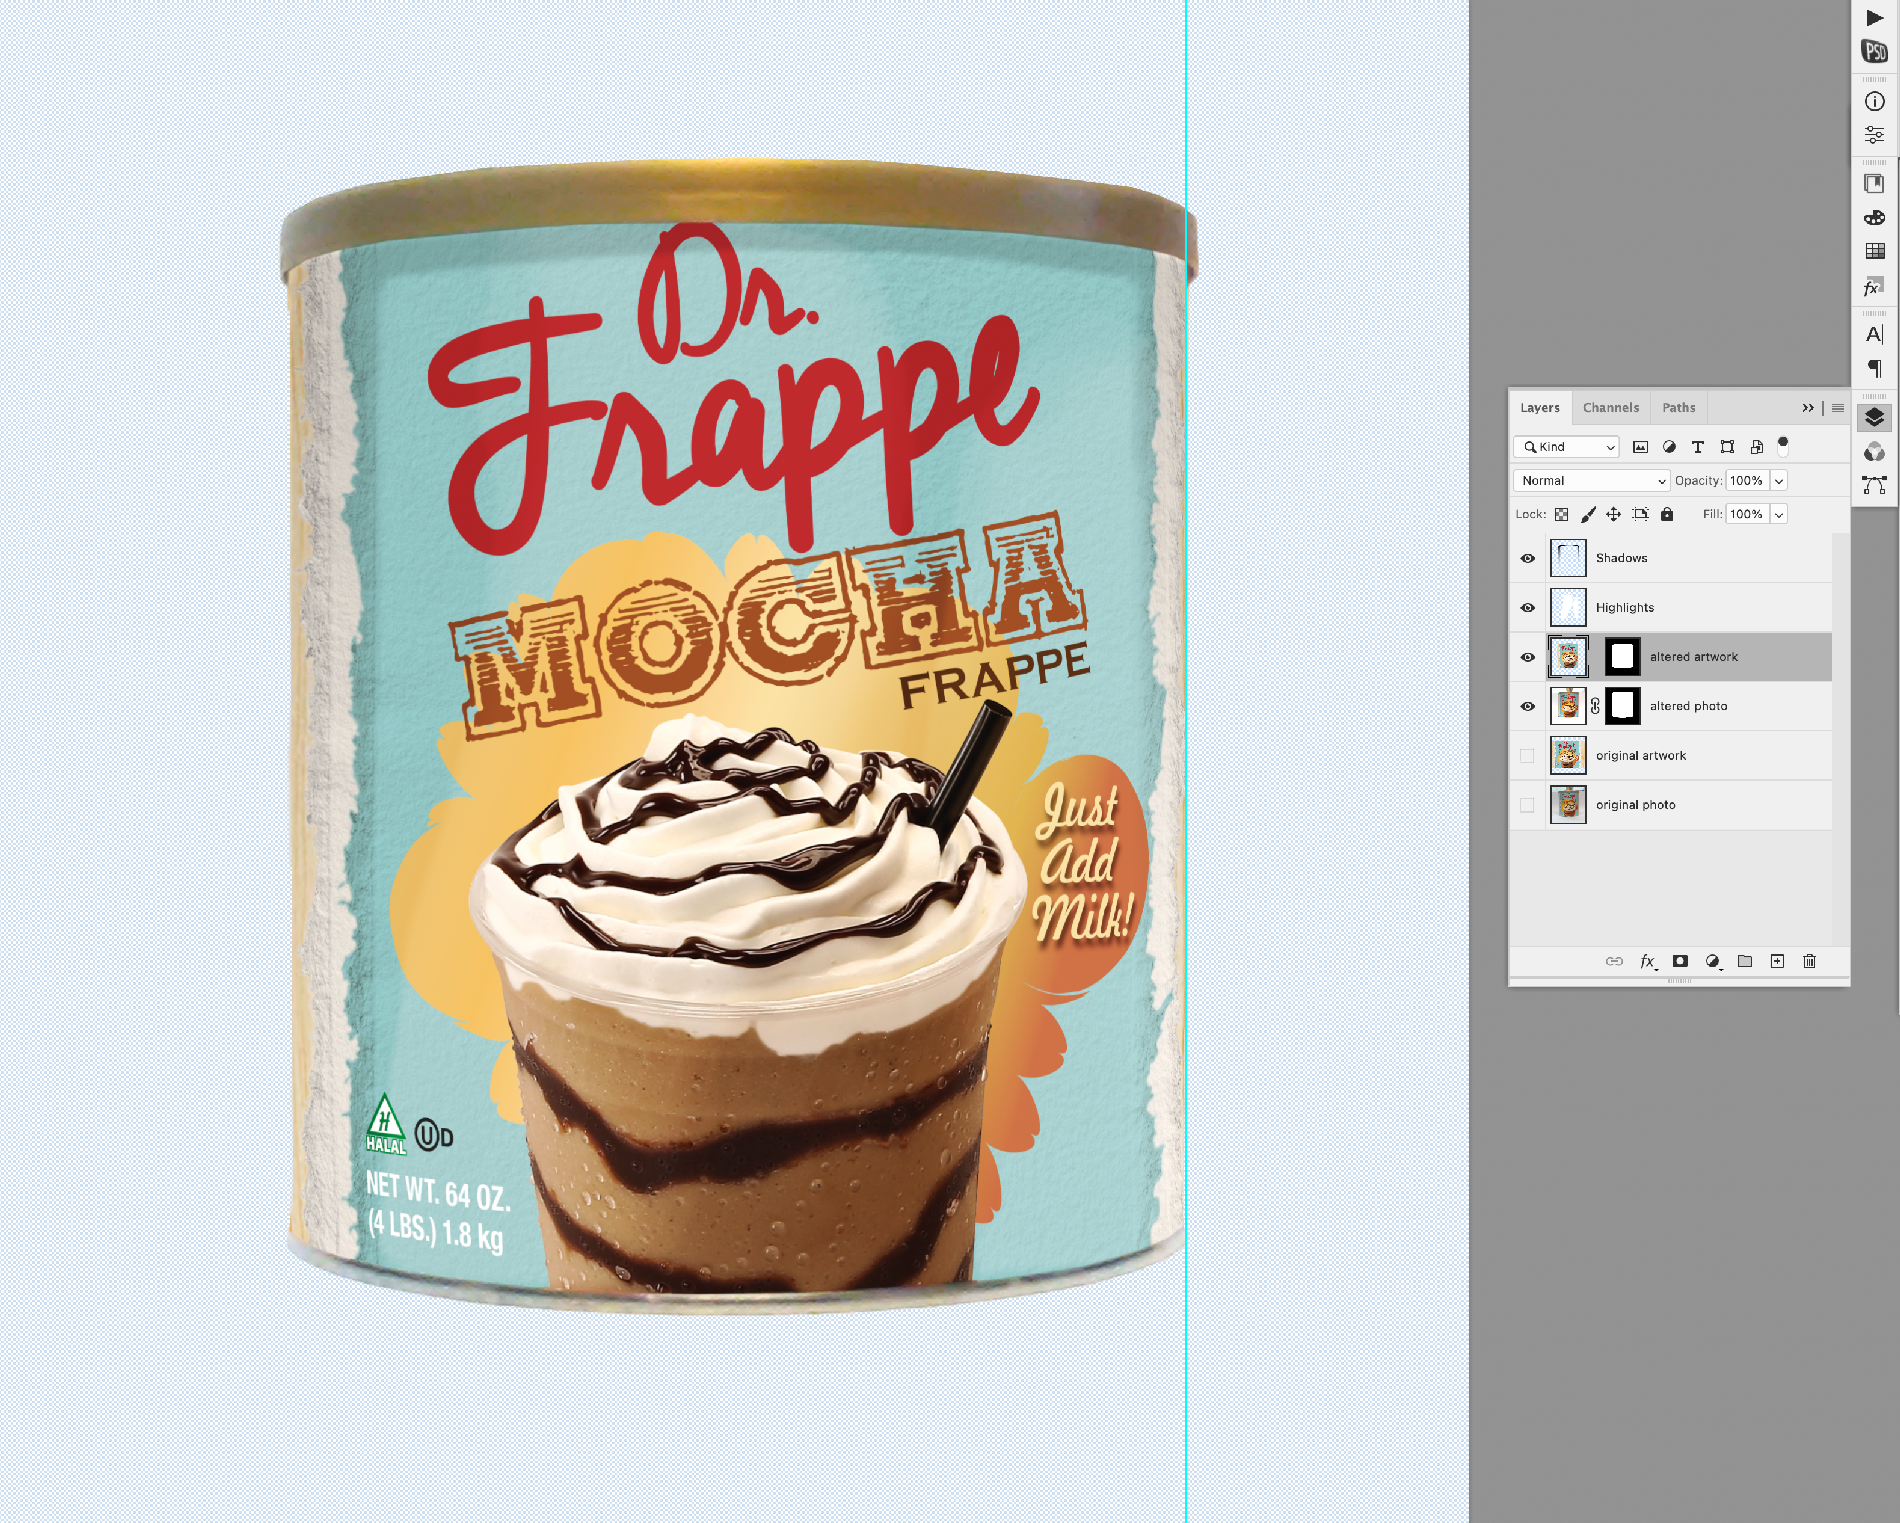
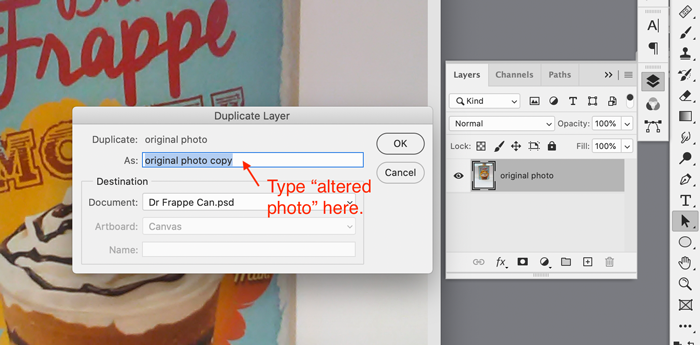
With the best photo open, select “Save As” from the File Menu (↑⌘S) to save it as a .PSD file and rename it something meaningful so you can find it easily. Double-click on the Background Layer to create Layer 0 and rename it “original photo”.
From the Layer Menu, scroll down to “Duplicate Layer”. A dialog box appears with the option of naming the new layer. I recommend that you name it “altered photo” because it is the layer that we will make all the changes to.
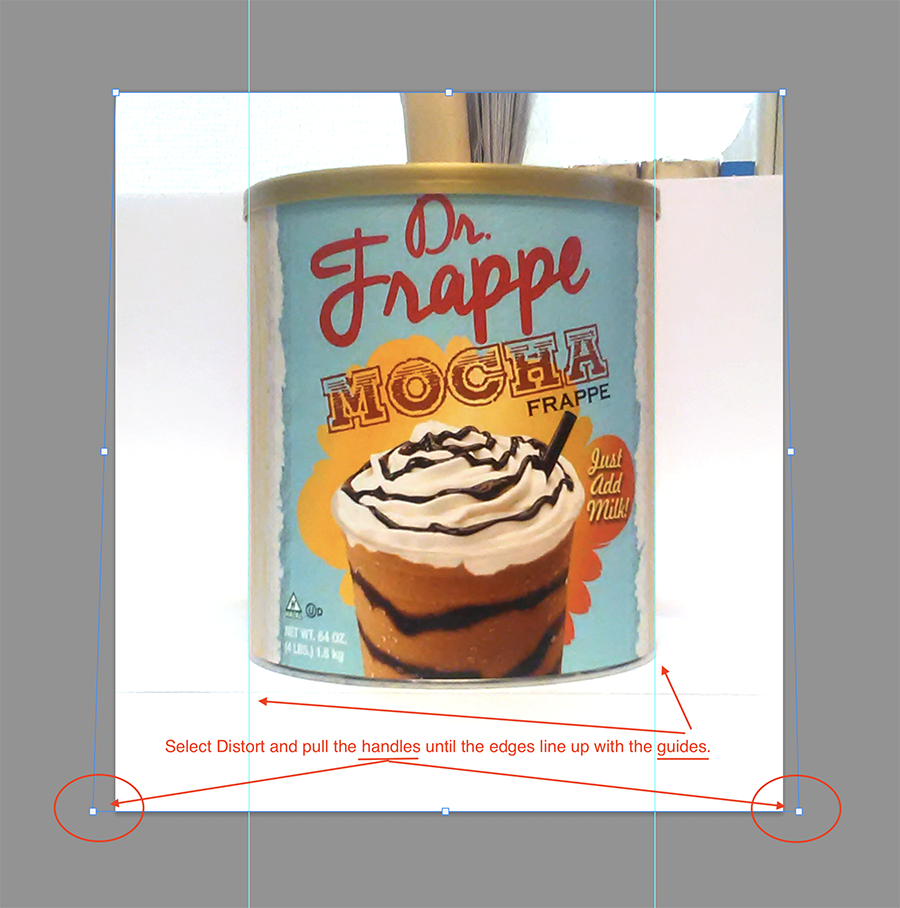
Hide the “original photo” layer by clicking on the eye symbol and make sure that your “altered photo” layer is selected. You won’t use the “original photo” layer again unless you need to start over for some reason. From the Edit Menu, select Free Transform (⌘T), then Control-Click anywhere to view the Transform Submenu. Scroll down the submenu to select Distort. Use the handles to correct any perspective distortions in the “altered photo”.
Once you are satisfied that everything is perfect, make a mask to hide the white backdrop. If there is enough contrast between your rough mockup and the white backdrop, the Quick Selection Tool will create a fast selection which you can then convert to mask. Adjust the mask by painting black on the mask itself with the Brush Tool (B) until it is perfect. Use the Eraser Tool (E) to eliminate the parts of the mask that go too far.
Step 5:
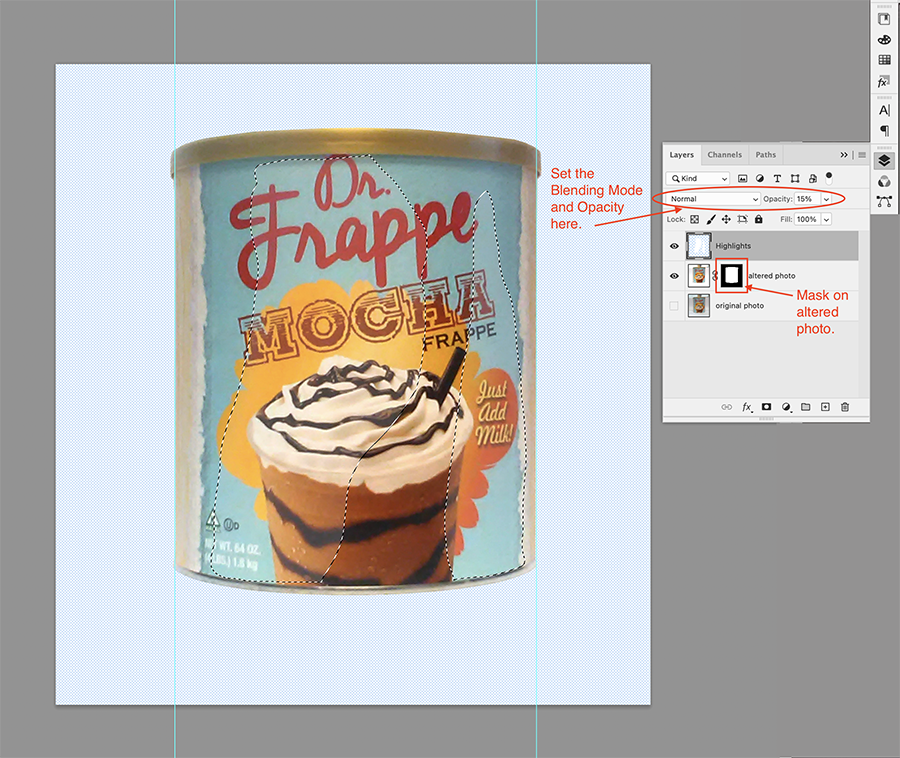
Add a new layer called “highlights”. Use the Lasso Tool (L) to trace the highlights on the “altered photo”, feather 5px, fill with white and reduce the opacity to 15% with Normal Blending Mode. Use the Eraser Tool (E) to soften any edges you don’t like. You may need to make more than one highlight this way.
Step 6:
Add a new layer called “shadows”. Use the Lasso Tool (L) to trace the shadows on the “altered photo”, feather 2px, fill with black. You may want to use the Gradient Tool (G) to create shadows that vary in darkness. Use the Eraser Tool (E) to soften any edges you don’t like. You may need to make more than one shadow this way. Then reduce the opacity to 50% (or whatever looks best) and set the Blending Mode to Multiply.
Hide both the highlights and shadow layers.

Step 7:
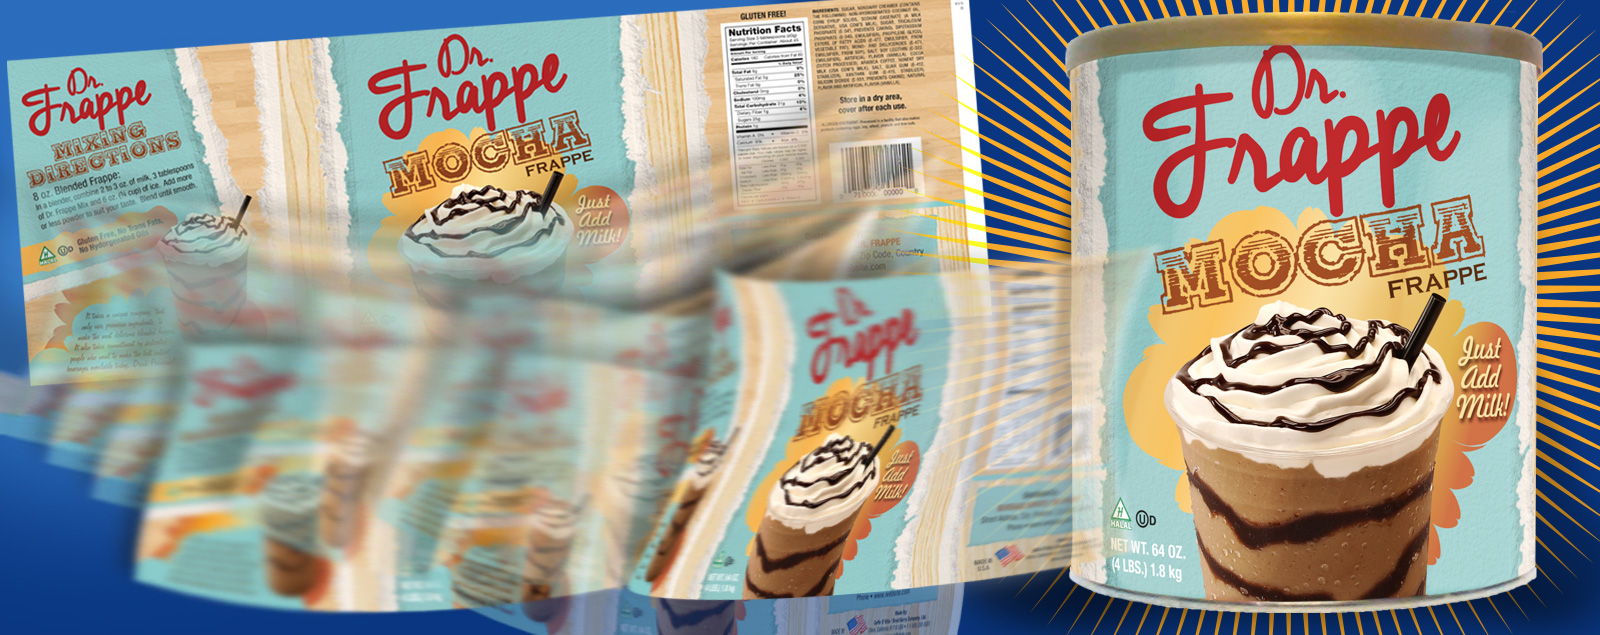
Open your new packaging art in Photoshop and select only the front face with a little bit of the sides. Copy-&-paste or drag the artwork into your layered Photoshop file. Rename the layer “original artwork” and drag it down until it is just above the “altered photo” layer.
Duplicate the “original artwork” layer and rename the duplicate “altered artwork”. Hide the “original artwork” layer. You won’t use it unless you need to start over for some reason. SAVE your Photoshop file at this point.
Select the “altered artwork” layer and reduce its opacity to 70%. Select Free Transform (⌘T) to warp the “altered artwork” layer until it matches the “altered photo” layer beneath. Change the size first, then Control-Click anywhere to view the Transform Submenu and scroll down to select “Warp”. Tug on the corners and handles to warp your “altered artwork” layer. While you are warping, a grid of lines will appear. You can grab a line and tug it to drag a portion of the layer to the correct position. This is often more useful than tugging on the corners and handles alone. It helps to warp one side of the “altered artwork” first and then work on the other side.
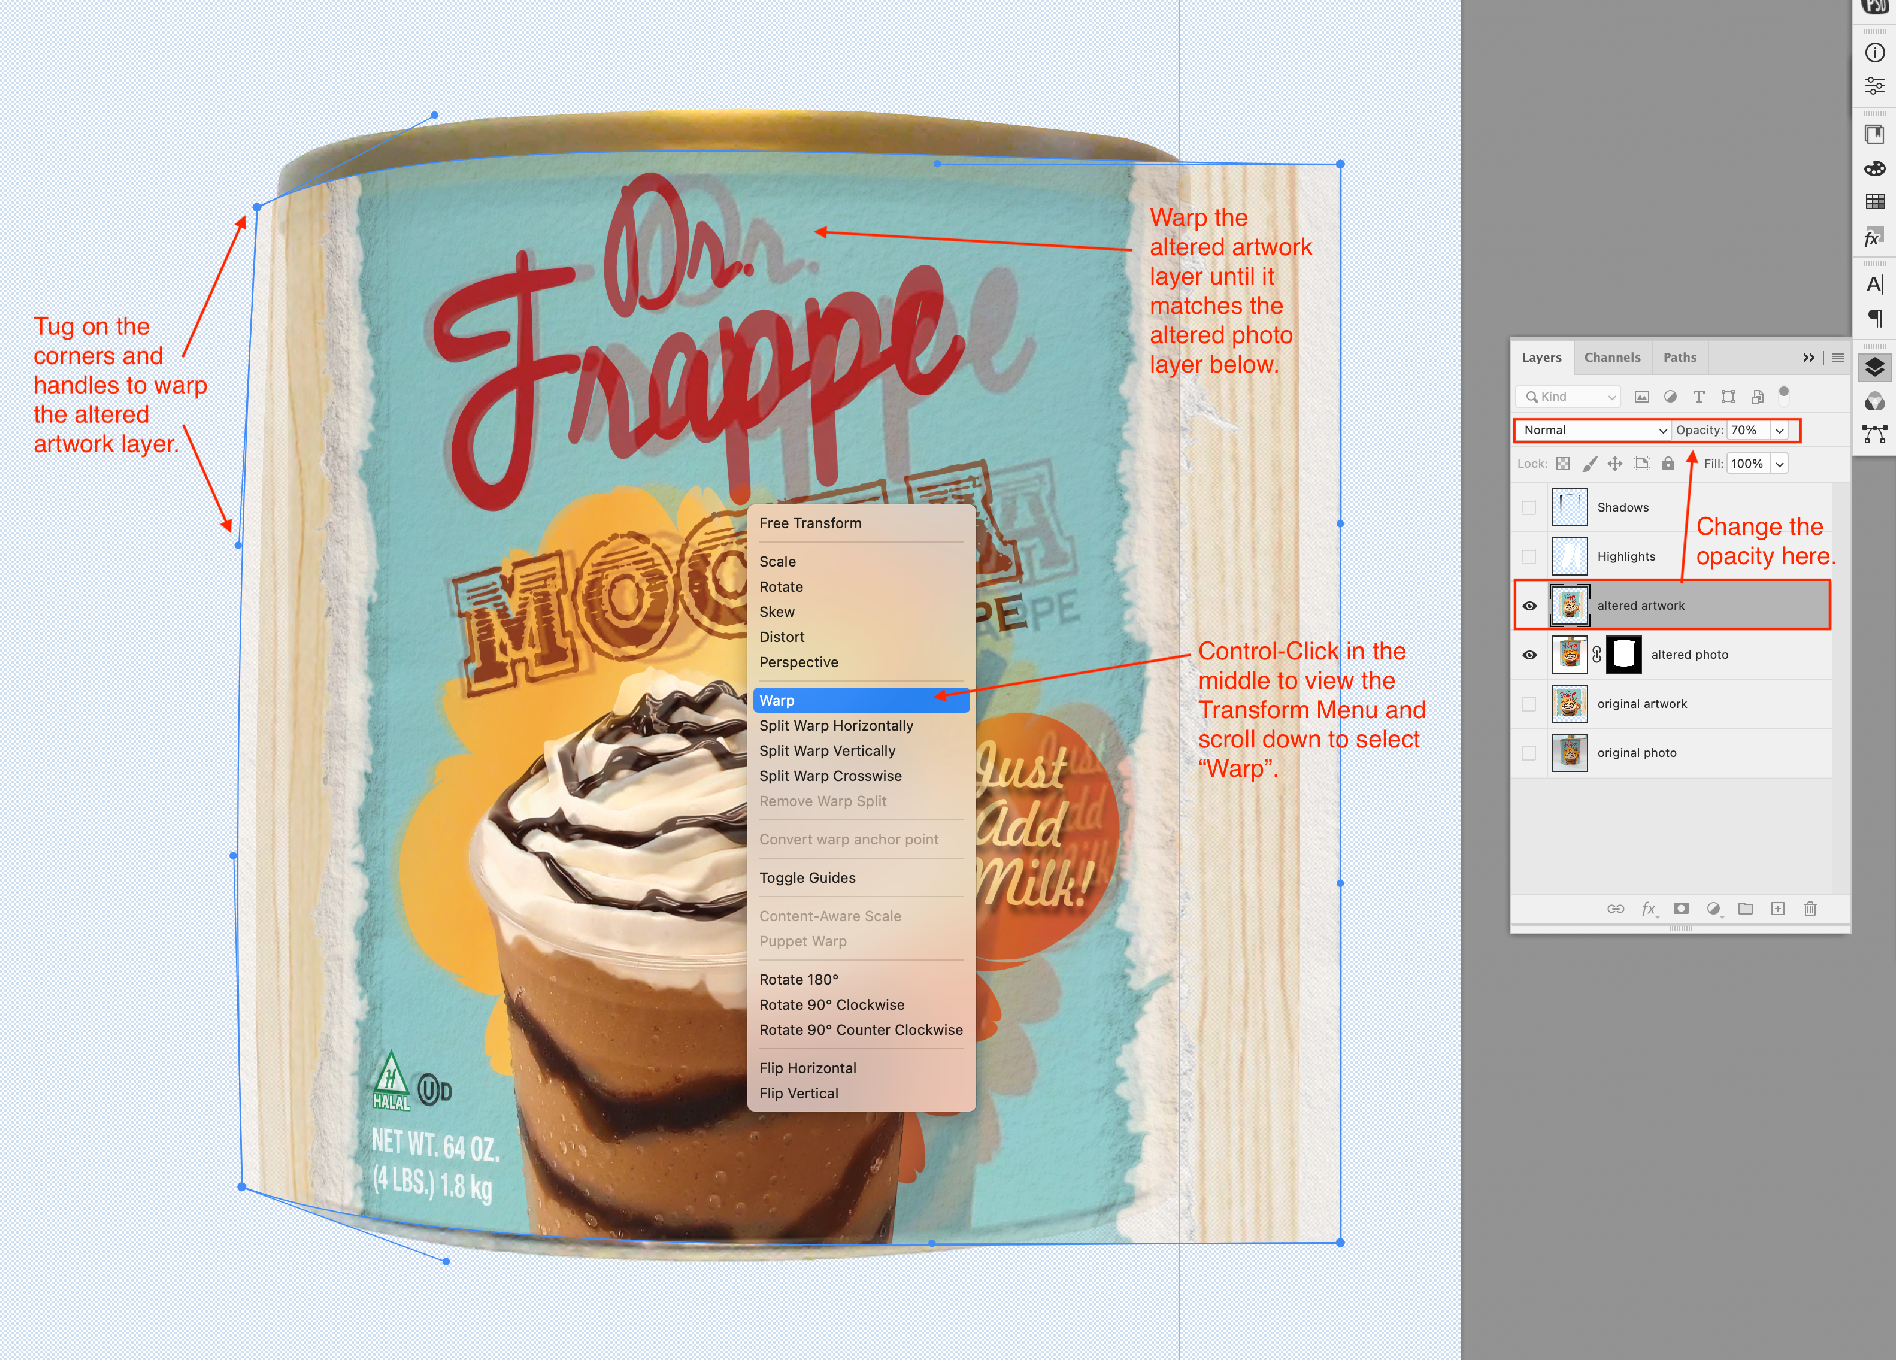
When you start warping the other side, it will undo part of your work on the first side! Just keep going back and forth between the two sides until your artwork matches your “altered photo” layer.
Pro Tip: If you are unable to make everything in the “altered artwork” layer match the “altered photo” layer, then make sure the customer’s logo, product name and product photo are correct, at least. You can fail on all the other details and still please your customer.
Once you are done, Control-Click anywhere to view the Transform Submenu and select “Free Transform”. Double-Click to accept the transformation.
Pro Tip: DO NOT SAVE your work at every little step in the transform-&-warp process! Doing so results in a fuzzy image. Wait until until your “altered artwork” matches the “altered photo” layer. THEN save.
Step 8:
When you are done transforming and warping the “altered artwork” layer, change the opacity of the “altered artwork” layer to 100% and use the clipping path or mask from the “altered photo” layer to mask out whatever is not needed. In my example, it was necessary to paint black on the mask for the “altered artwork” layer to reveal the plastic lid and the metal foot of the can. Reveal the hidden Highlights and Shadows layers. Adjust the Opacity and/or the Blending Modes on the Highlights and Shadows layers until it looks real. SAVE and you are ready to export the Photoshop file into whatever file format is required.
This whole process takes about 20 minutes and then YOU ARE DONE!