
Here’s a fun MC Escher-like experiment; make solids splash!
One of the reasons we love Photoshop is that you can make surreal images, such as make solids splash. Here I combined a kid in a superhero cape with splashes to create a unique “splashing superhero kid.”
Step-by-Step Instructions to Make Solids Splash
Start with an image of something solid.
Step 1: I started out with a stock image I had bought previously from ShutterStock.com.

I made the Layers Panel show by typing F7. Double-clicking on the Background in the Layers Panel converted it to a separate layer. I changed the default name of “Layer 1” to “kid in cape.”
Use good workflow habits.
It is always a good practice rename your layers something meaningful. That way, you can easily find the one you want. Later on, you won’t remember which image is on “Layer 1.” Just in case you need your original photo again, save it as a Photoshop PSD file with a new name.
Give yourself plenty of room to work.
I increased the size of my canvas (type⌥⌘C) to give me more room to work with. I used Free Transform (type ⌘T) to rotate the “kid in cape” layer until he looked like he was flying.
Separate your subject from the background.
I went to the Select Menu and scrolled down to Subject. Photoshop magically selected just the kid and his cape. I added a mask by clicking on the little mask icon at the bottom of the Layers Panel.
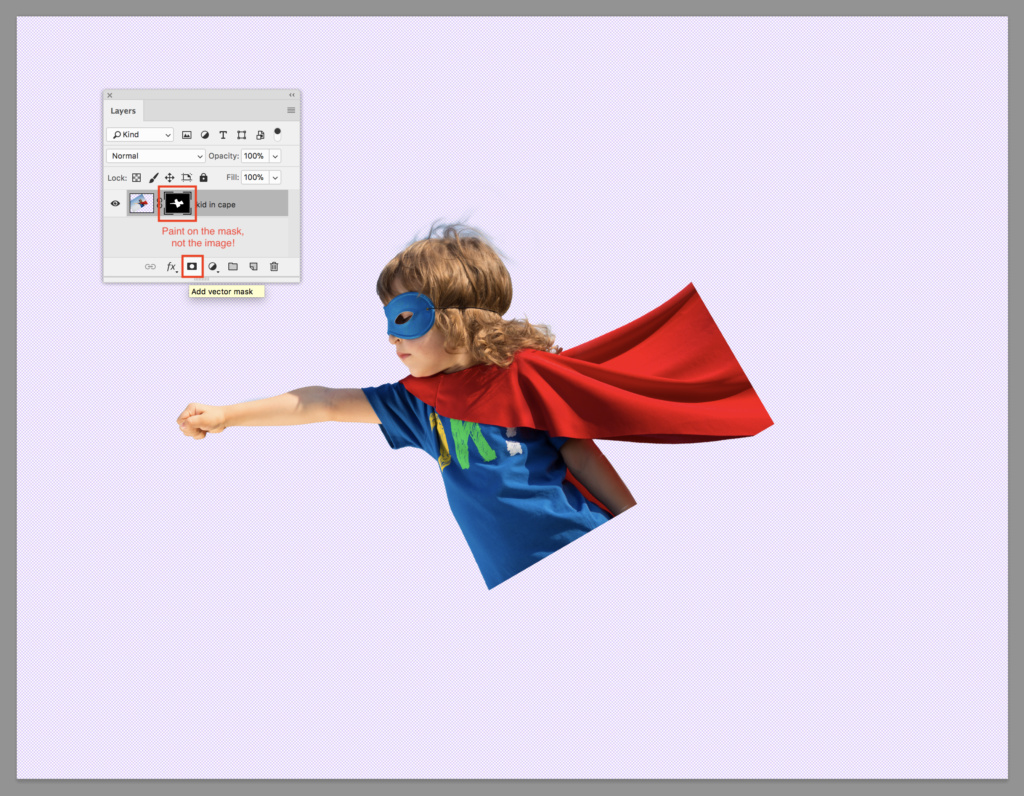
I selected the mask, not the image, by clicking on it. Selection is confirmed by the little black line around its icon in the Layers Panel. Then, I selectively erased some of my mask to show some of the wisps of hair. I felt that was important to convey movement. I used a soft-edged Brush Tool (type a B) to paint black on the mask. You can change its opacity by typing a number (1=10%, 0=100%, etc.). I wasn’t worried about removing every little bit of sky between the hair wisps. I planned to add a new sky image at the end. (The reason is that rotating kid also rotated the sky behind him and now the horizon was wrong.)
How to remove wispy hair from the background.
If your project requires removing the background from every wisp of hair, there are lots of tutorials to try. I like this one from Clipping Path India.
The next step is to add a water image to make your solids splash!
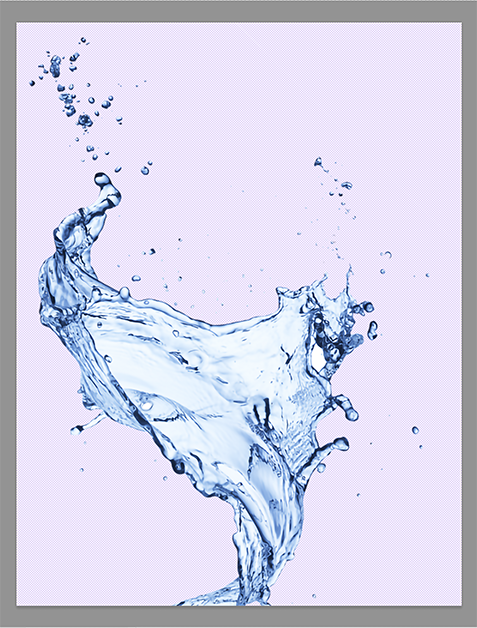
Step 2: I didn’t have any water splash images with a transparent background, so I searched the Clipart Library. The Clipart Library offers their images for free and asks only that you give credit where it’s due. Here is the one I selected:
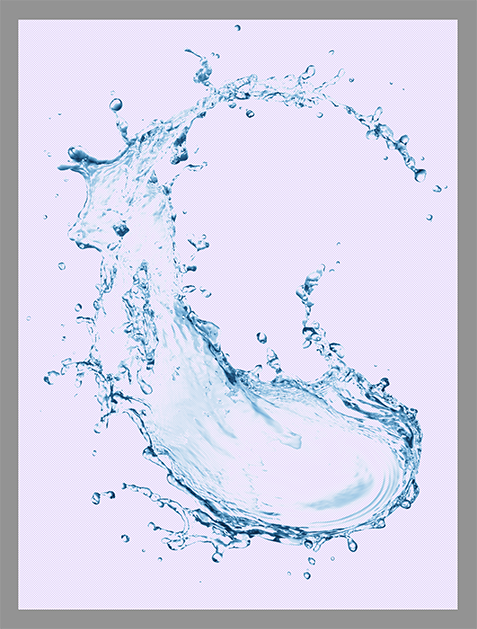
As you can see by the purple grid in the background, my selected image has a lot of transparent areas. I dragged it into my Photoshop document and renamed its layer. I used Free Transform (type ⌘T) to rotate the water splash to line up with the kid’s body. But the cut-off kid’s body showed through the transparent parts of the water splash. This was not good.
How to create a fill-in layer:
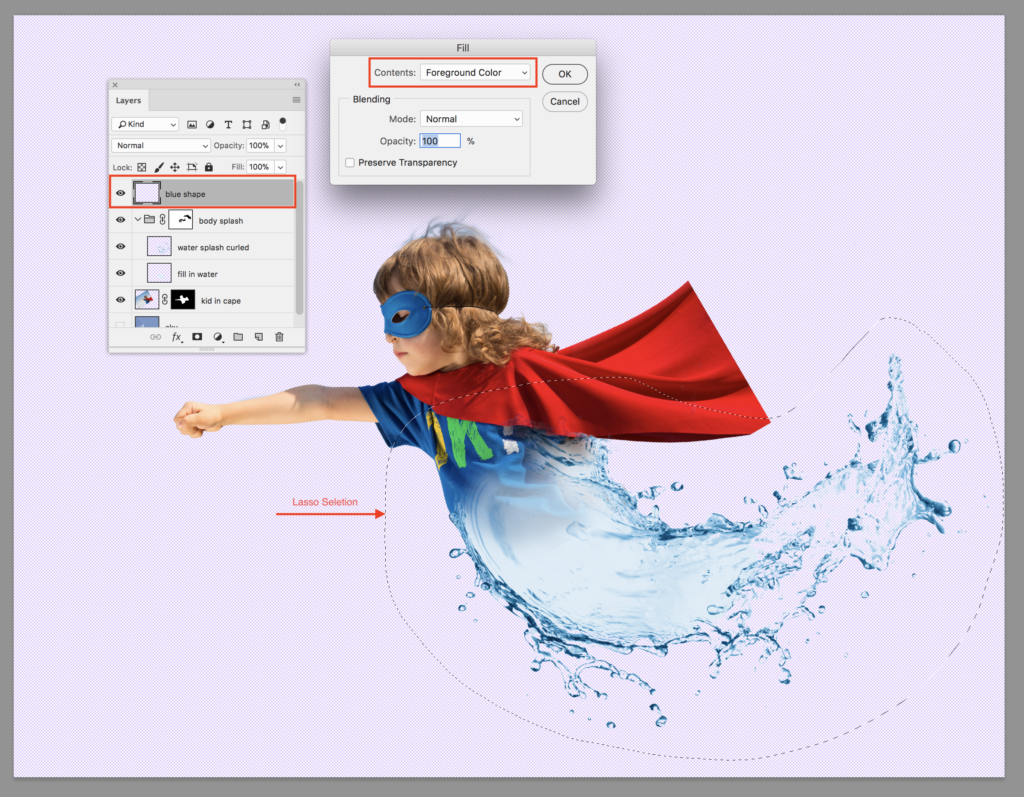
To solve this problem, I created a new layer (type ⇧⌘N). I placed it under my water splash layer and renamed it “fill in water.” Using the Eyedropper Tool (type an I), I selected the lightest color in my water splash image. The color automatically became the Foreground Color. I verified that I had the “fill in water” layer selected. Then I used the Lasso Tool (type an L) to make a rough selection around the kid’s body.
Next, I filled the selection (type ⇧F5 and choose Foreground Color) and deselected (type ⌘D). To make it look like a natural, I used the Brush Tool (type a B) to paint a softer edge.
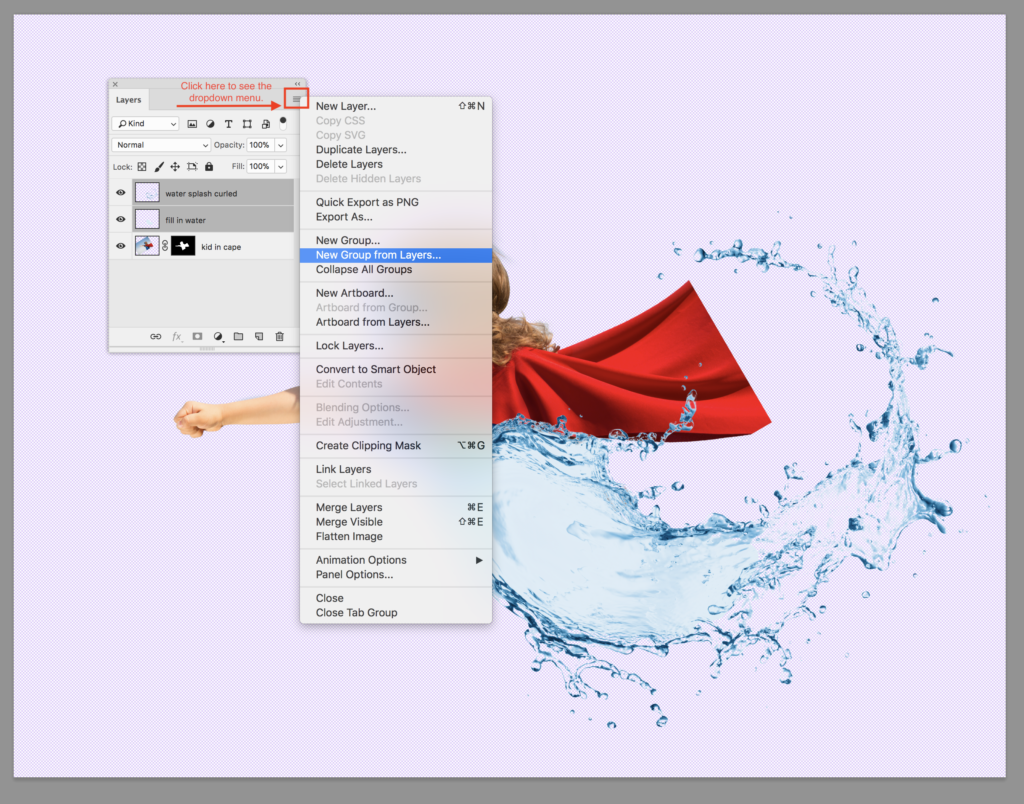
I put the two water layers in their own folder. I selected the two layers by clicking on them while holding the Shift Key (⇧). Then I clicked on the three horizontal bars menu at the top right of the Layers Panel. I chose “New Group from Layers” from the dropdown menu that appeared. I named the folder “body splash.”
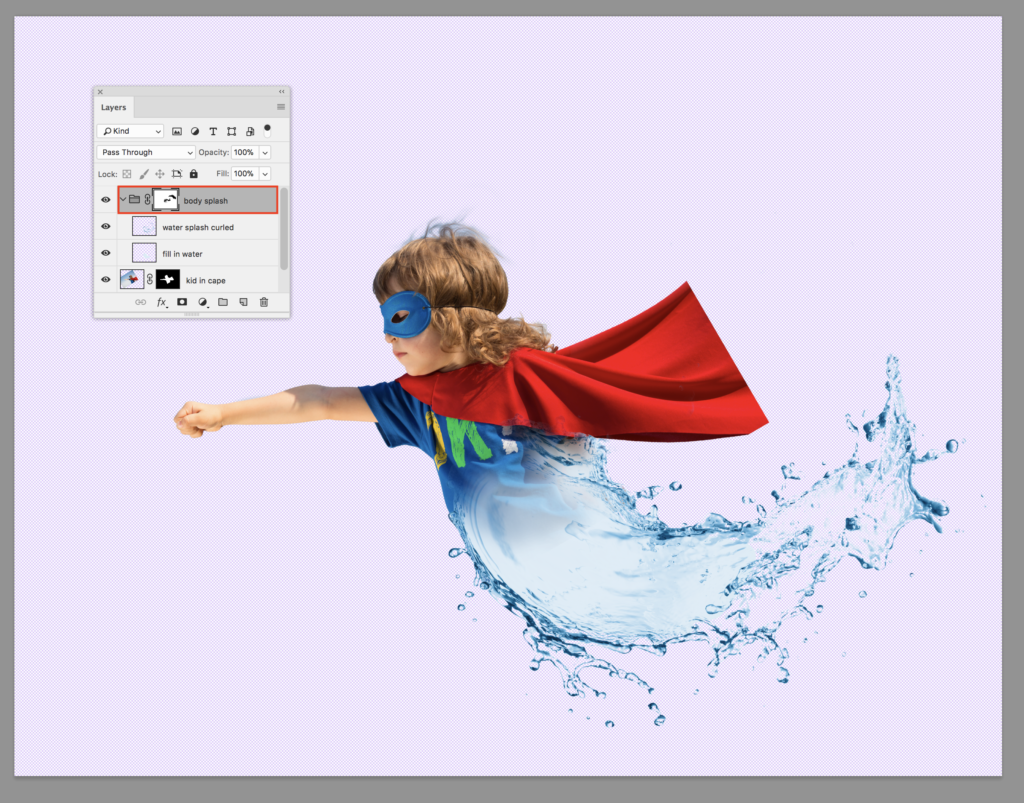
With the new group selected, I added a mask and began to selectively paint with a black, soft-edged Brush Tool (type a B) until the water splashes blended into the kid’s body. I also masked out some of the curl in the water splash where it overlapped the cape. When I got that done, a little bit of the kid peaked out around my water splash, so I painted some more on the kid’s layer mask until everything looked right.
The next step is to make the splash the same blue as the kid’s shirt.
I made a new layer (⇧⌘N) above the water splash group and renamed it “blue shape.” Then I took the Lasso Tool (type an L) to roughly select an area surrounding the water splashes. Using the Eyedropper Tool (type an I), I selected the blue color from the kid’s shirt to make it the Foreground Color. Next, I filled the selection (type ⇧F5 and choose Foreground Color).
Well, that looked strange!
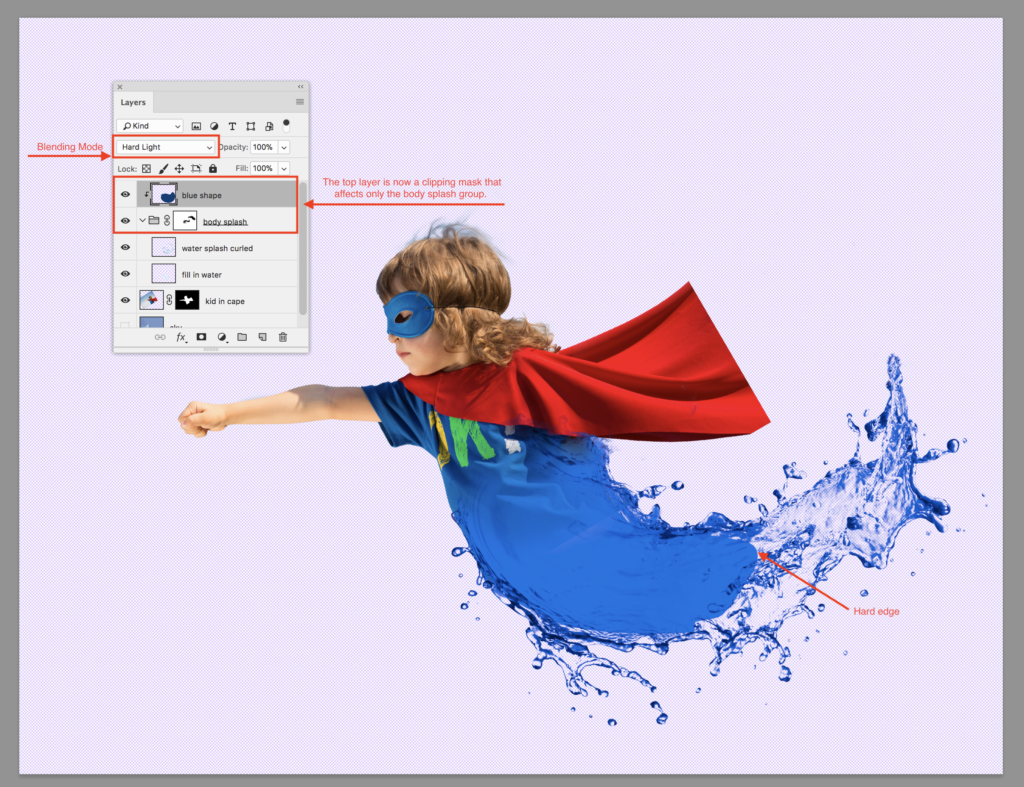
But stay with me. I played with the Blending Mode until the blue shape turned the water splash the same blue as the kid’s shirt. Then I moved my cursor to the line between the “blue shape” layer and the “body splash” group, held down the Option Key (⌥) and clicked once to create a clipping mask that only affects the “body splash” group. But there appeared a hard edge where I had painted on the “fill in water” layer that I didn’t like.
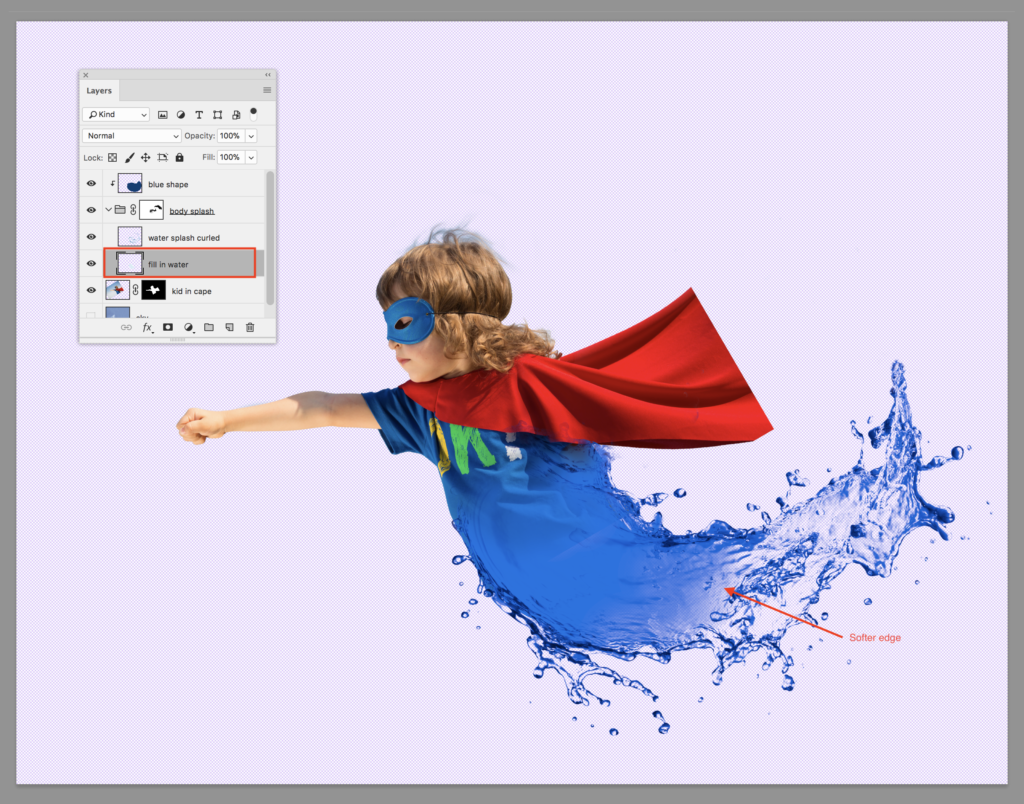
Soften the hard edges.
So, I used the Eraser Tool (type an E) and typed the brackets keys [ or ] until I had an eraser Brush the size I wanted. To change the opacity, I typed a number (1=10%, 0=100%, etc.). Then I selectively erased the “fill in water” layer until I had a nice, soft edge. That’s how I made the first solids splash.
The next step was to repeat this process and make the red cape solids splash like water.
Step 3: I went back to the Clipart Library and selected another splash image. Here’s the image I chose:
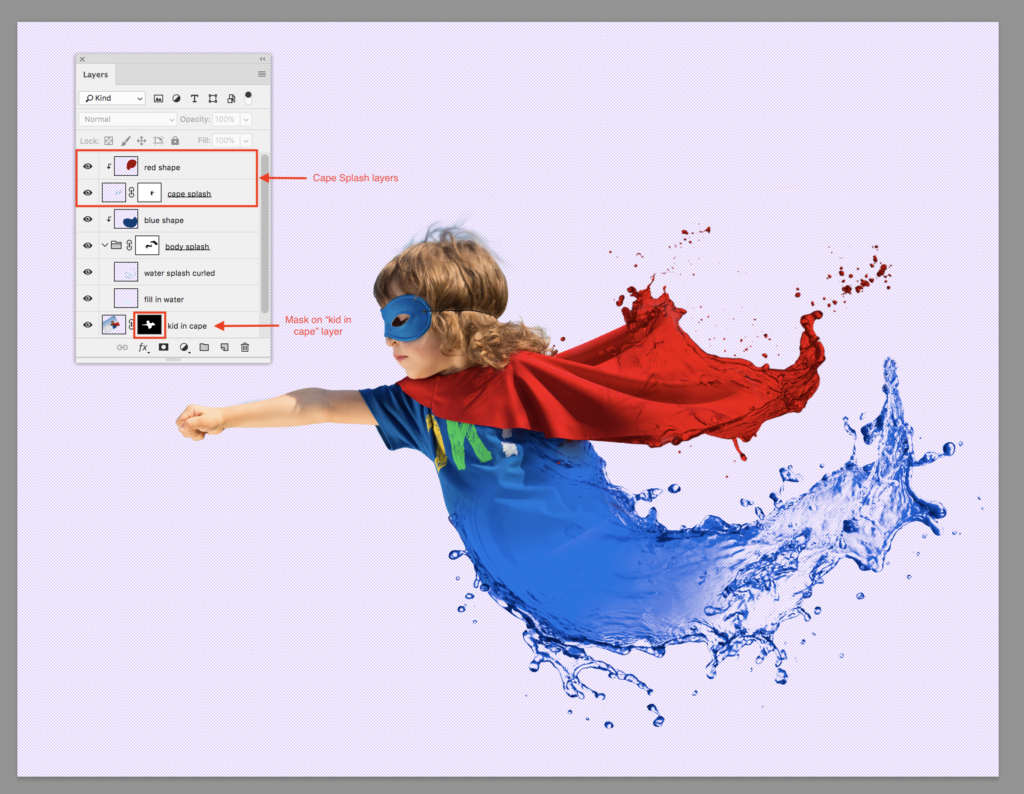
This splash image did not have any transparent spots in the middle, so I did not need to create a fill-in layer. I dragged the new splash image to the top layer of my Photoshop document, renamed it “cape splash,” and rotated it with the Free Transform Command (type ⌘T) until it looked like a part of the cape.
Turn the splashing water red.
I made a new layer (⇧⌘N) above the cape called “red shape,” selected a red from the kid’s cape with the Eyedropper Tool (type an I), and filled the selection (type ⇧F5 and choose Foreground Color) and deselected (type ⌘D).
Next, I changed the Blending Mode on the “red shape” layer until the splash looked the same red as the cape and Option-Clicked the line between the two layers to create a clipping mask that only affects the “cape splash” layer. I finished up by adding a mask and selectively painting on the mask with a black, soft-edged Brush Tool (type a B) until the “cape splash” layer looked like a part of the cape. I added to the mask on the “kid in cape” layer to hide the spots where the cape showed outside the “cape splash.” That’s how the last of the solids splash.
Here’s what I got:
Now to add a new sky and see how it looks!
Step 4: I added a sky photo from my previously purchased collection that I bought from Dynamic Graphics, which is out of business now.
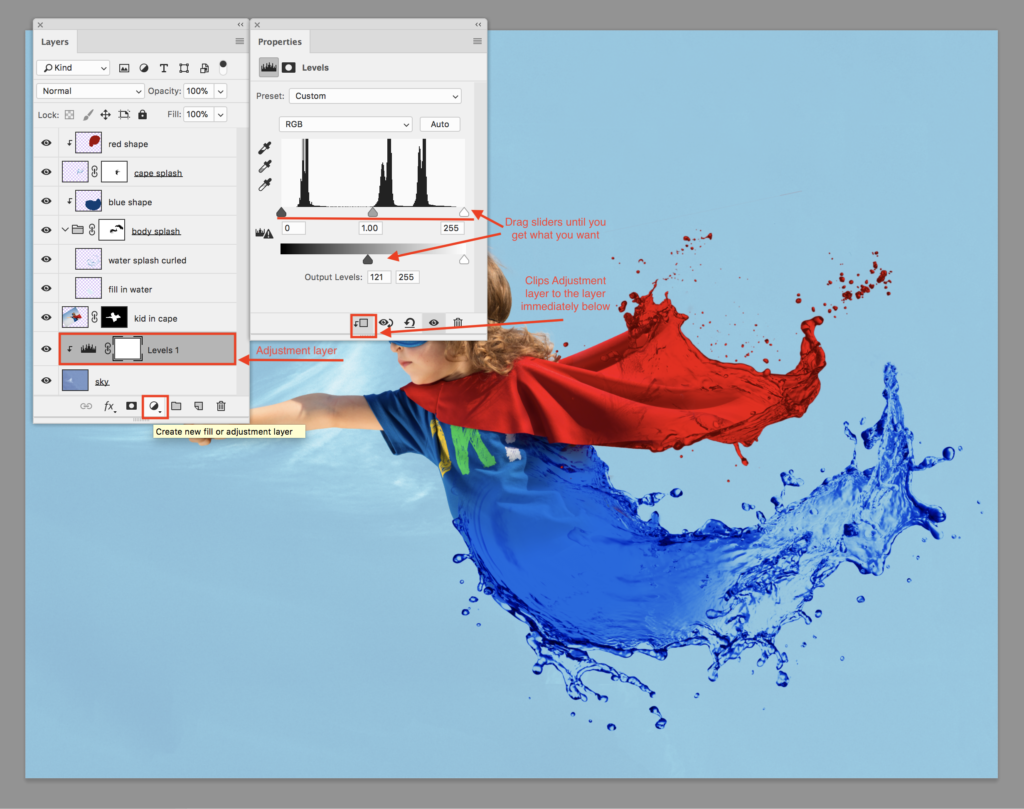
Whoops, the blue splash doesn’t contrast enough with my sky. Good thing I’m working in layers! All I need to do is change the Blending Mode on the “blue shape” layer from Hard Light to Linear Light to increase the contrast so more folds in the shirt and bubble in the splash show up.
Then, I thought that the sky should be a little lighter, but I didn’t want to permanently alter my sky image. So, I added an adjustment layer by clicking on the half black, half white circle at the bottom of the Layers Panel. I moved the sliders around until I got the differentiation in blues that I wanted.
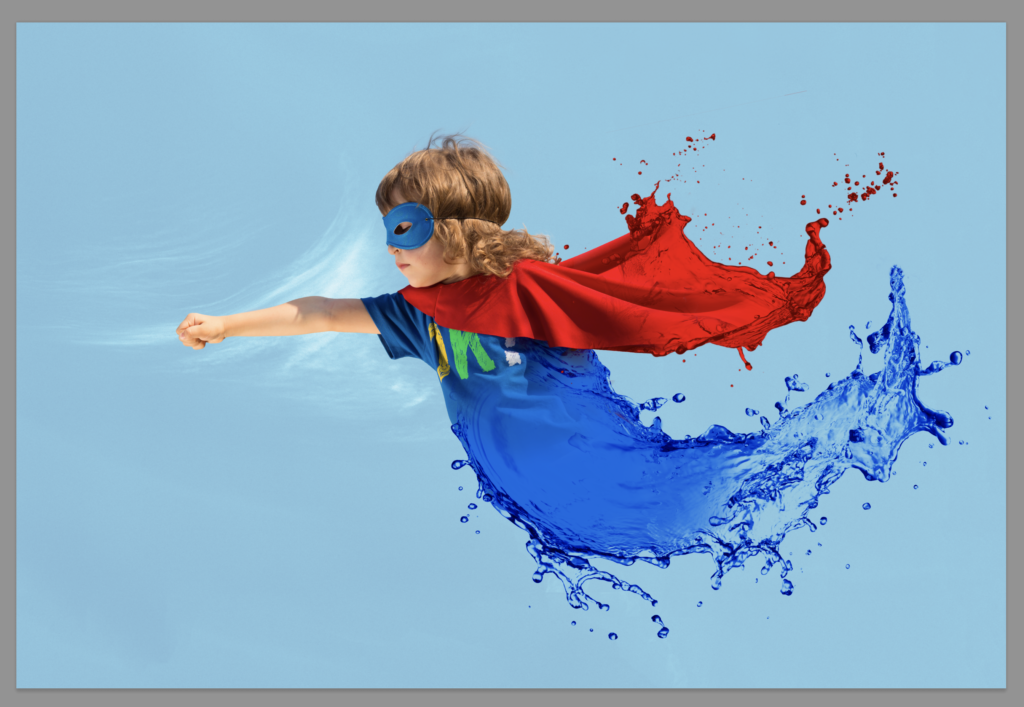
Then I was done making solids splash!
Here’s how the final piece looks:
I hope you enjoyed this tutorial. I am a graphic designer who does a lot of Photoshop work for my customers. Please take a look at my other tutorials and resources.
Remove the Background Quickly in Photoshop with Blend If Method
Delete Backgrounds Quickly in Photoshop: Color Range Method
Take Out Backgrounds in Photoshop Easily with Select & Mask
Eliminate Backgrounds Fast in Photoshop with Combo Tools
Awesome Photo Mockups In 2 Easy Steps
Creating A Photo Mockup From Scratch
17 Free DIY Resources for Graphic Designers
By Martha Ridgeway, Graphic Designer