
It’s time to update your portfolio with the best possible photo mockups of your latest work. By far, my favorite source is PSDcovers.com, which offers flawless Photoshop actions that create high-resolution, layered files suitable for large projects. The entire process involves only two steps and takes mere seconds to complete. Even better, they have hundreds of actions available for FREE. If you need their premium actions, their subscription rate is only $1.35 a month!
Simple directions for making photo mockups:
First, install the PSDCovers Photoshop plugin.
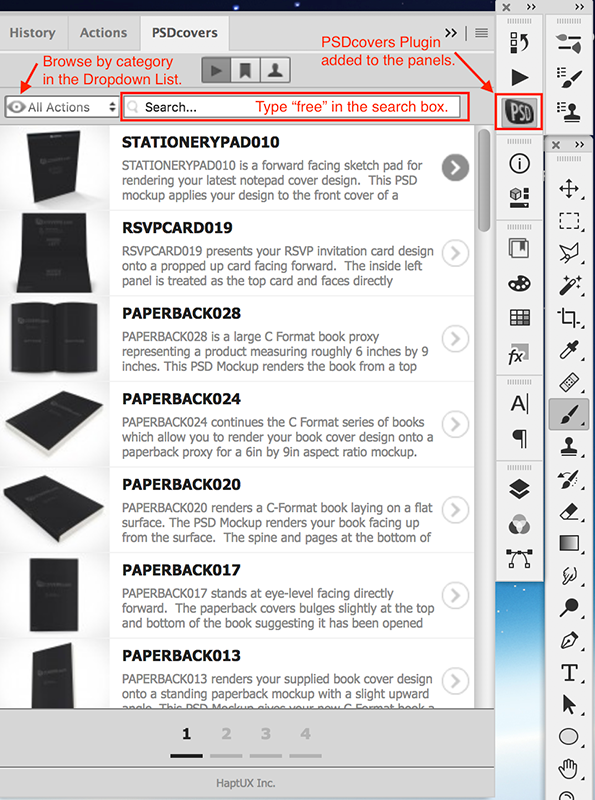
Go over to PSDcovers.com and download the PSDcovers Photoshop plugin, which is free. Locate the Quick Install Guide on their website and follow the instructions to install the plugin. Next, launch Photoshop. From Photoshop’s Window Menu, scroll down to Extensions and select PSDcovers. The plugin will be added to your panels automatically.
Next, create an account and and sign in. (An account is free and does not require a credit card.) Close the title page. Type “free” in the Search Field and start browsing. Or you can select a category (brochures, boxes, etc.) from the Dropdown List to the left of the Search Field.
Now, you are ready to begin!
Step 1
Select an action and click on “Step 1”. The Photoshop action will create a new working file and stop. Notice the gray and black blocks of the new working file, with each block labeled.
Pro Tip: Don’t close this document until you are sure that you like the final result! That way, you can always go back to the working file if you make a mistake.
Open your artwork in Photoshop. I use a high-quality PDF to make this part simpler. Select the appropriate area. Drag or cut-&-paste your selection into your working file and distort your selection as necessary to make it completely fill the space. It is helpful to have “Snap” selected in the View Menu.
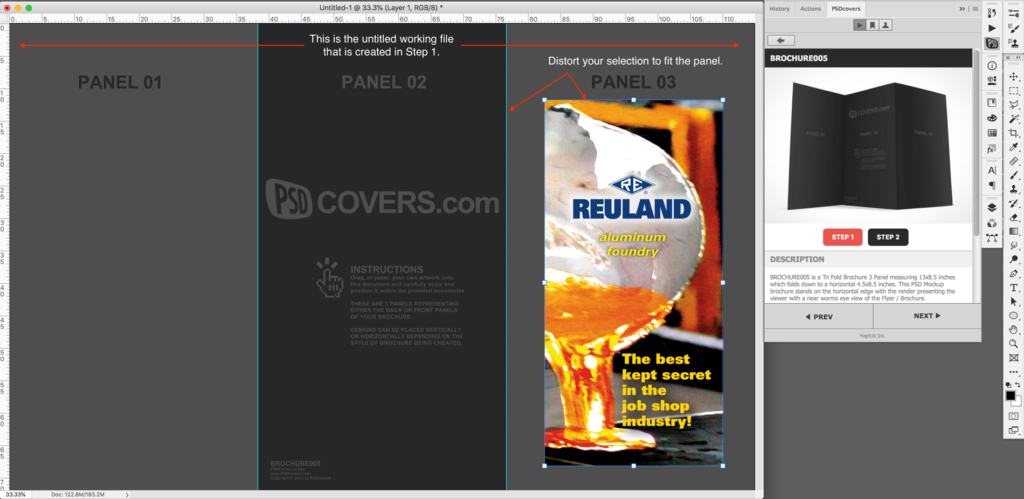
At this point, repeat the process of adding segments of your artwork to the working file until you have all the sections of your project placed and distorted.
Pro Tip: Make sure that all your artwork layers are at the top of the list of layers in the Layers Panel (F7) before you proceed to Step 2. If you skip this part, your final photo mockups will have the PSDCovers logo and all of their instructions!
Now, watch the magic happen!
Step 2
Go back to the PSDcovers panel, click on “Step 2”, and Violà! Your perfect and awesome mockup is done, complete with realistic shadows underneath. Nothing could be easier.
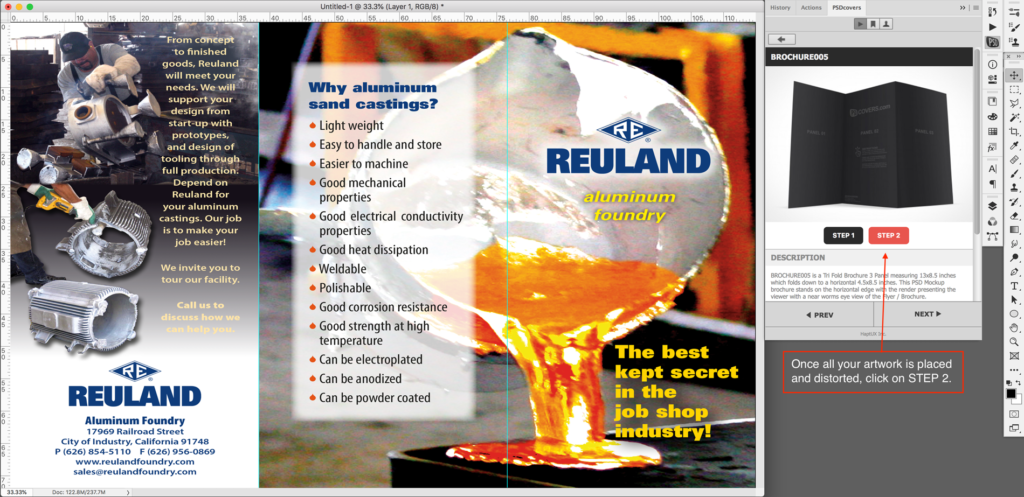
Here is my final result.
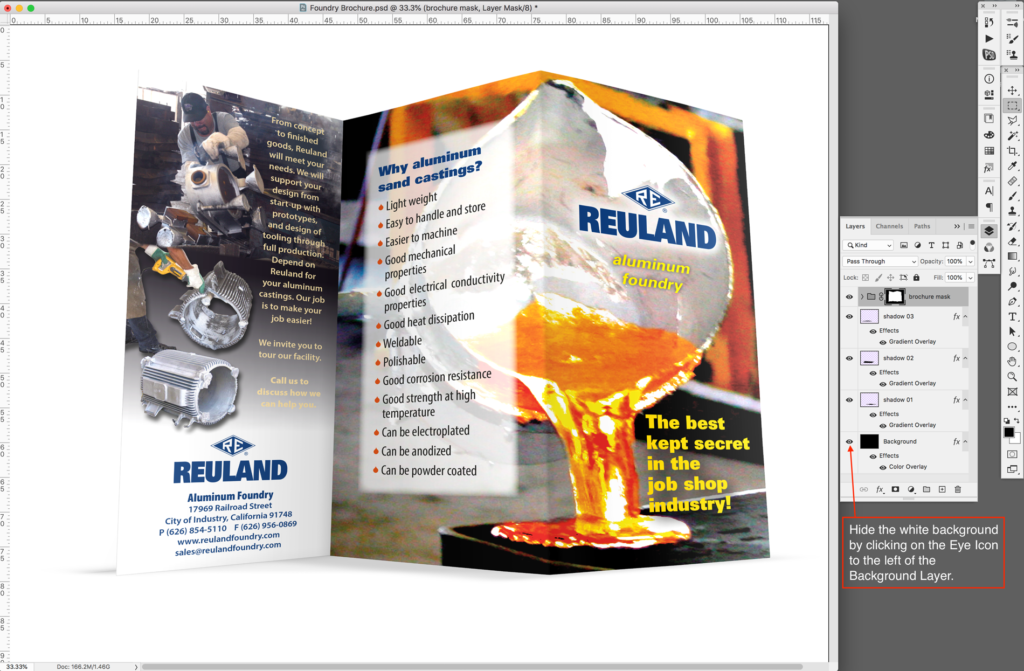
Finally, hide the background layer if you would like a transparent background. You will find all the editable layers of the image within the top layer group. You can adjust every part to best suit your content.
Happy portfolio updating!
What if you can’t find suitable Photoshop actions to create photo mockups of your projects?
Here’s what you do instead. Please ready my article, Creating A Photo Mockup from Scratch.
I hope you enjoyed this tutorial. I am a graphic designer who does a lot of Photoshop work for my customers. Please take a look at my other tutorials and resources.
Remove the Background Quickly in Photoshop with Blend If Method
Delete Backgrounds Quickly in Photoshop: Color Range Method
Take Out Backgrounds in Photoshop Easily with Select & Mask
Eliminate Backgrounds Fast in Photoshop with Combo Tools
Awesome Photo Mockups In 2 Easy Steps
Creating A Photo Mockup From Scratch
17 Free DIY Resources for Graphic Designers
By Martha Ridgeway, Graphic Designer