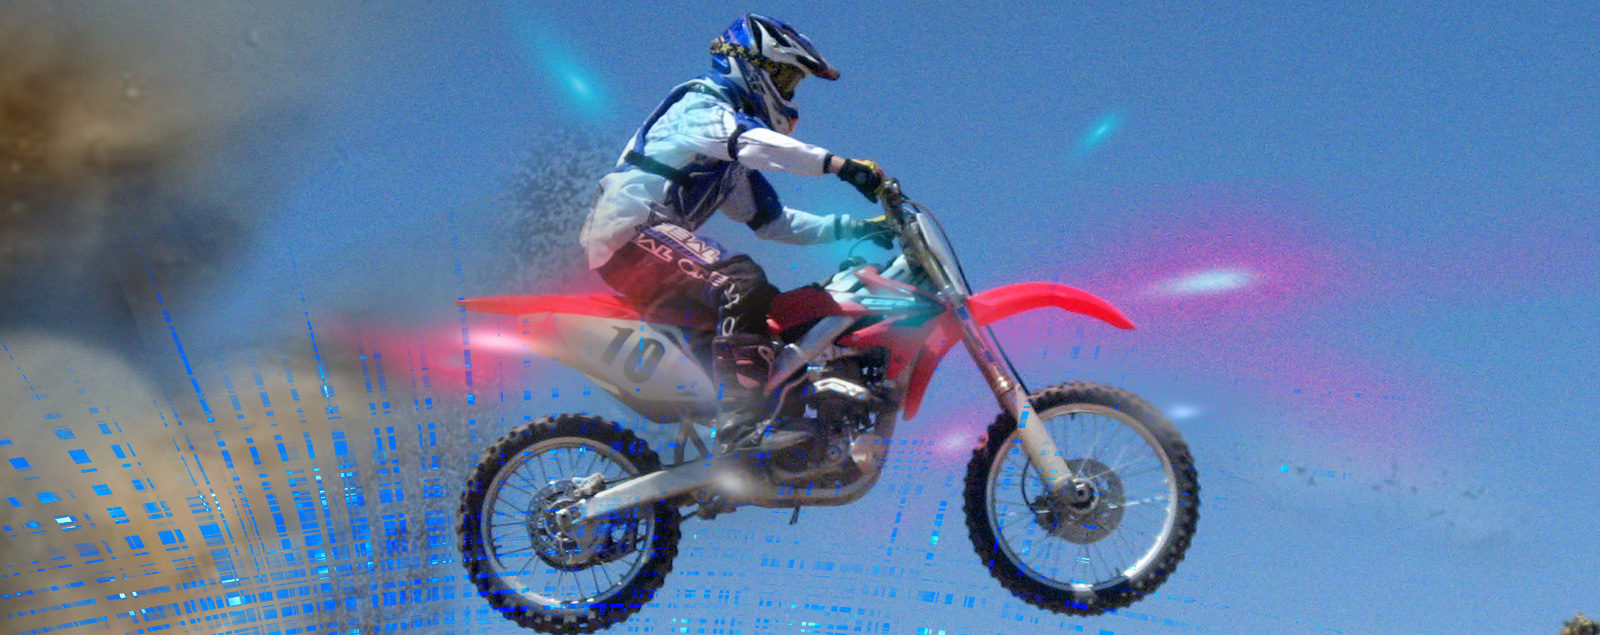
I had a great photo of a local kid getting some air on his dirt bike. Why not dress it up a bit? I decided to make some special effects with the Wave Filter in Photoshop to dramatize the action.
First, I opened the photo, double-clicked on the background to make it a layer and renamed it “original photo”. That helps me keep track of things. I made sure that the foreground and background colors were set to their defaults. That will become important in the next step.
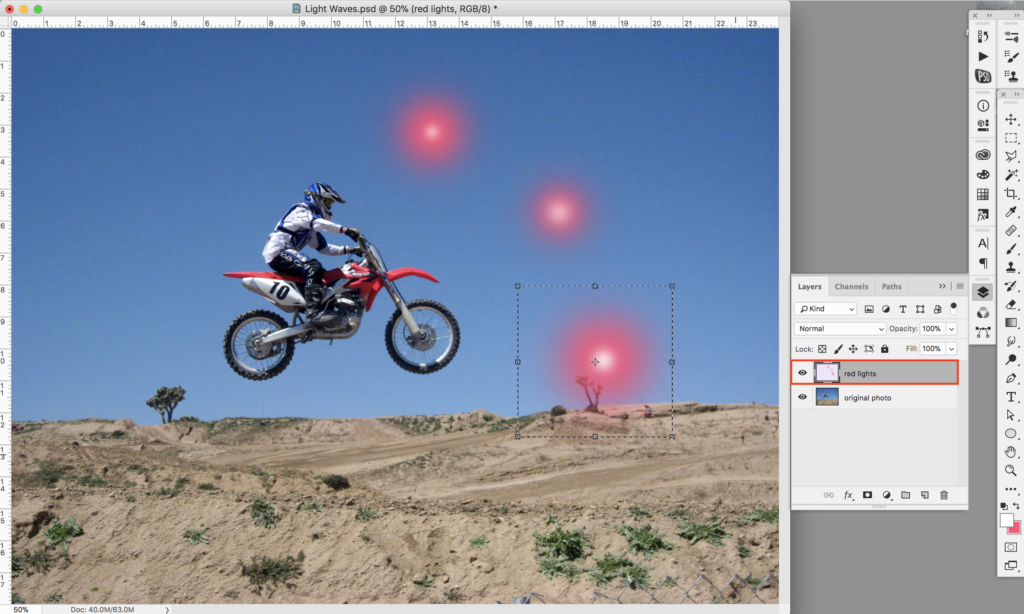
Then I created at new layer (⇧⌘N) and named it “red lights.” I used the Eyedropper Tool (type an “I” to select it) to choose a nice red from the motorcycle fender, which became the new foreground color.
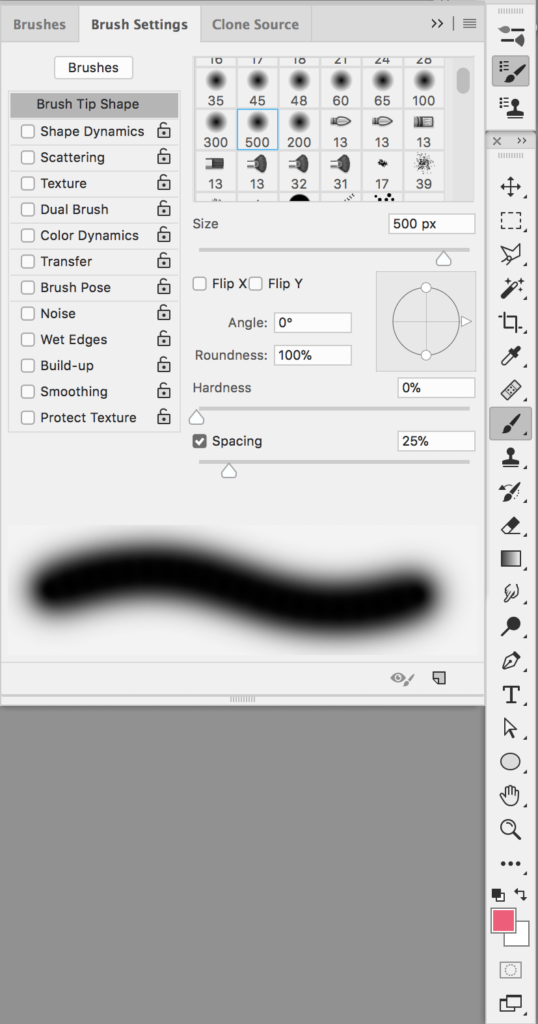
Next I chose a 500-pixel soft round brush.
With the “red lights” layer selected, I clicked on the mouse once. Taking care not to move my mouse hand, I typed a left bracket with my free hand to reduce the size of the brush and clicked again. I did that a few more times. Lastly, I used my free hand to type an X to switch the foreground and background colors so that white was now my foreground color. Then I clicked the mouse once more to create a white center in my red blob. I made two more red blobs the same way, and the last one got two mouse clicks of white.
You can copy, move, and transform each red blob until you have what you want.
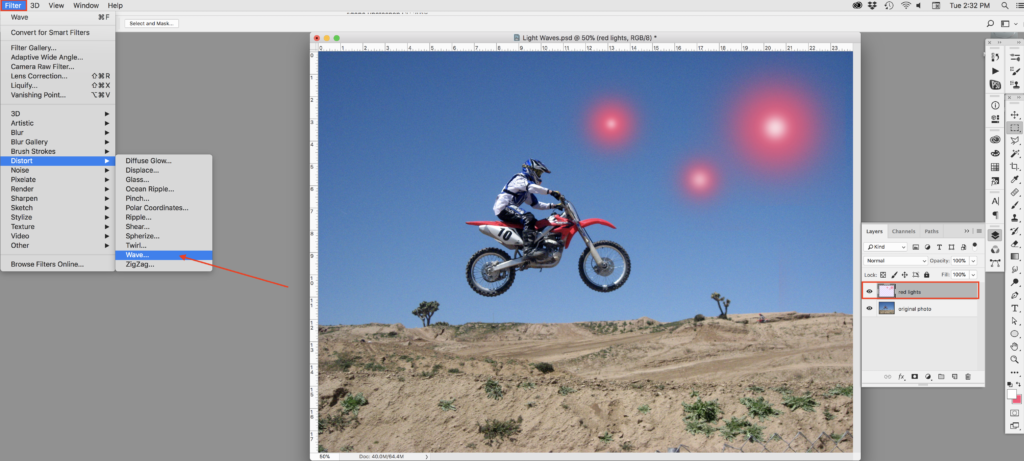
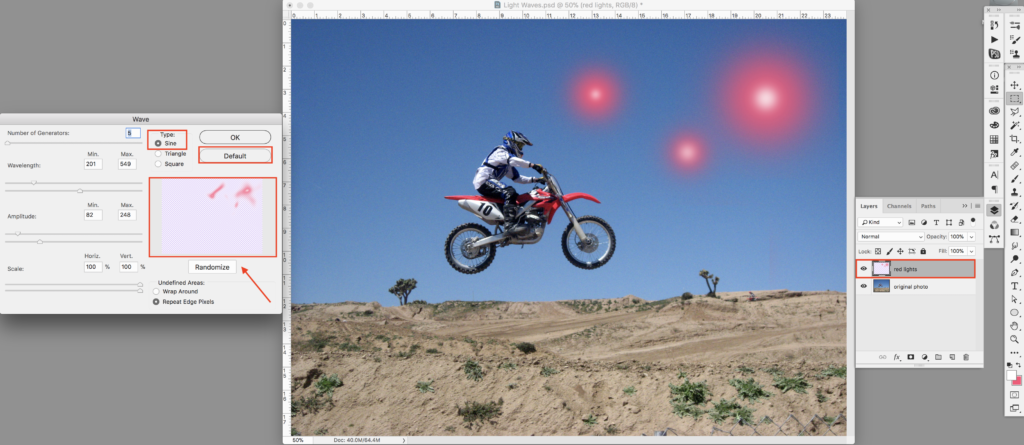
Making sure that I had my “red lights” layer selected, I went to the Filter Menu and scrolled down to Distort and selected Wave.
A dialog box popped up with sliders on the left to adjust the shape of the red lights. A little window shows a preview of what your adjustments will look like. Play around and see what happens. I chose “Sine” so that my waves would be comet shaped. By the way, if you hold down the Command Key (⌘), the Cancel Button changes to “Default,” allowing you to go back to the default settings. Hold down the Control Key (⌥), and the Cancel Button changes to “Reset."
You can also hit the Randomize Button and let Photoshop change your red blobs for you. Every time you hit the Randomize Button, you’ll get something new. I hit the Randomize Button once, liked what I saw, and hit OK.
Next, I transformed my red lights (⌘T) and control-clicked to get to the submenu and selected “Warp.” (You can also get to the Transform submenu by choosing the Edit Menu and scrolling down to Transform. The submenu appears on the right.) I warped and twisted the red light waves until I liked them. Finally, I changed the Blending Mode in the Layer Panel to “Overlay” and positioned the red lights where I wanted.
![]()
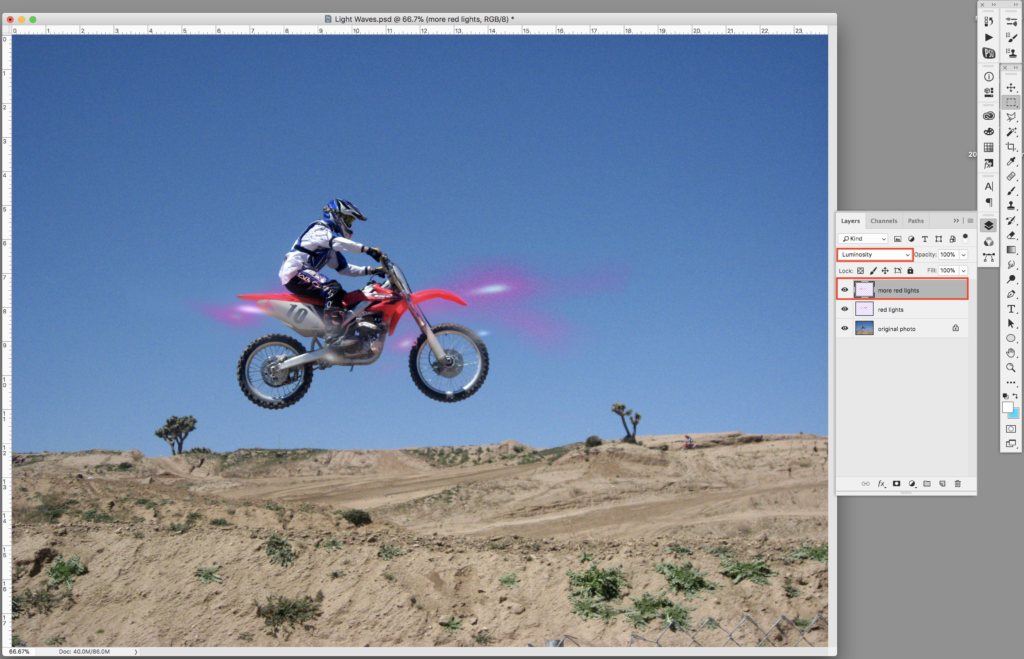
I wanted to repeat this whole process until I had all the wave lights that I felt the photo needed. So, I made a new layer (⇧⌘N), named it “more red lights,” made more red blobs, and applied the Wave Filter. This time I changed the Blending Mode in the Layer Panel to “Luminosity.”
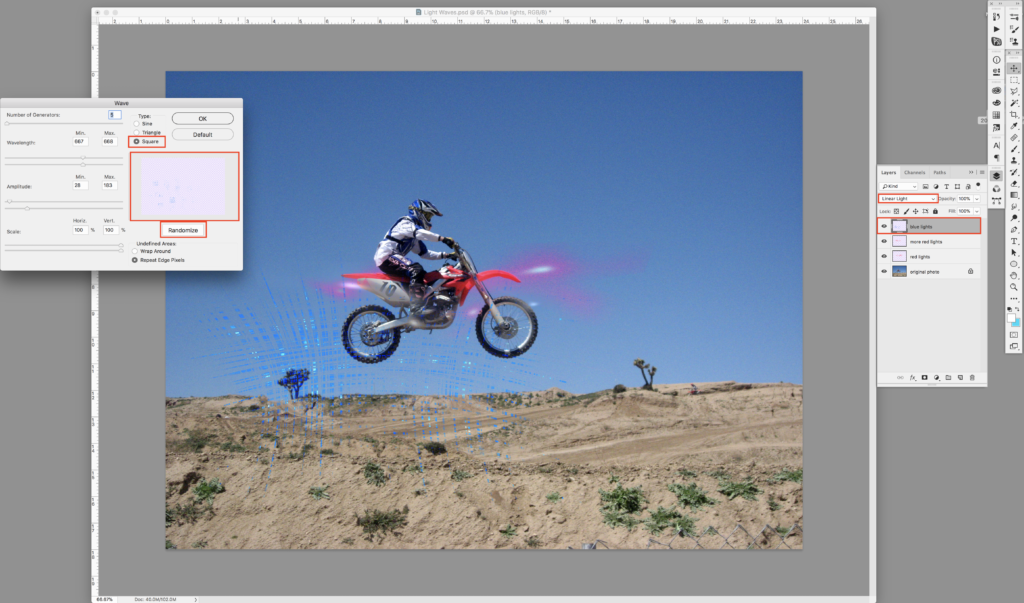
For the next step, I used the Eyedropper Tool (type an “I” to select it) to choose a dark blue from the rider’s helmet. I repeated the process of making blobs on a new layer and going to the Wave Filter, but this time I chose the Square Type as well as the Randomize Button. When I liked what I saw, I hit OK. I transformed and warped the blue lights, then changed the Blending Mode to Linear Light.
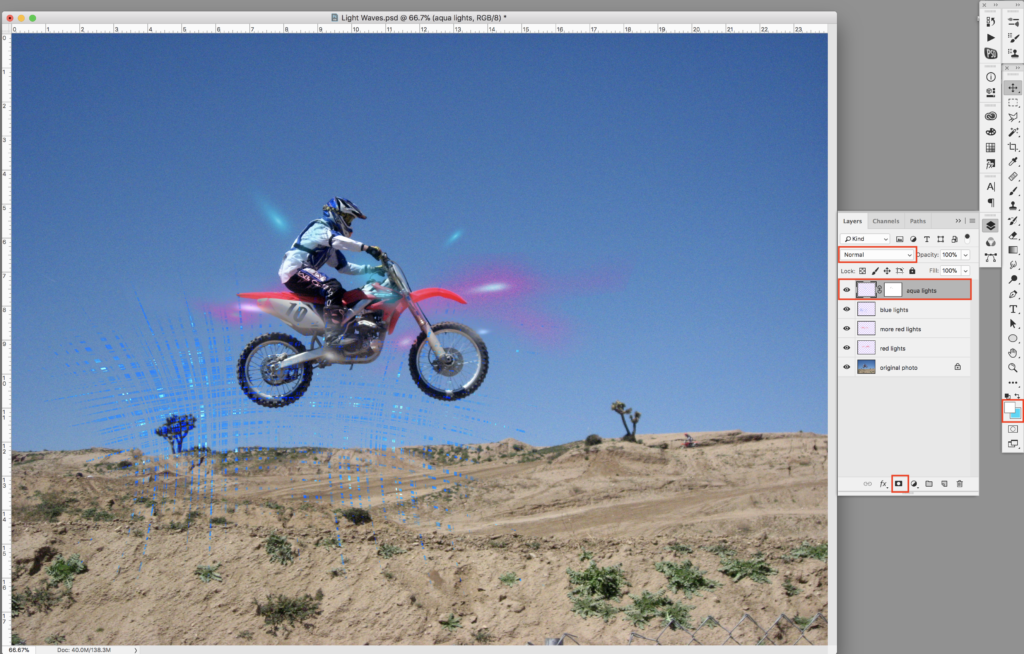
I decided that I like what I had so far, but it needed some aqua lights. I made a new layer (⇧⌘N), named it “aqua lights,” double-clicked on the foreground color and created a nice aqua color from the pop-up window, then hit OK. I repeated the whole process of making blobs, but this time I went back to the comet shaped waves by choosing the Sine Type in the Wave Filter dialog box and hit the Randomize button a few times. When I liked what I saw, I hit OK. I transformed and warped the aqua lights, then played around with the Blending Mode, finally settling on “Normal.” Finally, I added a mask so that I could selectively make some of the aqua lights transparent by grabbing the Brush Tool (B) with black as the foreground color, typing the number “5” to make the Brush Tool paint at 50% opacity, then painting on the mask until I was satisfied with the result.
You can see that there are lots of ways to play round and add drama to your photos.
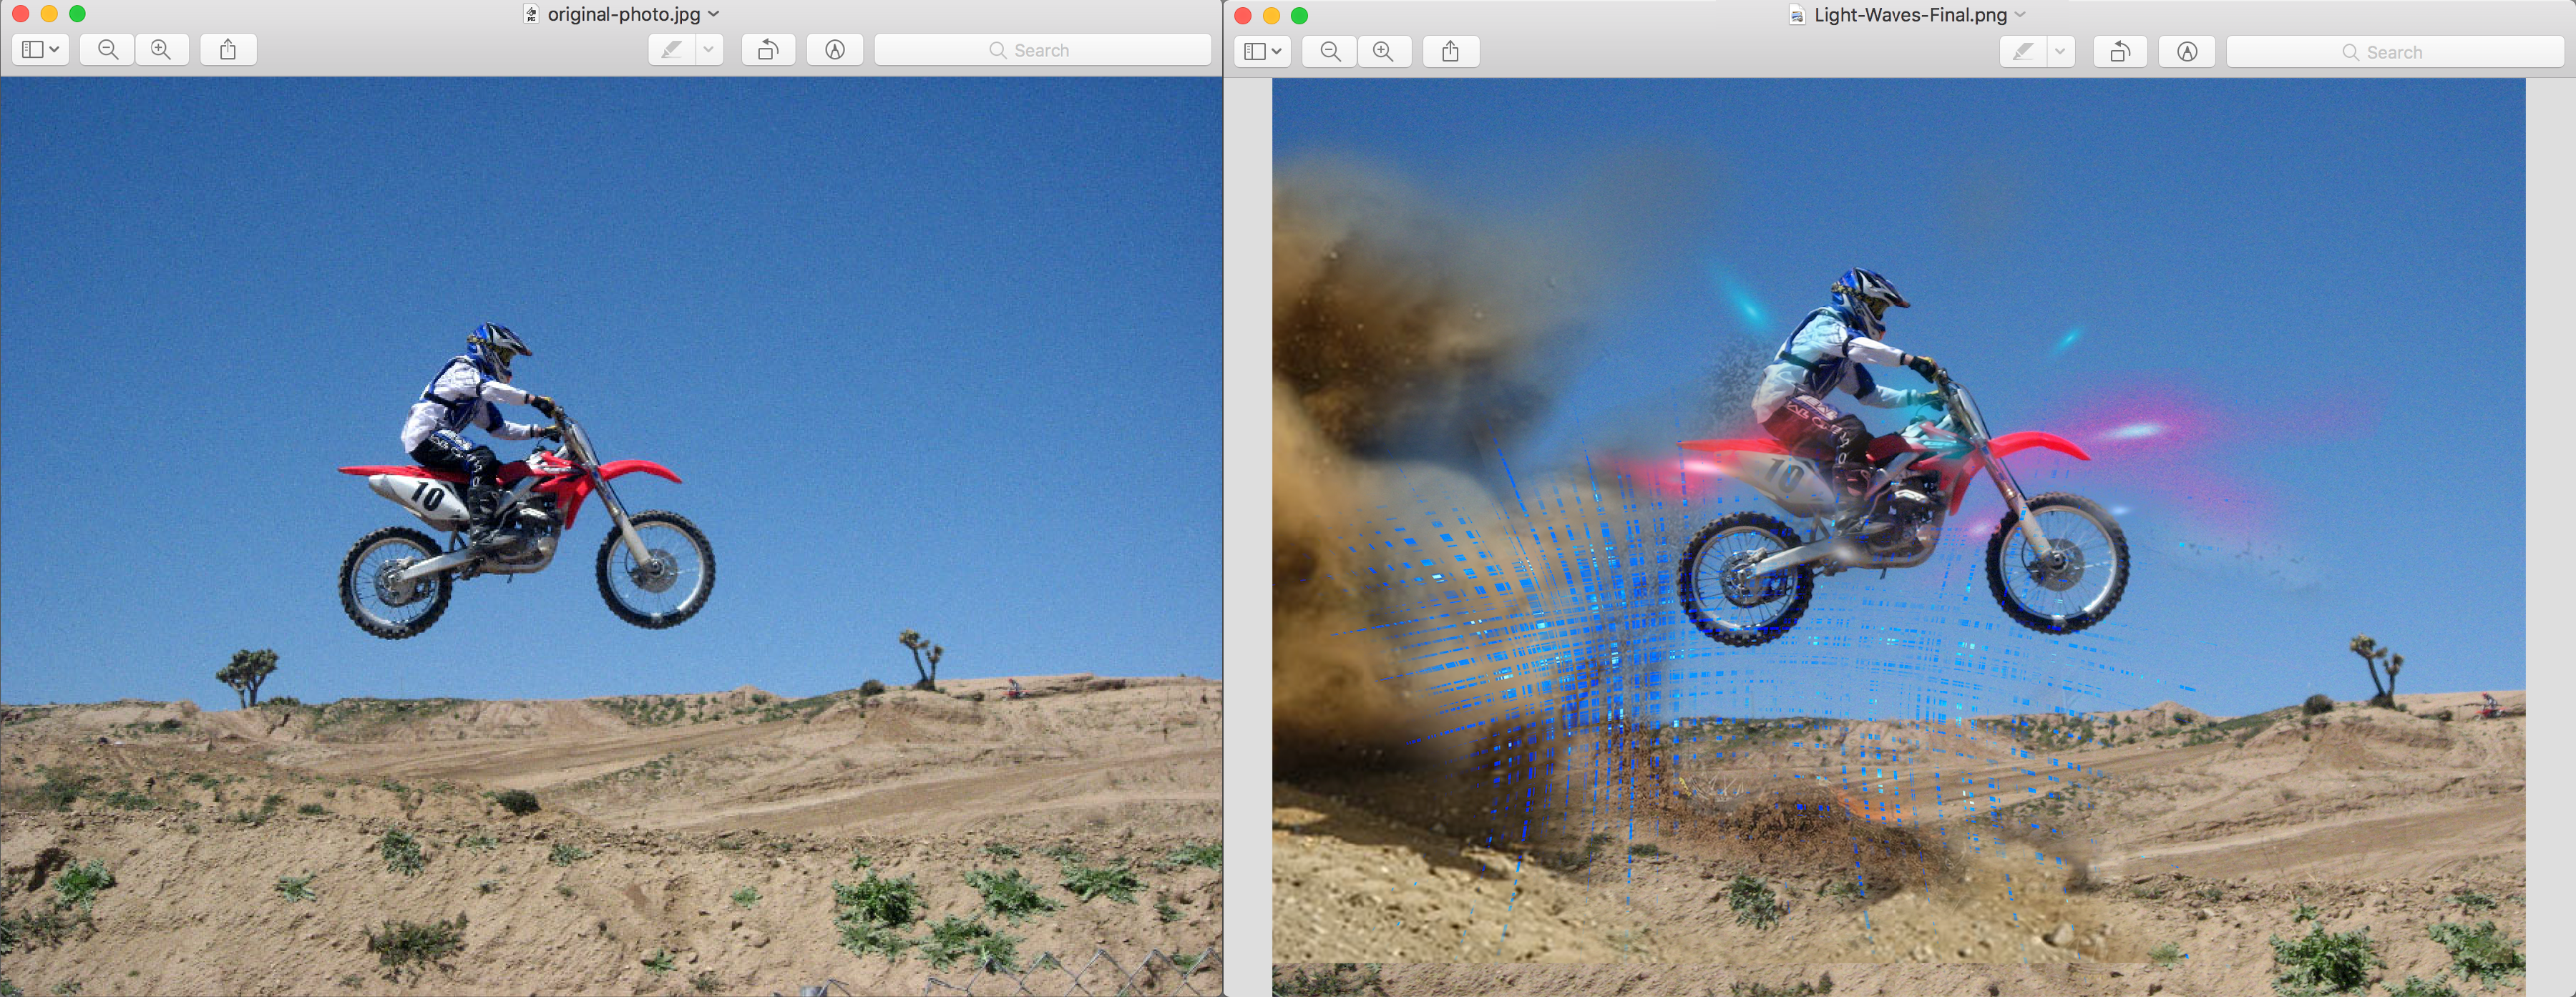
Because dirt bikes kick up a lot of dirt and mud, but got cropped out of the original photo, I decided that putting them back in would tell the story better. (Picasso did say that art is the lie that tells the truth, you know!) Using other photos I had which showed clouds of dirt, I selected the pixels I wanted, masked and transformed them, named the layers something meaningful so I would not get confused later, and played around with the Blending Mode for each layer. Surprisingly, the “Normal” Blending Mode worked out best for each dirt layer. Here is my final result side-by-side with the original photo:
I and my guys were viewing the good pointers found on your web blog and all of the sudden developed an awful suspicion I had not expressed respect to the web site owner for them. Most of the young men are already absolutely glad to read them and have in effect quite simply been enjoying them. Appreciate your actually being really kind as well as for figuring out this form of useful topics millions of individuals are really eager to know about. My sincere apologies for not expressing appreciation to earlier.