
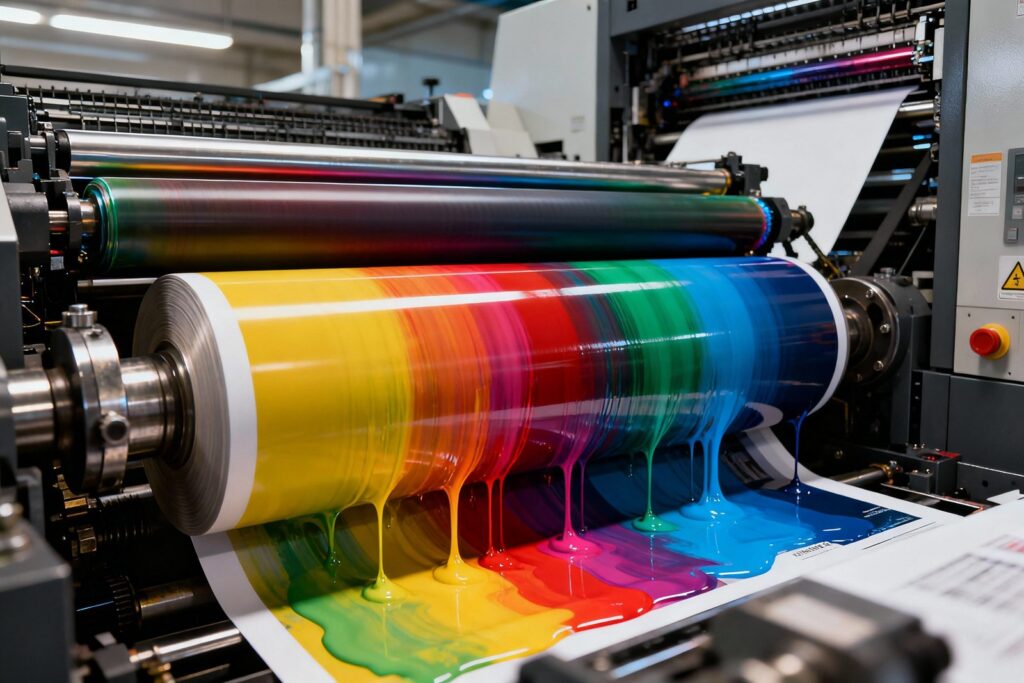
Image Credit: Offset Printing Technology
Why Your Marketing Materials Begin With the Right Printing Service
Every great marketing campaign relies on more than just a strong message—it depends on professional, high-impact materials that reflect your brand’s credibility. Brochures, flyers, and direct mailers are often the first tangible touchpoints a customer has with your business, making the choice of printing service a critical decision. Poor print quality, delayed turnaround, or inconsistent color accuracy can damage perceptions before a sale is ever made.
“A reliable printing service acts as an extension of your marketing team.“
Across Southern California and beyond, businesses are realizing that not all printing services deliver the same level of precision and reliability. With advancements in digital printing and variable data capabilities, today’s marketing materials can be highly customized and cost-effective—if you partner with a provider who understands industry standards and project workflow. This guide will walk you through key factors like print technology, paper selection, color management, and turnkey distribution options that directly influence performance.
You’ll learn how to evaluate print providers based on technical expertise, production capacity, and customer service—ensuring your materials arrive on time, on budget, and on brand. Whether you’re launching a local promotion or scaling a regional campaign, the right printing partner makes all the difference.
Master Your File Setup: Avoid Costly Printing Mistakes
Creating professional marketing materials starts long before printing—it begins with proper digital file preparation. Follow these steps to ensure your designs print flawlessly every time. Use our Guidelines for Art Files for more detailed information.
1. Set the Correct Resolution
Use a resolution of at least 300 DPI (dots per inch) for all images and graphics. Low-resolution files appear blurry when printed, especially on high-quality brochure or flyer stock. Always work from original high-res assets, not web images, which are typically 72 DPI.
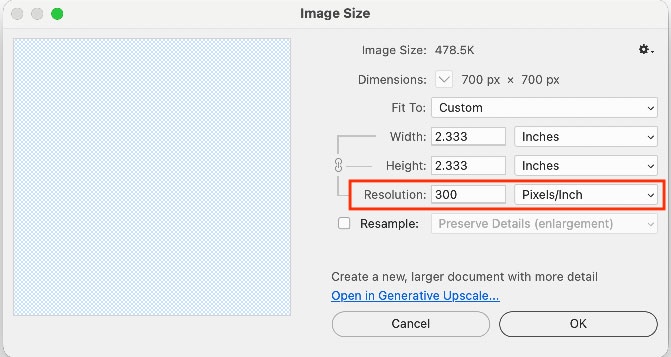
The Image Size Dialog Box in Photoshop where the resolution can be set.
2. Apply Bleed and Trim Safeguards
Extend background colors and images 0.125 inches beyond the cut line to create a bleed. This prevents unwanted white edges due to slight shifts during trimming. Keep all critical text and logos at least 0.25 inches inside the trim line to avoid accidental cropping.
3. Use the Right Color Format
Design in CMYK color mode, not RGB. Monitors display RGB colors, but commercial printers use CMYK inks. Submitting RGB files can result in unexpected color shifts—especially in vibrant hues. Additionally, provide Pantone (PMS) color codes when brand color accuracy is critical.
4. Export in Print-Ready Formats
Save final files as high-quality PDFs with embedded fonts and image bleed. Avoid JPEG or PNG formats for professional print jobs. Do NOT include crop marks and printer’s marks unless required by your print provider in San Dimas or throughout Southern California. Be sure to ask!
Double-check your setup before submission—most print delays stem from avoidable file errors.
Mastering Proofing: How to Catch Errors Before Printing
Avoid costly reprints and delays by nailing the proofing process. Whether you’re finalizing brochures, banners, or direct mailers, following a structured proofing workflow ensures accuracy and professional results. Here’s how to get it right:
1. Choose the Right Proof Type
Decide between digital proofs and physical proofs based on your project. Digital proofs are fast and eco-friendly—ideal for text and layout checks. However, for color-critical jobs like marketing collateral or packaging, always request a physical proof. This allows you to assess true color, paper stock, and finish under actual lighting conditions, especially important for businesses in Southern California where natural light influences design decisions.
2. Involve Stakeholders Early
Set up a clear approval chain with defined roles. Use shared digital workspaces to centralize feedback and avoid version confusion. Limit reviewers to key decision-makers to streamline input.
3. Check for Common Errors
Create a checklist: verify contact info, URLs, branding elements, alignment, and image resolution.
Pro tip: Zoom in on digital proofs to inspect fine details.
4. Confirm Final Approval in Writing
Require written confirmation before your print provider moves to production. This reduces misunderstandings and protects your timeline.
Pro tip: Schedule proof reviews during daylight hours to better assess color accuracy, especially when matching brand-specific Pantone values.
Mastering Color Accuracy for Professional Marketing Prints
Achieving consistent, accurate color in printed marketing materials starts with understanding the right color standards and workflows. Follow these steps to ensure your brand’s colors look perfect every time, whether you’re printing business cards in San Dimas or brochures for statewide distribution.
1. Choose the Right Color Model
Use CMYK (Cyan, Magenta, Yellow, Black) for full-color process printing like brochures or flyers. For precise brand colors—especially logos—use Pantone Matching System (PMS) colors, which offer consistency across different print runs and vendors.
2. Define Your Brand’s Color Palette Early
Document your primary and secondary colors in both CMYK and Pantone formats. This avoids guesswork and ensures long-term brand consistency, no matter where or when materials are printed.
Pro tip: Create a Brand Guide and distribute among staff and printers.
3. Request Physical Color Proofs
Always ask for a hard-copy proof before finalizing a print job. Digital previews can be misleading due to screen calibration differences.
4. Communicate Clearly with Your Printing Service
Provide color references by Pantone number or approved CMYK values. Specify if brand color accuracy is critical, especially when materials are part of a larger campaign.
5. Maintain Consistency Across Print Runs
Keep detailed records of ink formulations and settings. This ensures brochures printed six months apart in Southern California still match perfectly.
Pro Tip: Store all color specifications in your brand’s digital asset management system for easy access and team-wide alignment.
Mastering Finishing Techniques for Professional Marketing Materials
Elevate your marketing materials from basic to exceptional by selecting the right finishing options. These final touches significantly influence perceived quality and brand professionalism. Follow these steps to choose the best finishing techniques for your next print project.
1. Assess Material Purpose and Use
Determine how the piece will be used. For high-traffic items like brochures or menus, lamination—either glossy or matte—adds durability and resistance to wear. Gloss enhances color vibrancy, while matte offers a sleek, modern look ideal for corporate materials in Southern California markets.
2. Choose the Right Folding Method
Match your fold to content flow. Use a tri-fold for standard informational brochures or a gate fold for premium mailers. Always confirm fold lines align with image placement to avoid awkward creases through key visuals.
3. Incorporate Die-Cutting for Brand Differentiation
Custom die-cutting introduces unique shapes that make your materials stand out. Consider rounded corners for handouts or custom silhouettes for event invitations. Discuss feasibility with your print provider to ensure clean cuts and minimal waste.
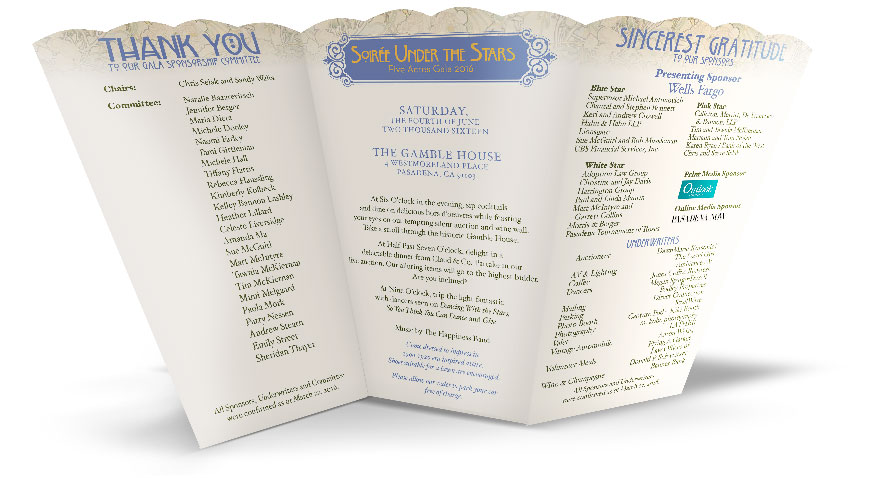
Example of custom die-cutting to create a fan-shaped invitation.
4. Select Binding Based on Page Count and Function
For multi-page documents like catalogs or reports, use saddle stitching for lighter booklets (8–48 pages) or perfect binding for thicker, magazine-style finishes. Coil or spiral binding works well for notebooks that need to lay flat.
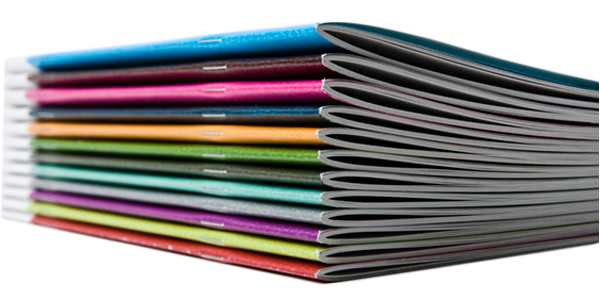
Example of saddle-stitched bindings.
Pro Tip: Always request physical proofs when applying specialty finishes—textures and dimensional effects are hard to visualize digitally.
What to Ask Before Choosing a Printing Service
Selecting the right printing service for your marketing materials can significantly impact your campaign’s success. Knowing the right questions to ask ensures you avoid costly delays and quality issues. Below are common concerns businesses face when vetting a printing service.
How do I know if a printer can handle my project scope?
Evaluate their capabilities in digital, offset, and large-format printing. Ask about substrate options—cardstock, glossy finishes, recyclable materials—and whether they support specialty processes like embossing or UV coating. Confirm they’ve managed similar projects, especially if you’re producing brochures, banners, or direct mailers.
What are typical turnaround times for marketing print jobs?
Standard production runs take 3–5 business days, but rush services may deliver in 24–48 hours. Always factor in design approval, file formatting, and shipping—especially when ordering from a printer in San Dimas or other parts of California where transit times vary.
Are online printers as reliable as local ones?
Local providers offer faster revisions, in-person color proofs, and regional expertise. However, ensure any provider, local or national, offers transparent timelines and responsive account management.
What file formats do printers require?
Submit print-ready files in high-resolution PDF (CMYK, 300 dpi, with bleed). Avoid RGB or low-res images to prevent reprints.
What hidden costs should I watch for?
Beware of setup fees, plate charges, or shipping markups. Request an all-inclusive quote before committing.
How can I ensure color consistency across print runs?
Use Pantone matching and request physical proofs. Digital project management tools can track color specs across reorders.
What happens if my order has an error?
Clarify the printer’s re-print policy upfront. Reliable partners accept responsibility for production mistakes, not design-related issues.
Learn about our experience, capabilities and our approach to project management by reviewing what happens to your order here.
Make the Right Choice for Your Marketing Print Needs
Choosing the right printing service for your marketing materials doesn’t have to be overwhelming. By now, you’ve walked through the essential checklist: evaluating print quality, turnaround times, material options, customer support, and overall reliability. These factors directly impact how your brand is perceived—whether it’s a brochure, business cards, or a full promotional campaign. Never underestimate the power of crisp, professional printing in reinforcing credibility and engaging your target audience effectively.
Start by reviewing samples to assess color accuracy and finishing techniques like lamination or embossing. Confirm the provider offers scalable solutions that align with both small runs and large campaigns, especially if your needs evolve. Local printers in the San Dimas and Southern California area often provide faster delivery and personalized service, giving your business a logistical edge.
Take the next step: request quotes from three vetted providers, compare their capabilities, and verify they support digital project management for smoother collaboration. A reliable print partner acts as an extension of your marketing team. When your materials reflect excellence, your brand stands out. Invest the time now—your audience will notice the difference.