
Here’s a fun and easy project: animate the Christmas lights on your Christmas still photo for your social media posts!
First, I went to DesktopNexus.com to find a free Christmas scene.
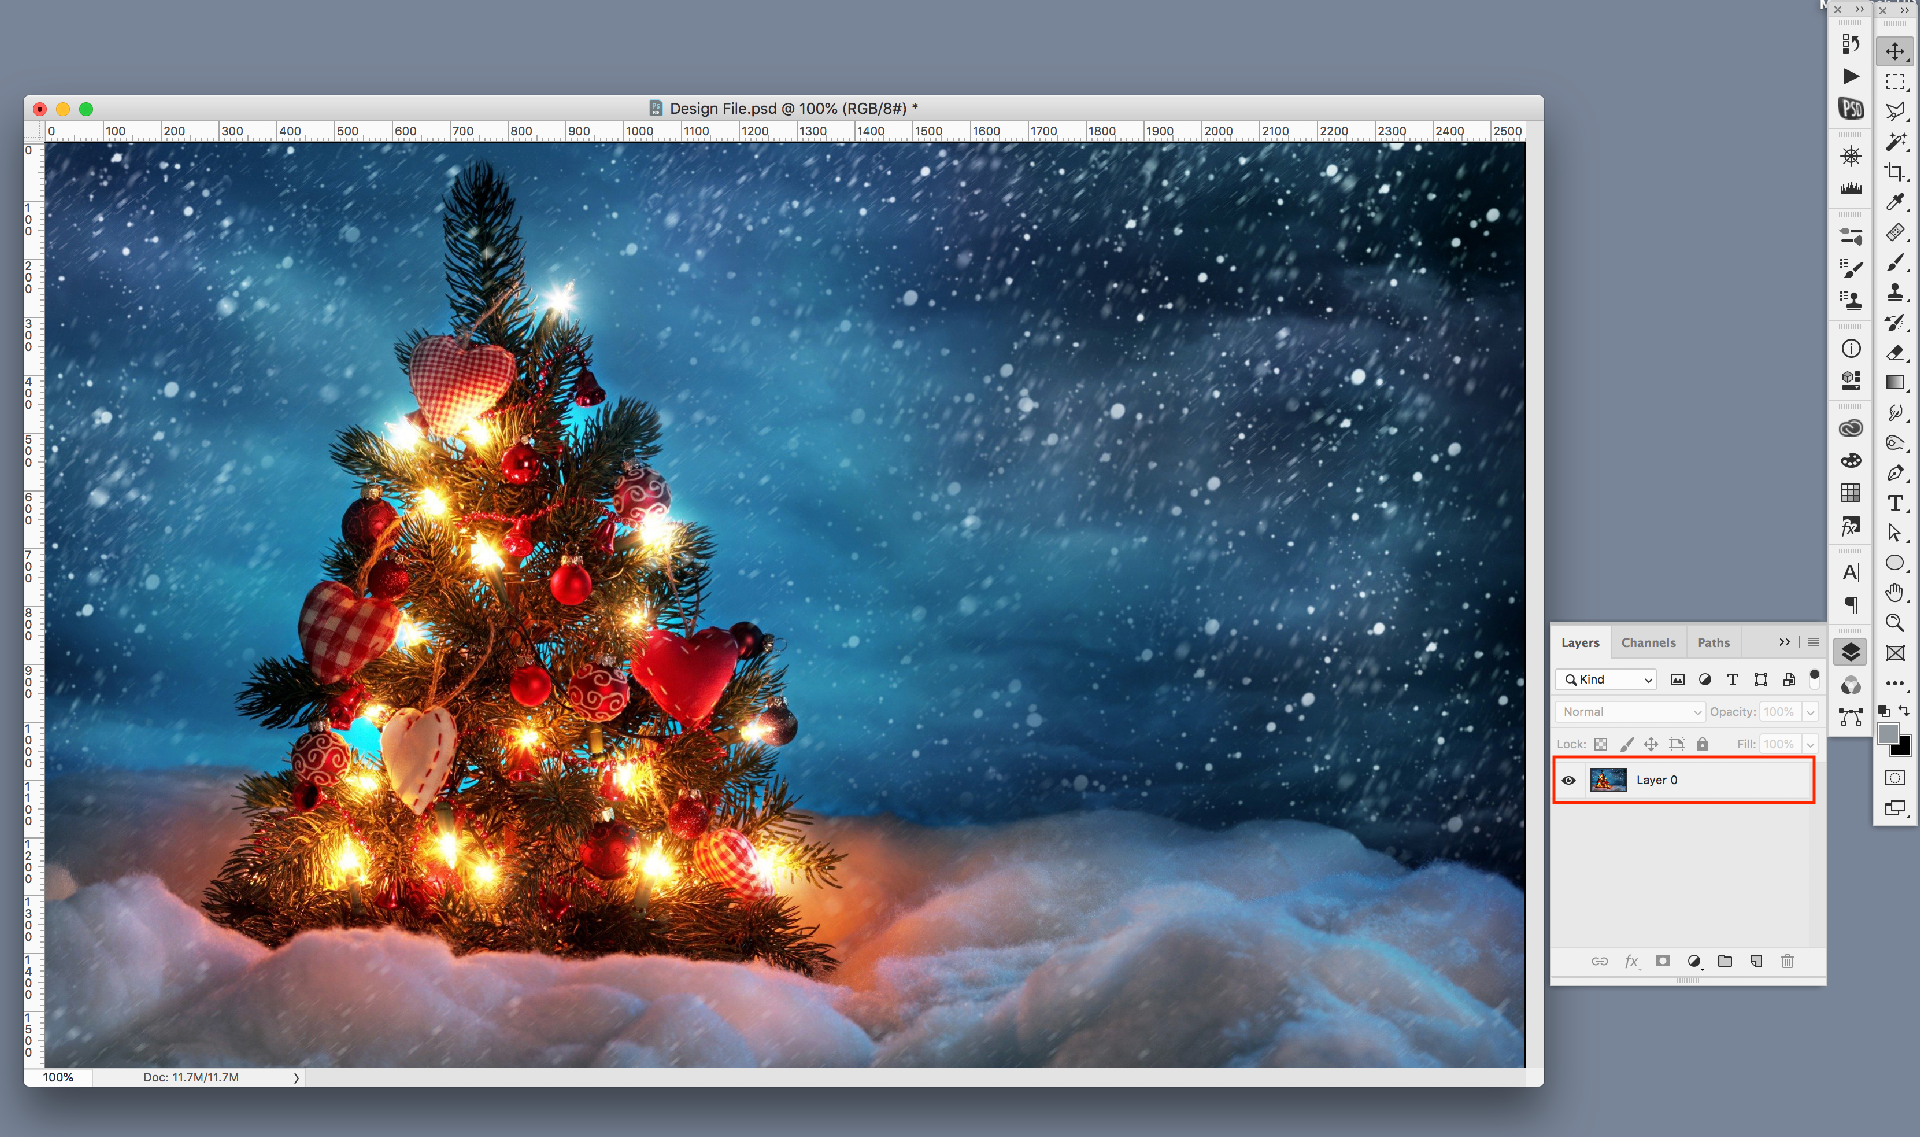
I downloaded my selected image and saved a copy as a PSD file because I planned to add a lot of layers. I gave the PSD file the name “Design File.psd” but you can name it “Working File.psd” or whatever makes sense to you.
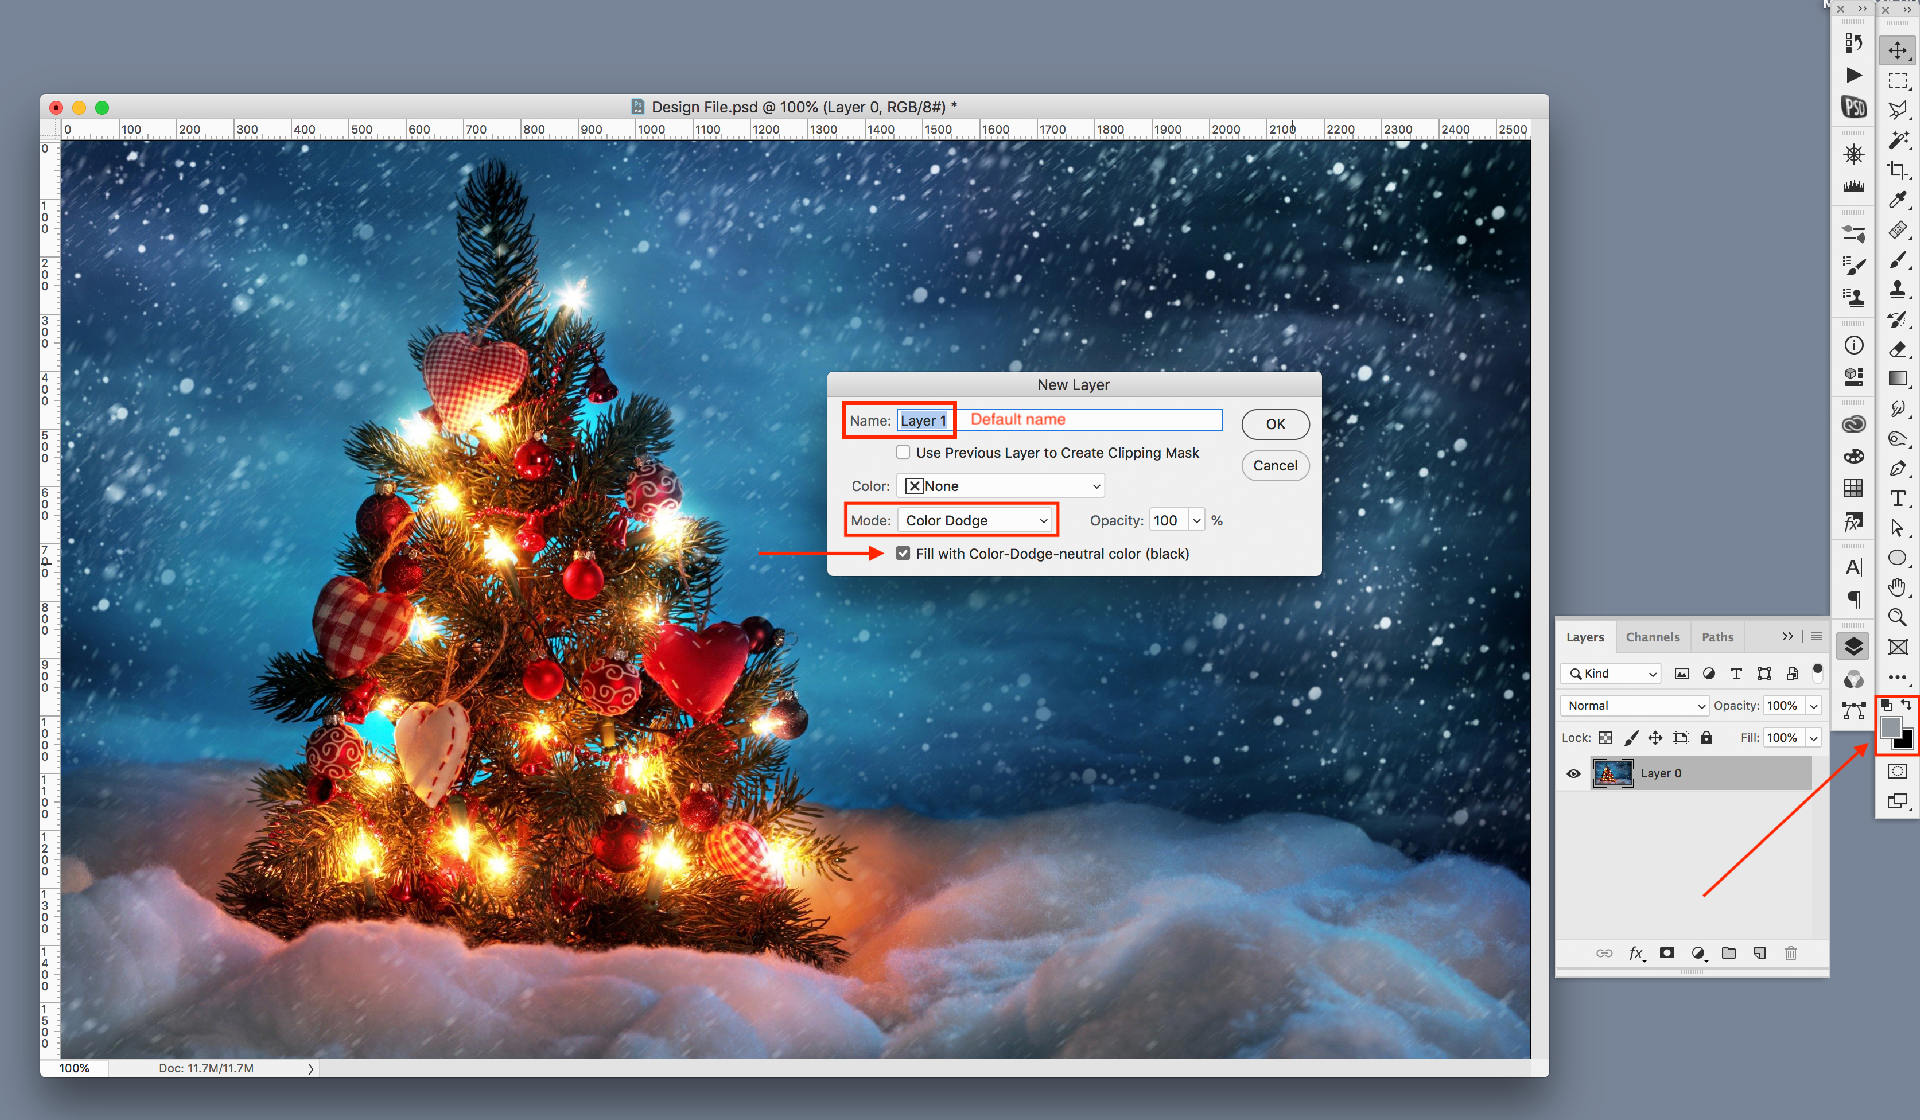
I made the Layers Panel show by typing F7. I converted the Background to a Layer by double-clicking on it in the Layers Panel to make it a separate layer, and accepted the default name. I created a new layer (type ⇧⌘N) and accepted the default name.
Normally, I urge everyone to rename their layers to something meaningful so that they can easily find the layer they want. Later on, nobody remembers what is on “Layer 1.” But with an animation, it won’t make any difference because all the layers will be nearly identical, anyway.
While still in the Layers Panel, I changed the Blending Mode to Color Dodge and added a check mark to “Fill with Color-Dodge neutral color (black)”. Then I clicked OK.
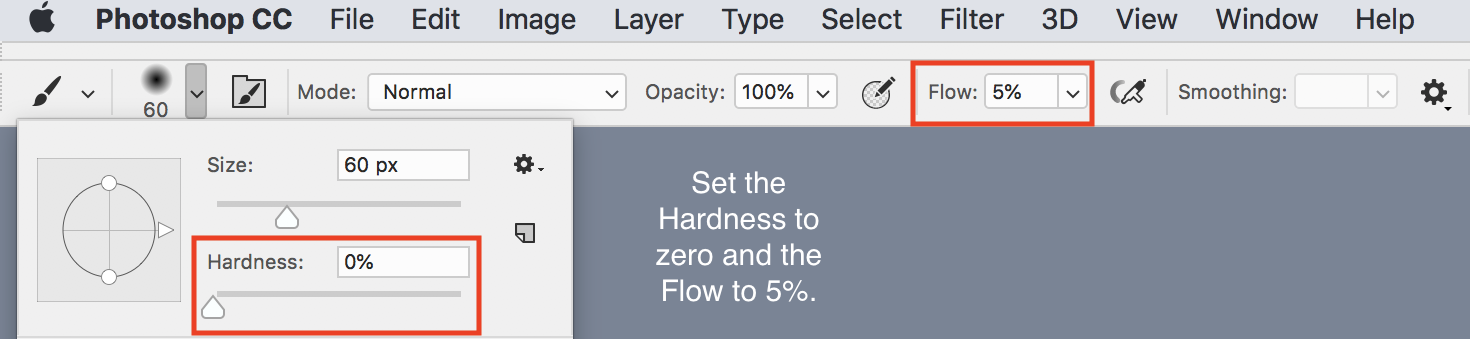
I saw that I had a custom color as the foreground color and that was not useful. So, I typed a “D” to reset to the default colors, then typed an “X” to switch the white color to the foreground color so that I could paint with white.
I chose a soft-edged Brush Tool (type a B), and set its Hardness to zero and its Flow to 5% in the Options Bar at the top left of the Photoshop window. If the Options Bar is not available, just select Options from the Windows Menu.
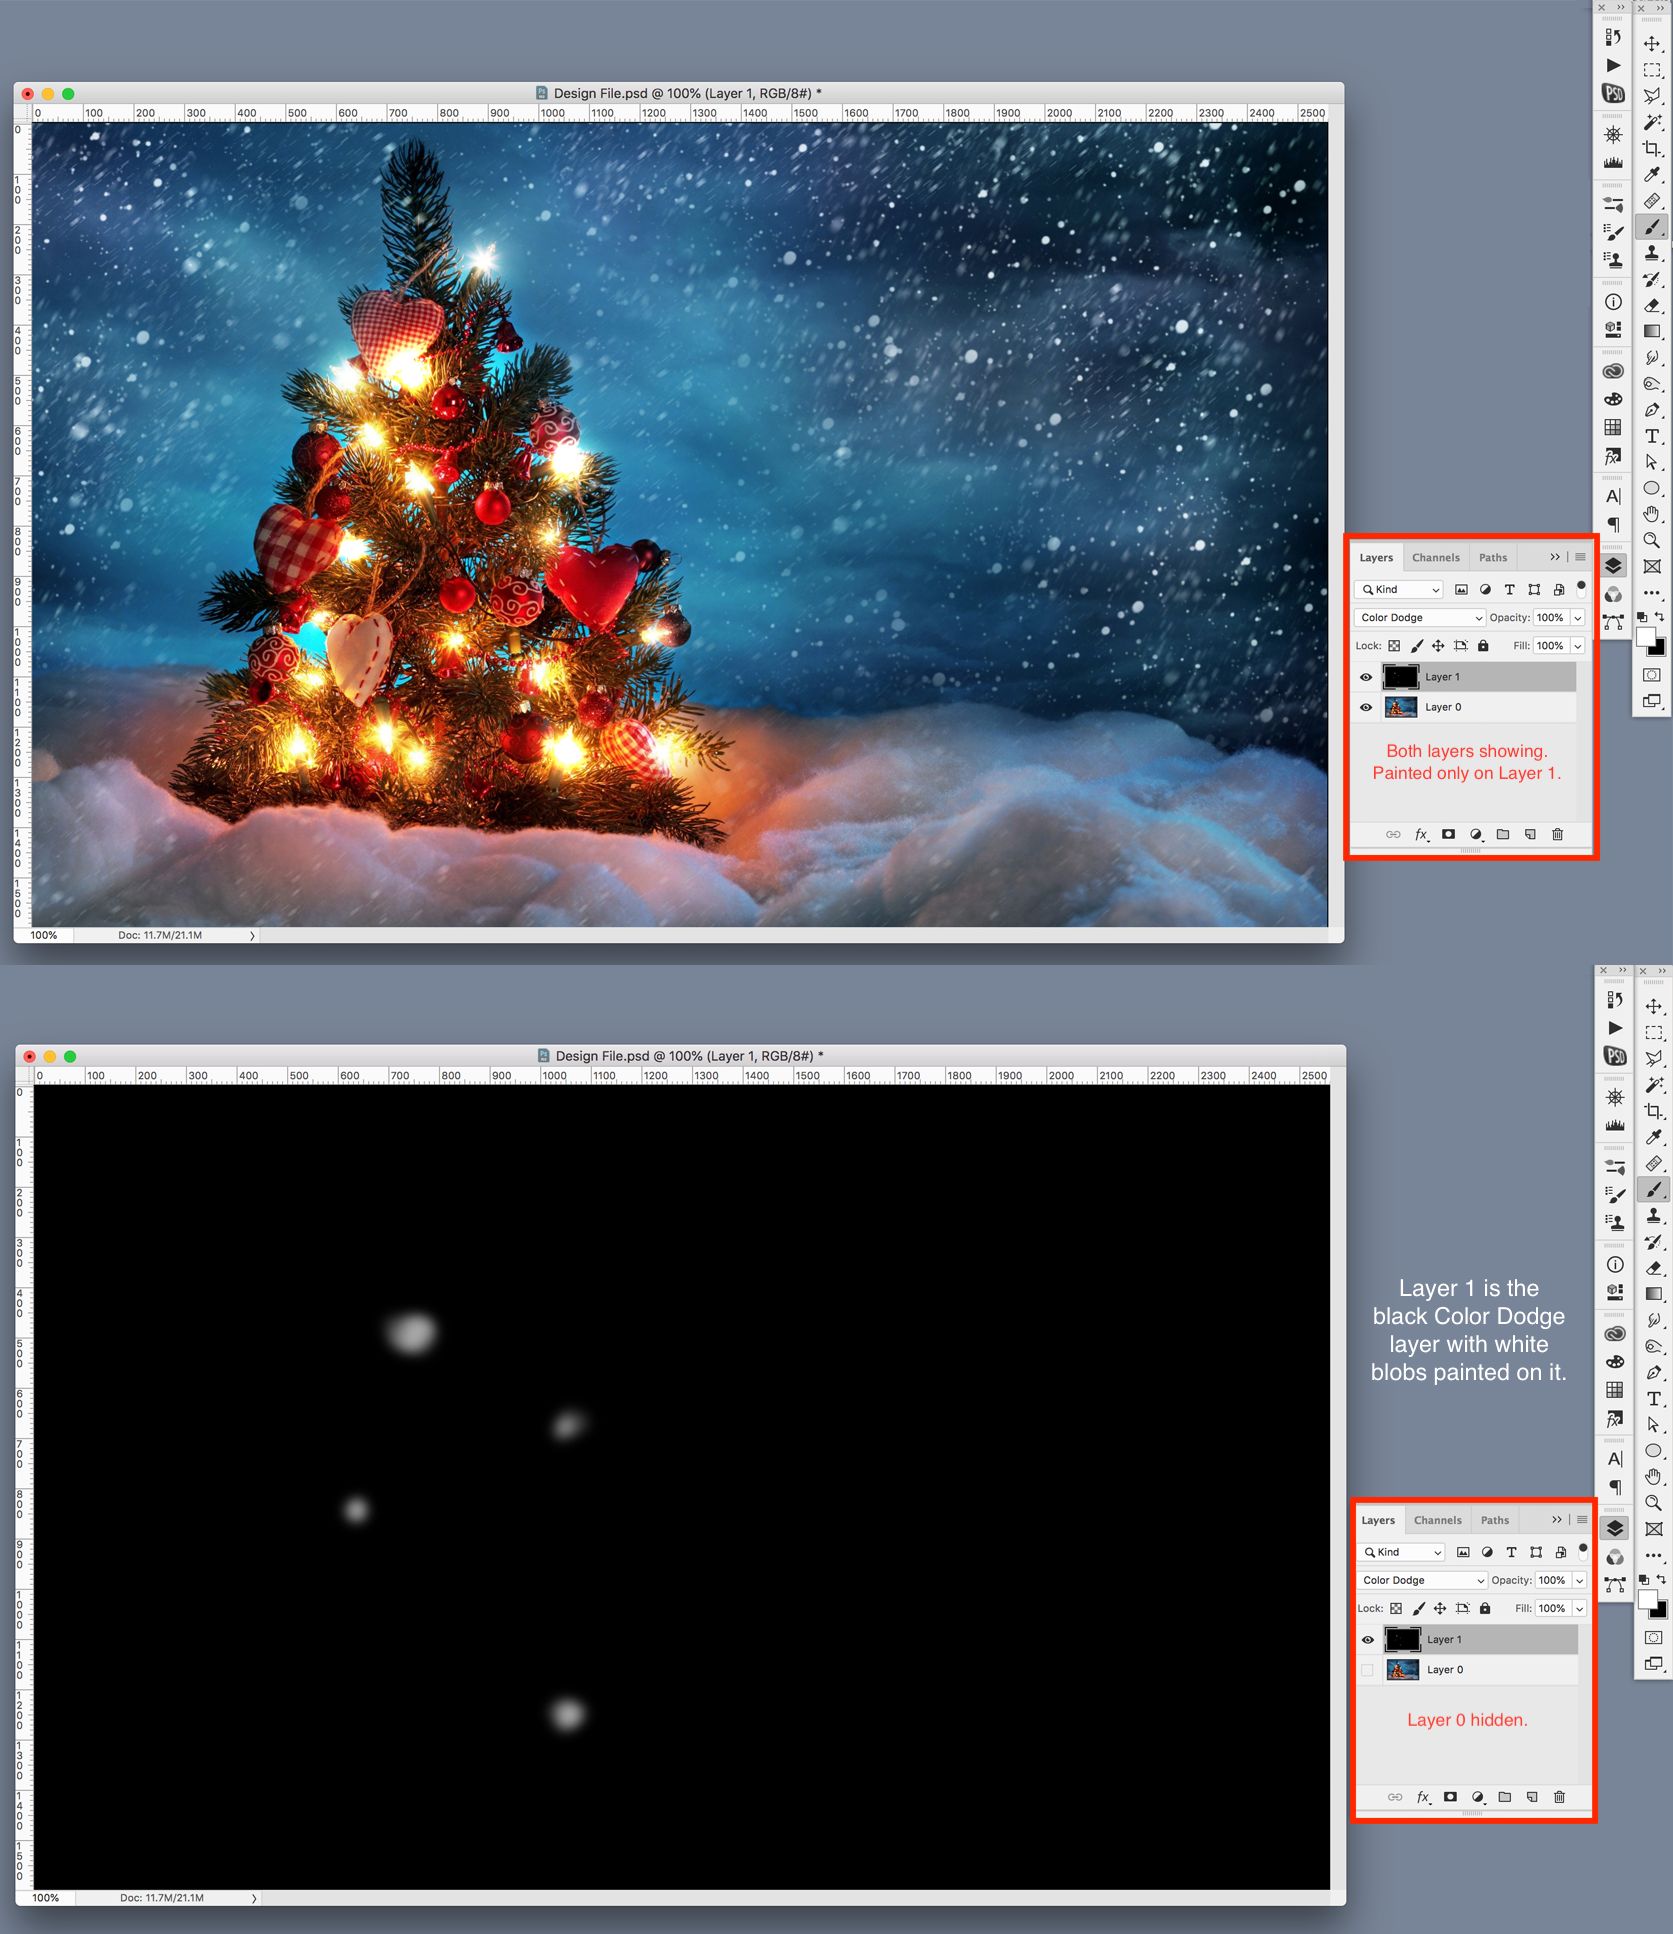
I selected Layer 1 and lightly painted some white blobs over a few random Christmas lights. I hid Layer 0 to check my work.
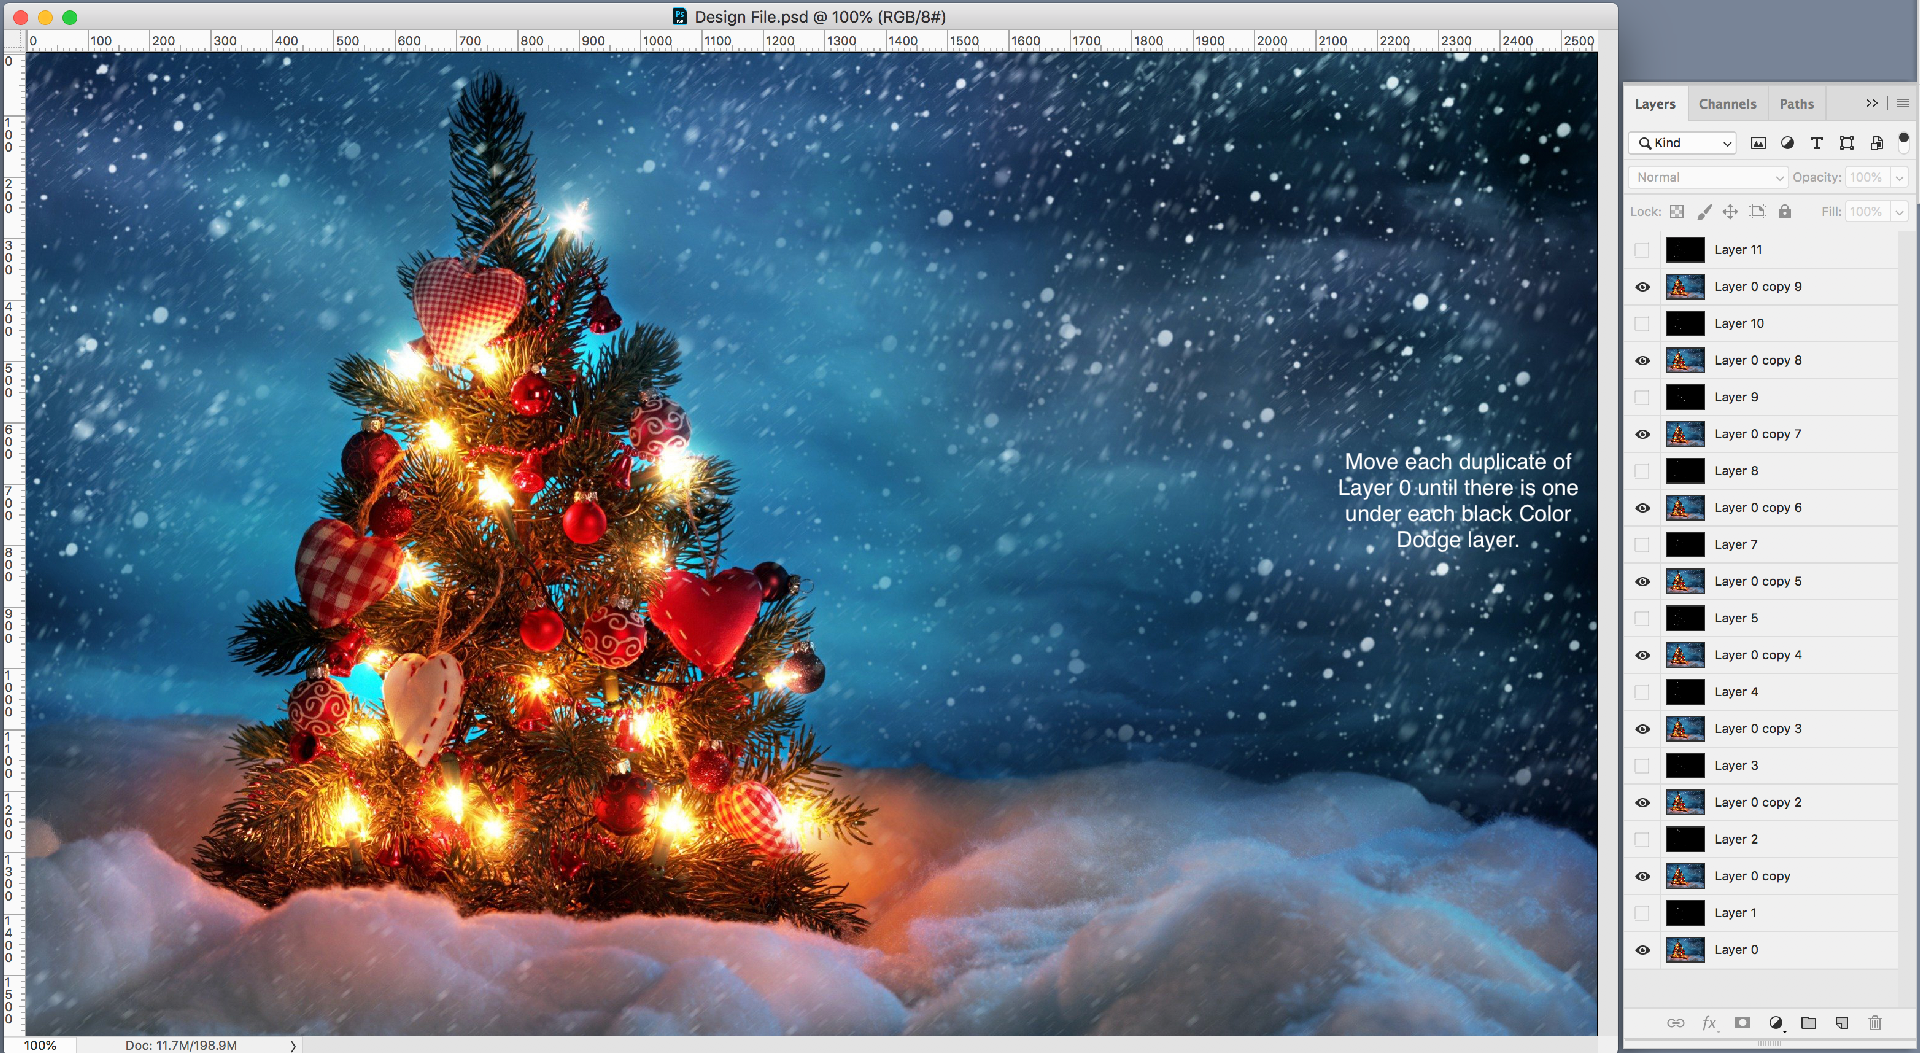
I continued making new black Color Dodge layers and painting white blobs over different sets of random Christmas lights until I felt I had enough. Finally, I duplicated Layer 0 until I had one copy of Layer 0 underneath each black Color Dodge layer with white blobs. Then I saved the document.
At this point, I resaved my document under a new name in order to always have the editable layers to go back to, if needed. I could not duplicate them and work on the second set because the Photoshop Animation feature will add all the layers to the animation, even the ones I don’t want. So, I did a “Save As” and gave the new file the name of “Animated Christmas Lights.”
Making sure that only Layer 0 and Layer 1 were visible, I merged those two layers by typing ⌘E.
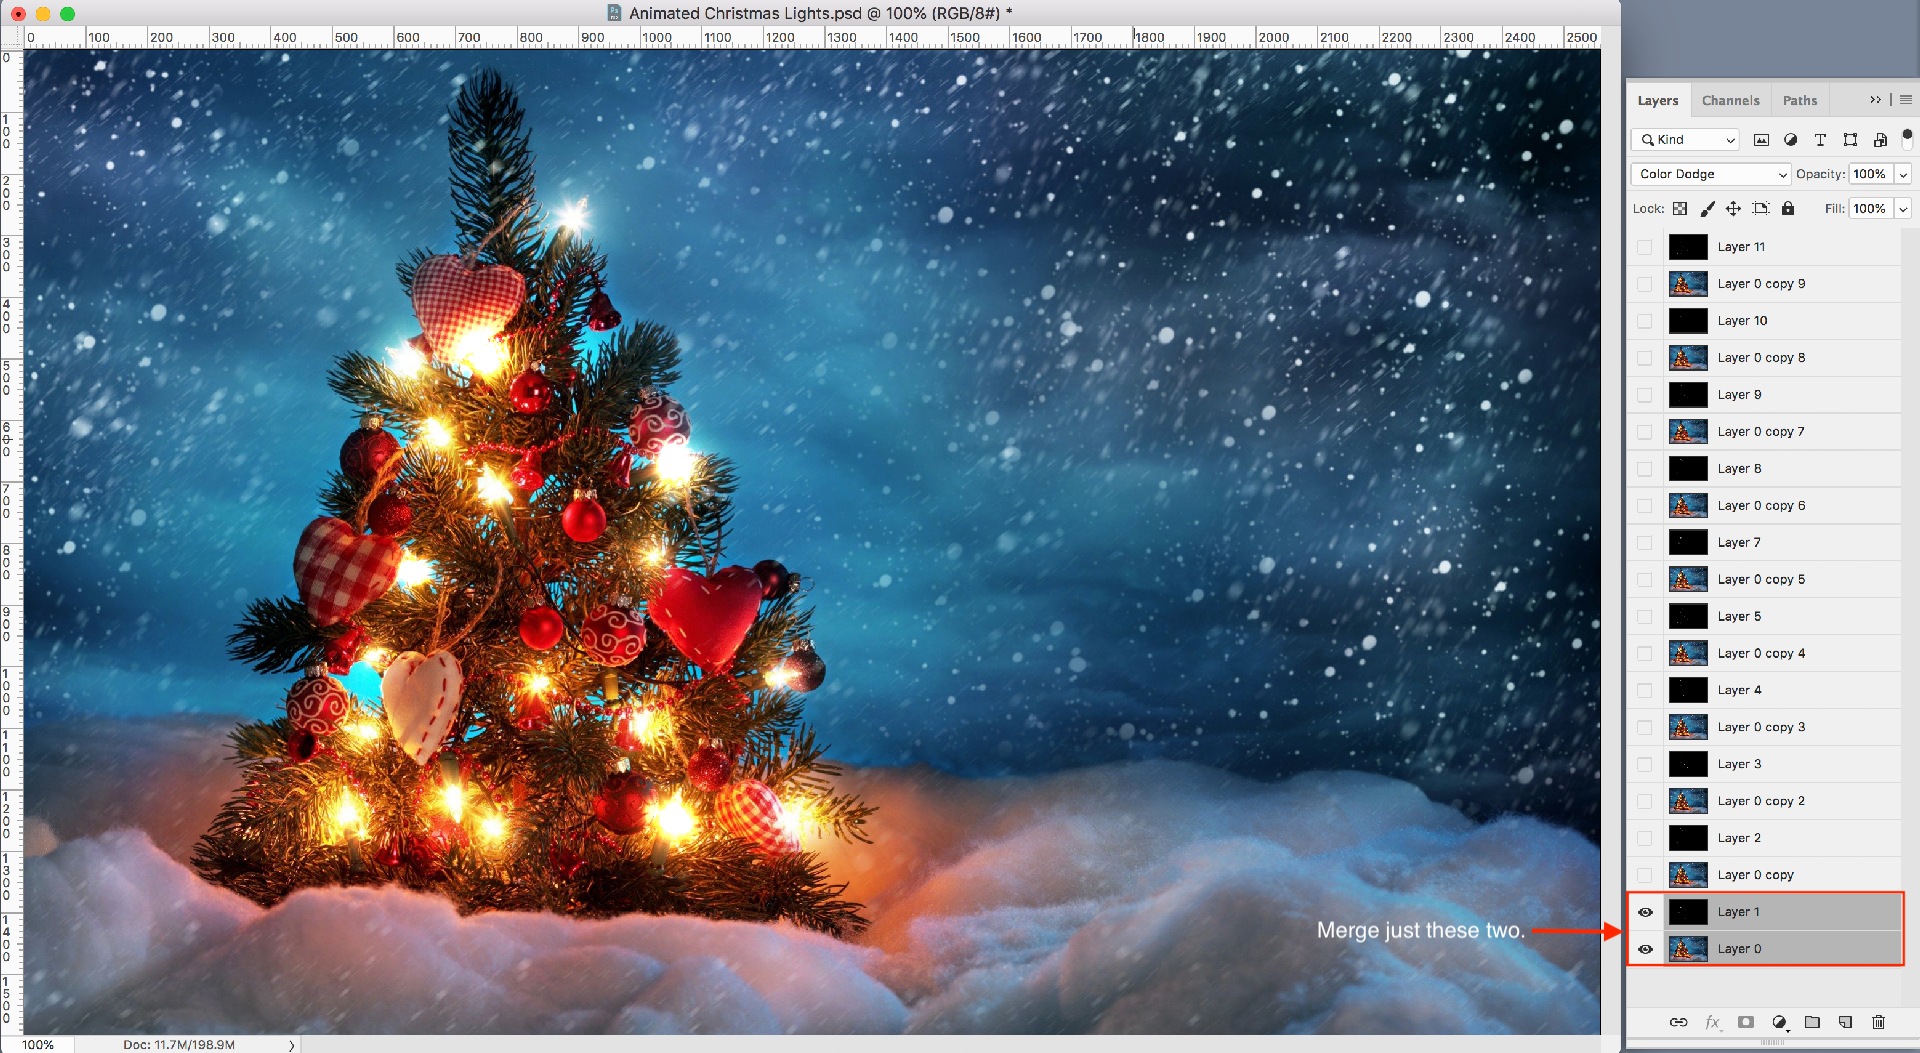
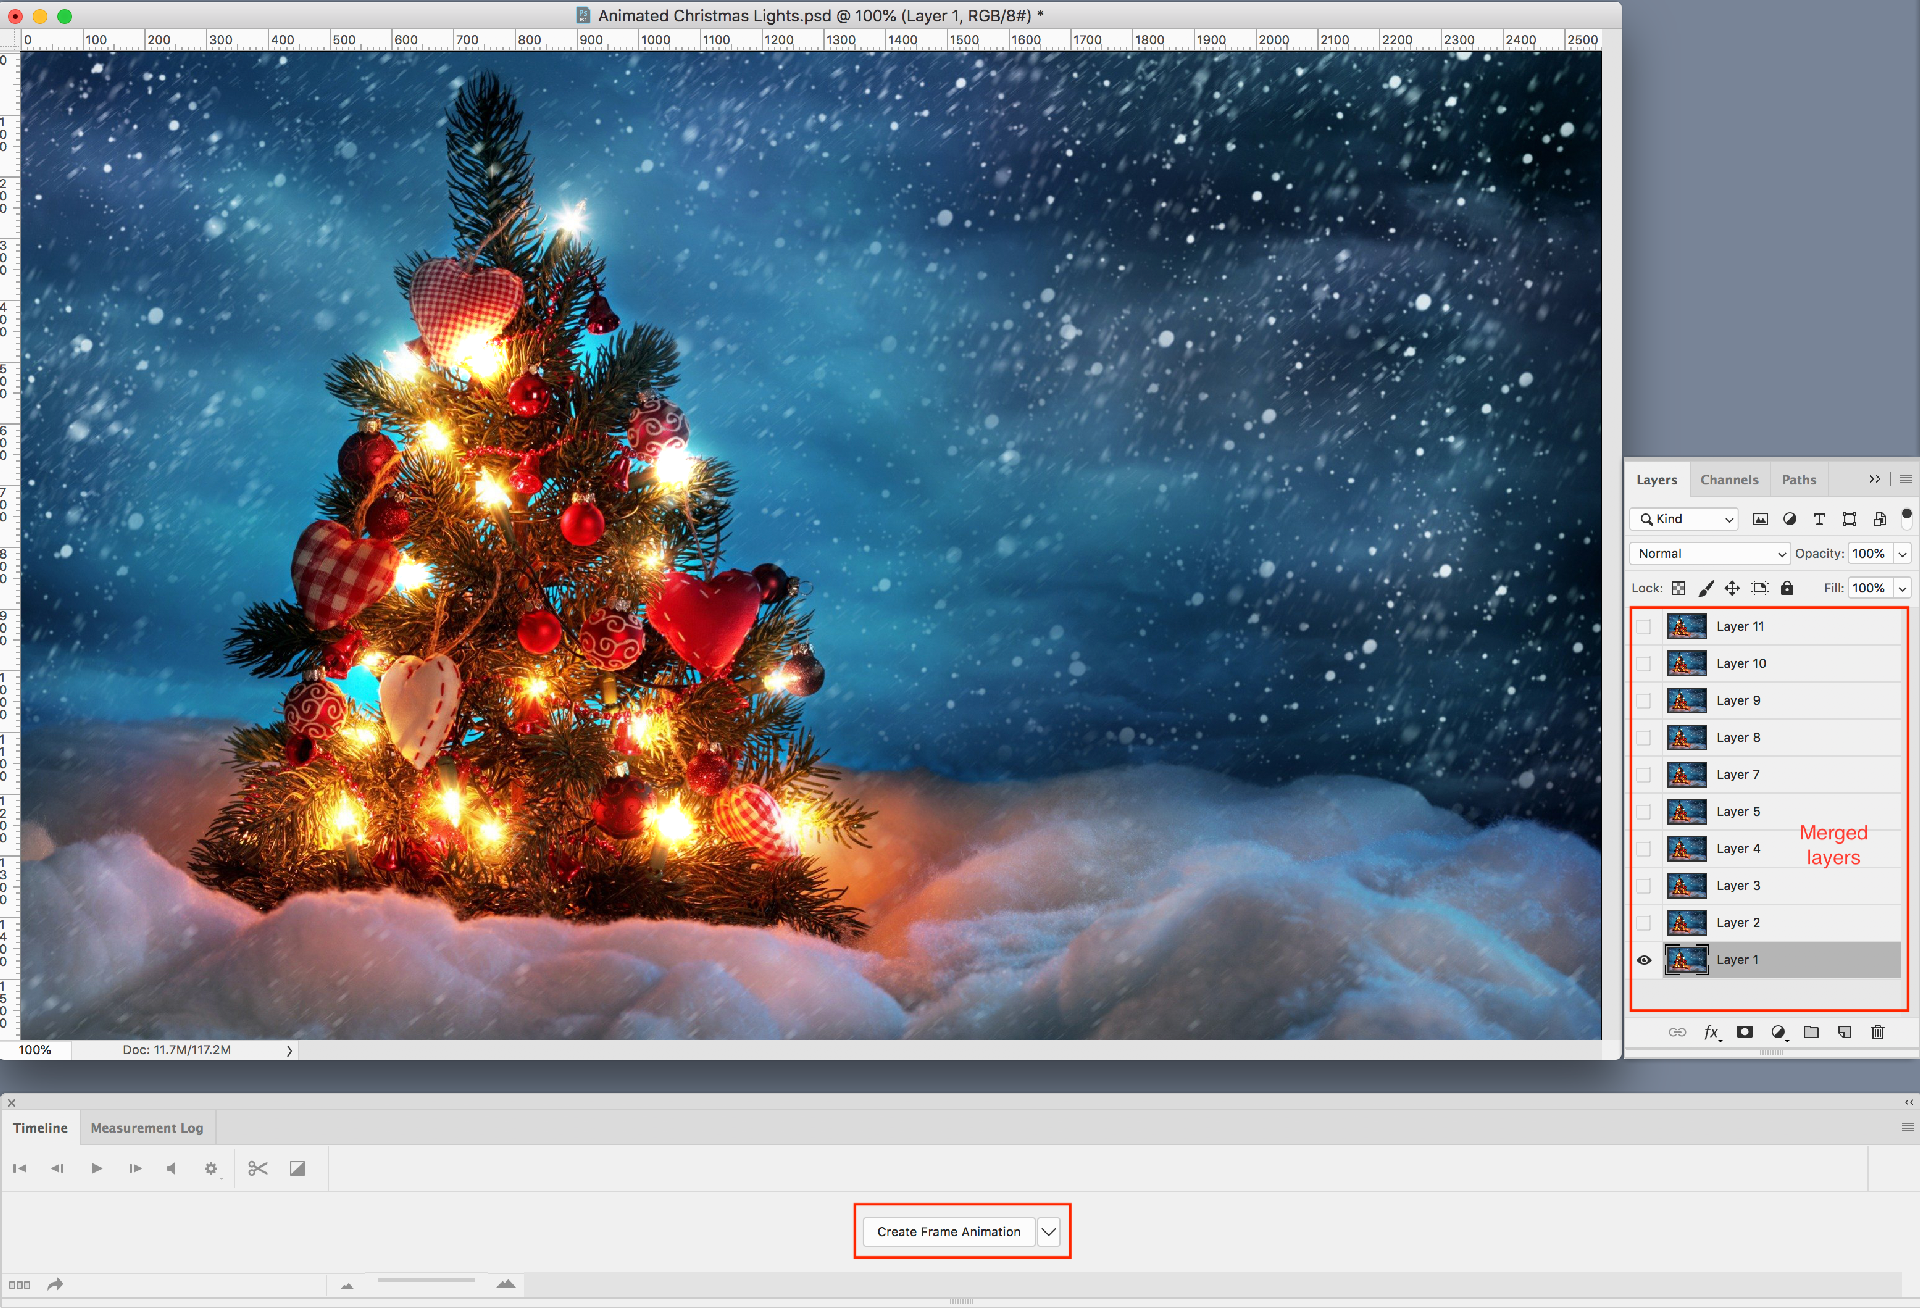
Then I went through all the layers and merged each duplicate of Layer 0 with the black Color Dodge layer immediately above it.
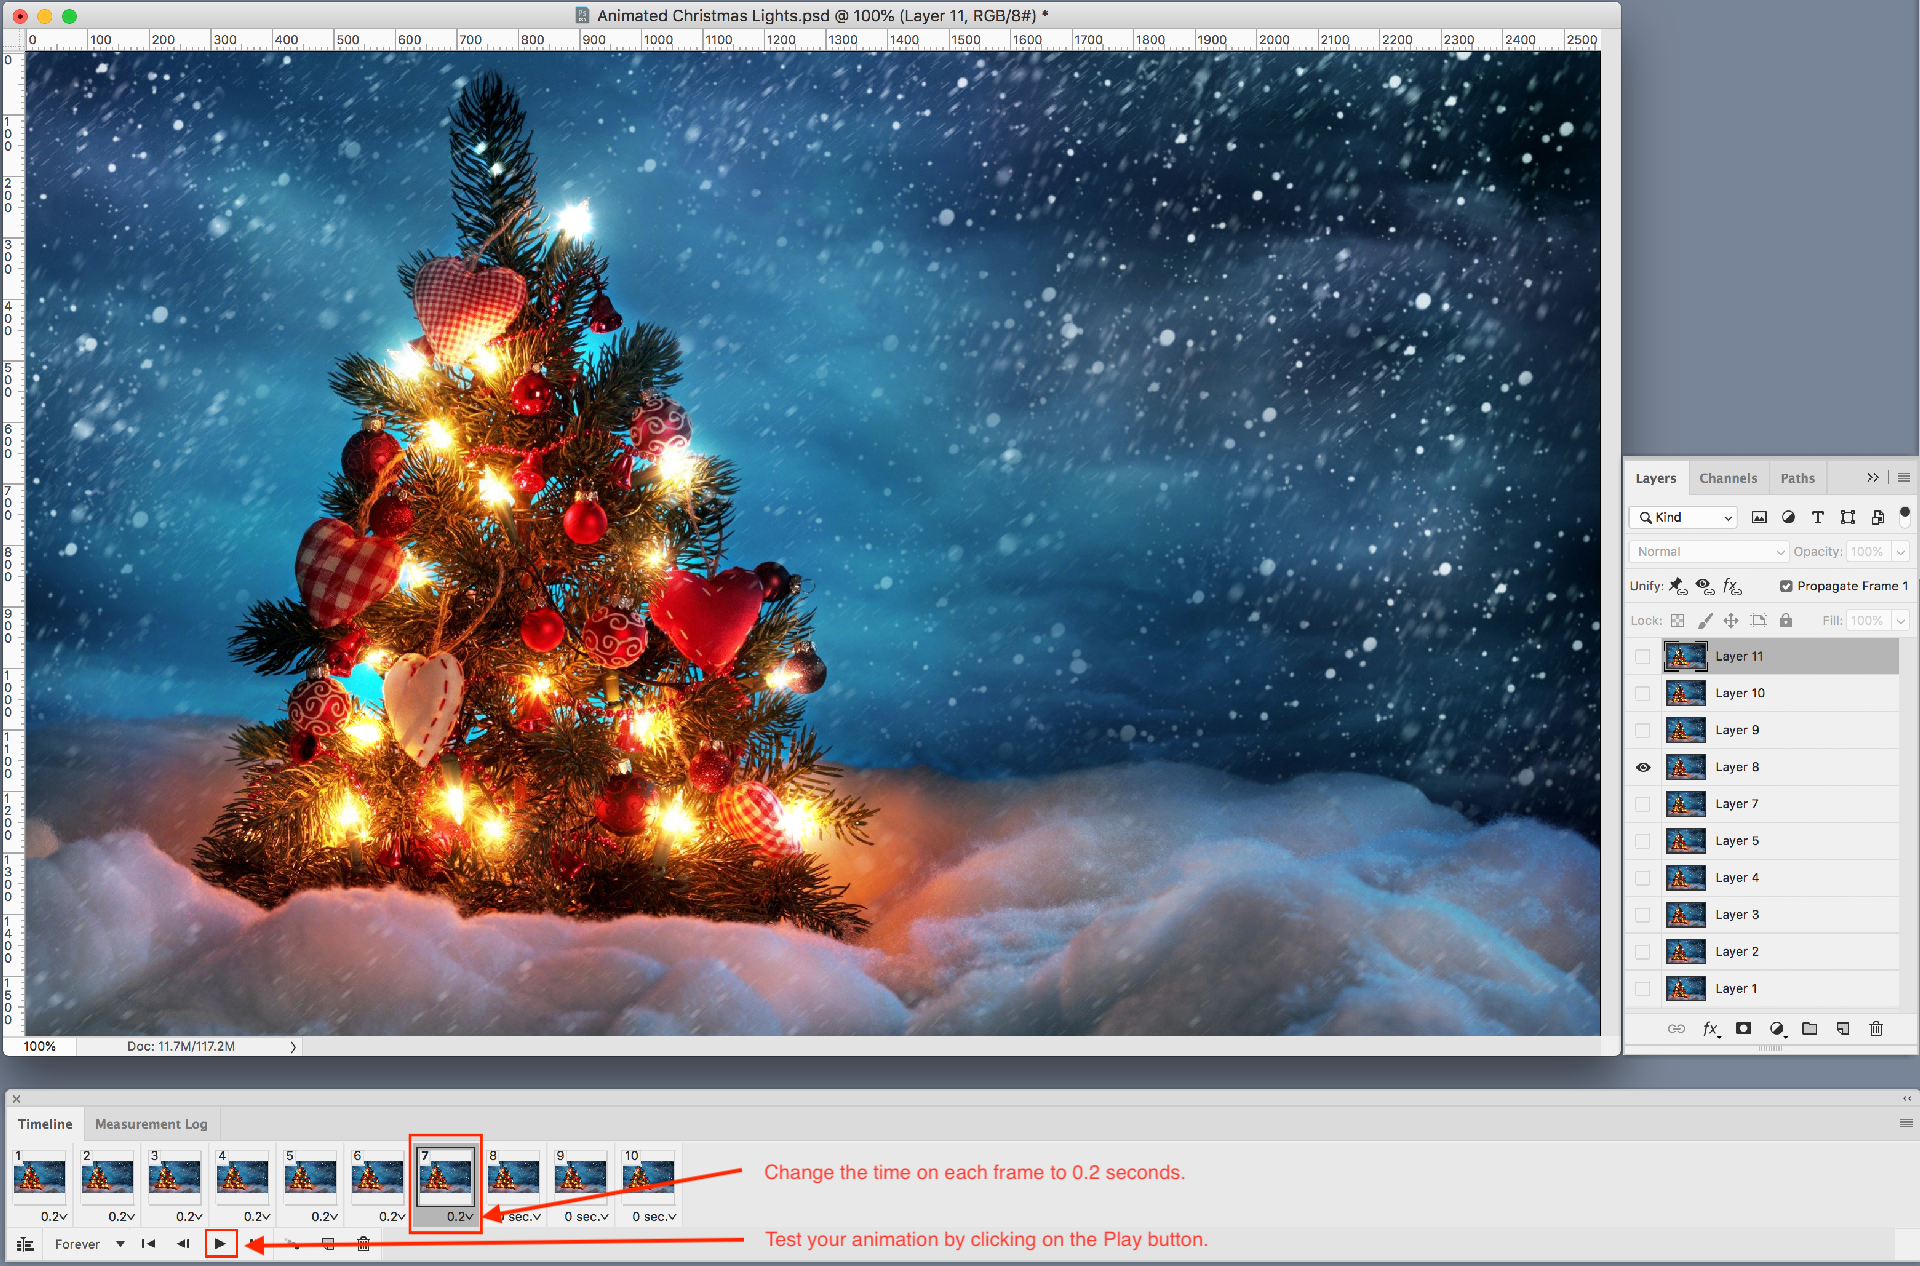
Now the fun part began! I went to the Window Menu and scrolled down to Timeline to open the Timeline Panel. I went to the drop-down menu in the middle of the Timeline Panel and choose “Create Frame Animation.” I clicked once on the words “Create Frame Animation” to add the first frame to the Timeline.
Then I selected “Make Frames From Layers” from the drop down menu on the top right of the Timeline Panel to add all the layers as frames to the Timeline. Change the play time for each Frame from the default 0 to something reasonable, like 0.2.
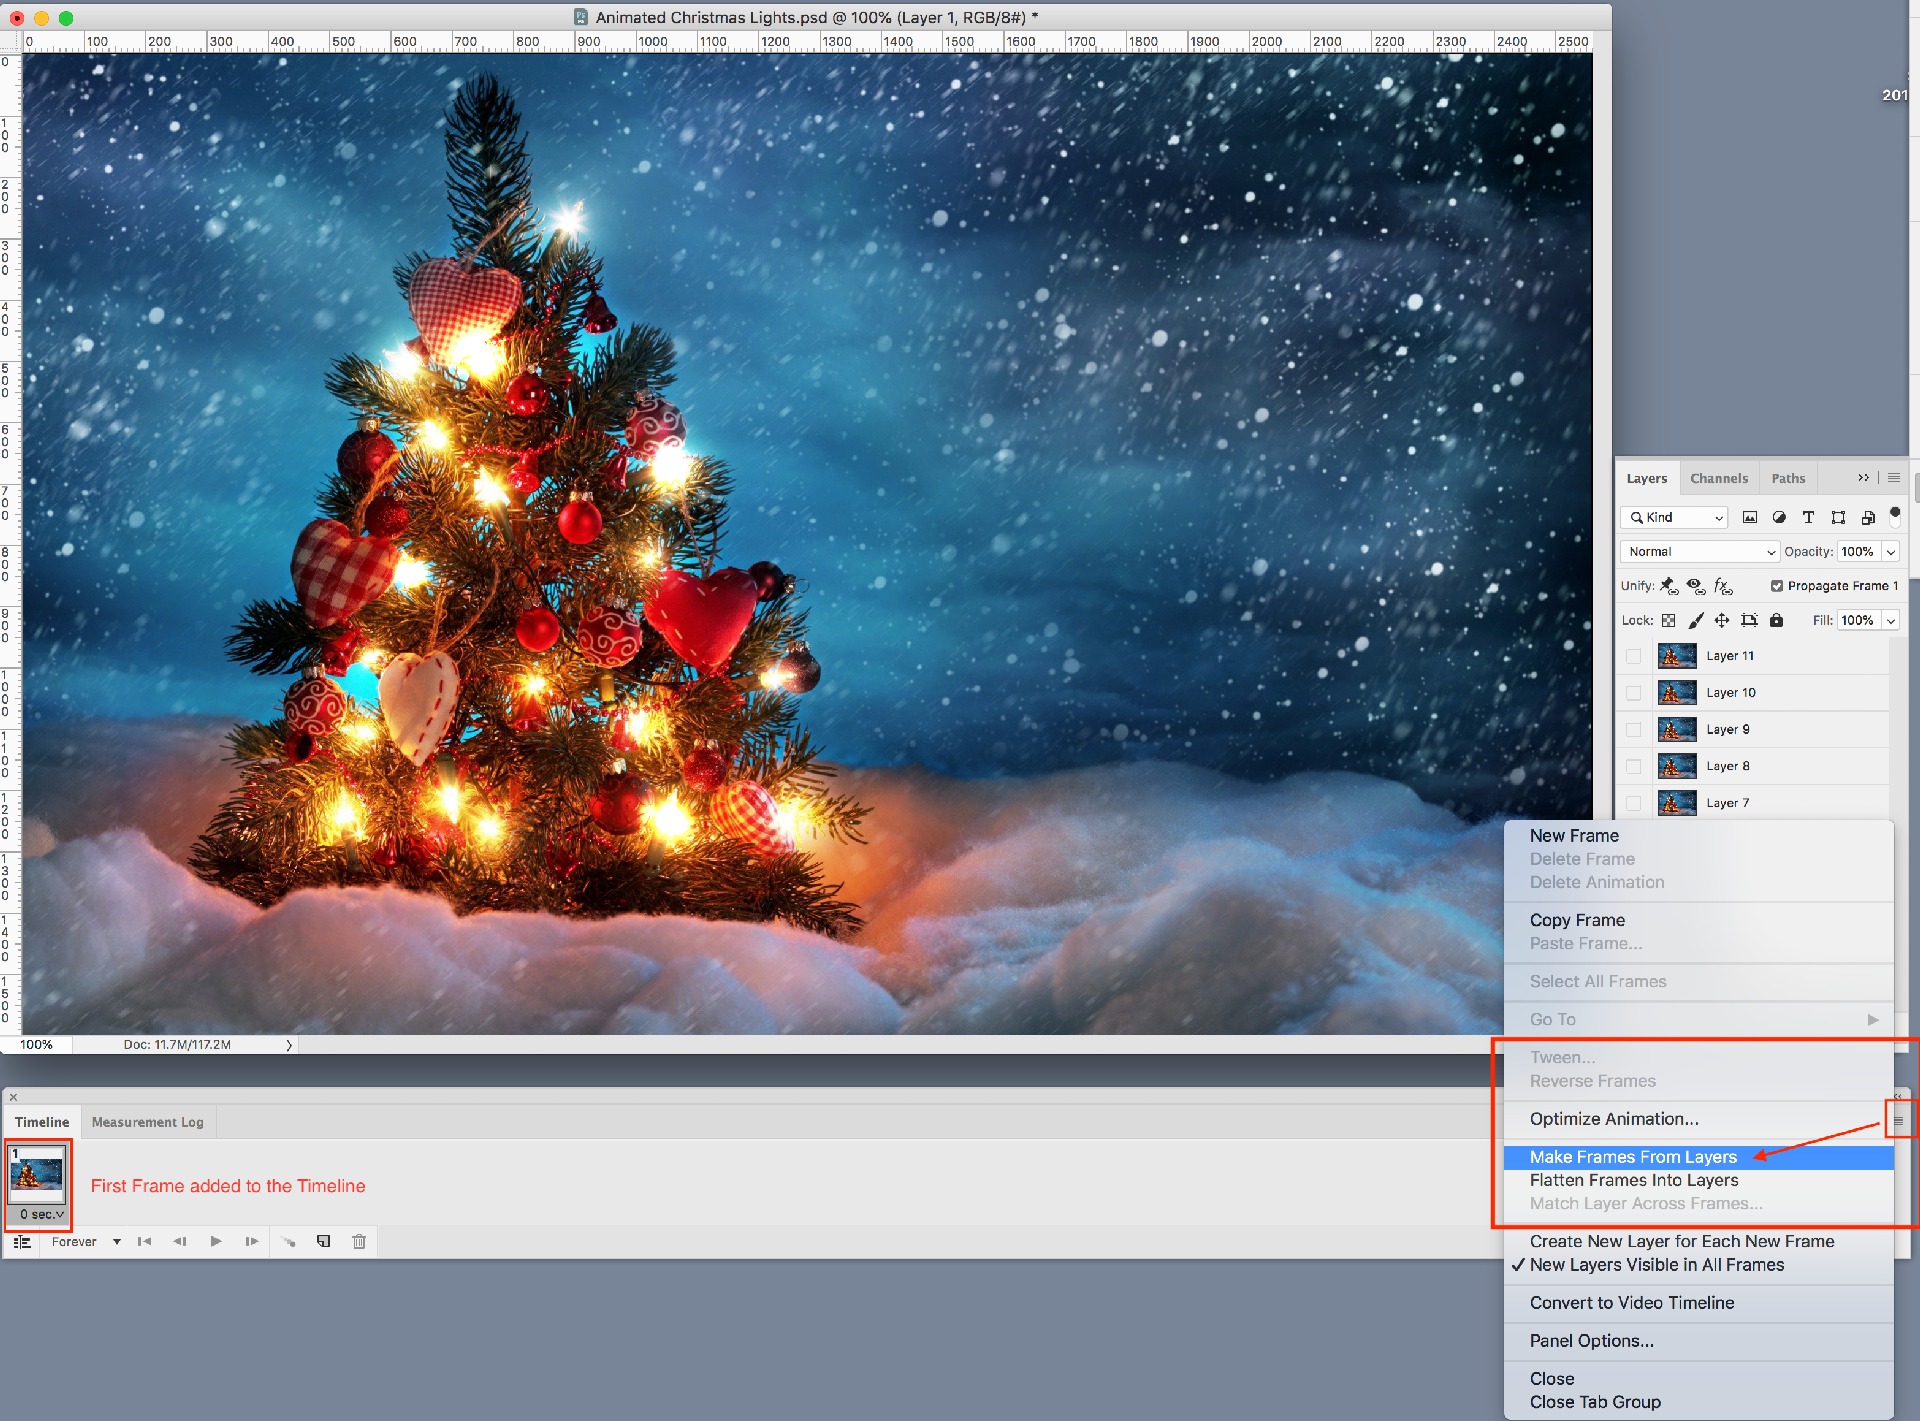
Notice that I have 11 layers but only 10 Frames. That is because I skipped “6” when naming my layers. I could go back to my Design File.psd and change it if I really wanted to. Instead, I hit the Play button on the bottom left of the Timeline Panel to test my animation and see how it worked out.
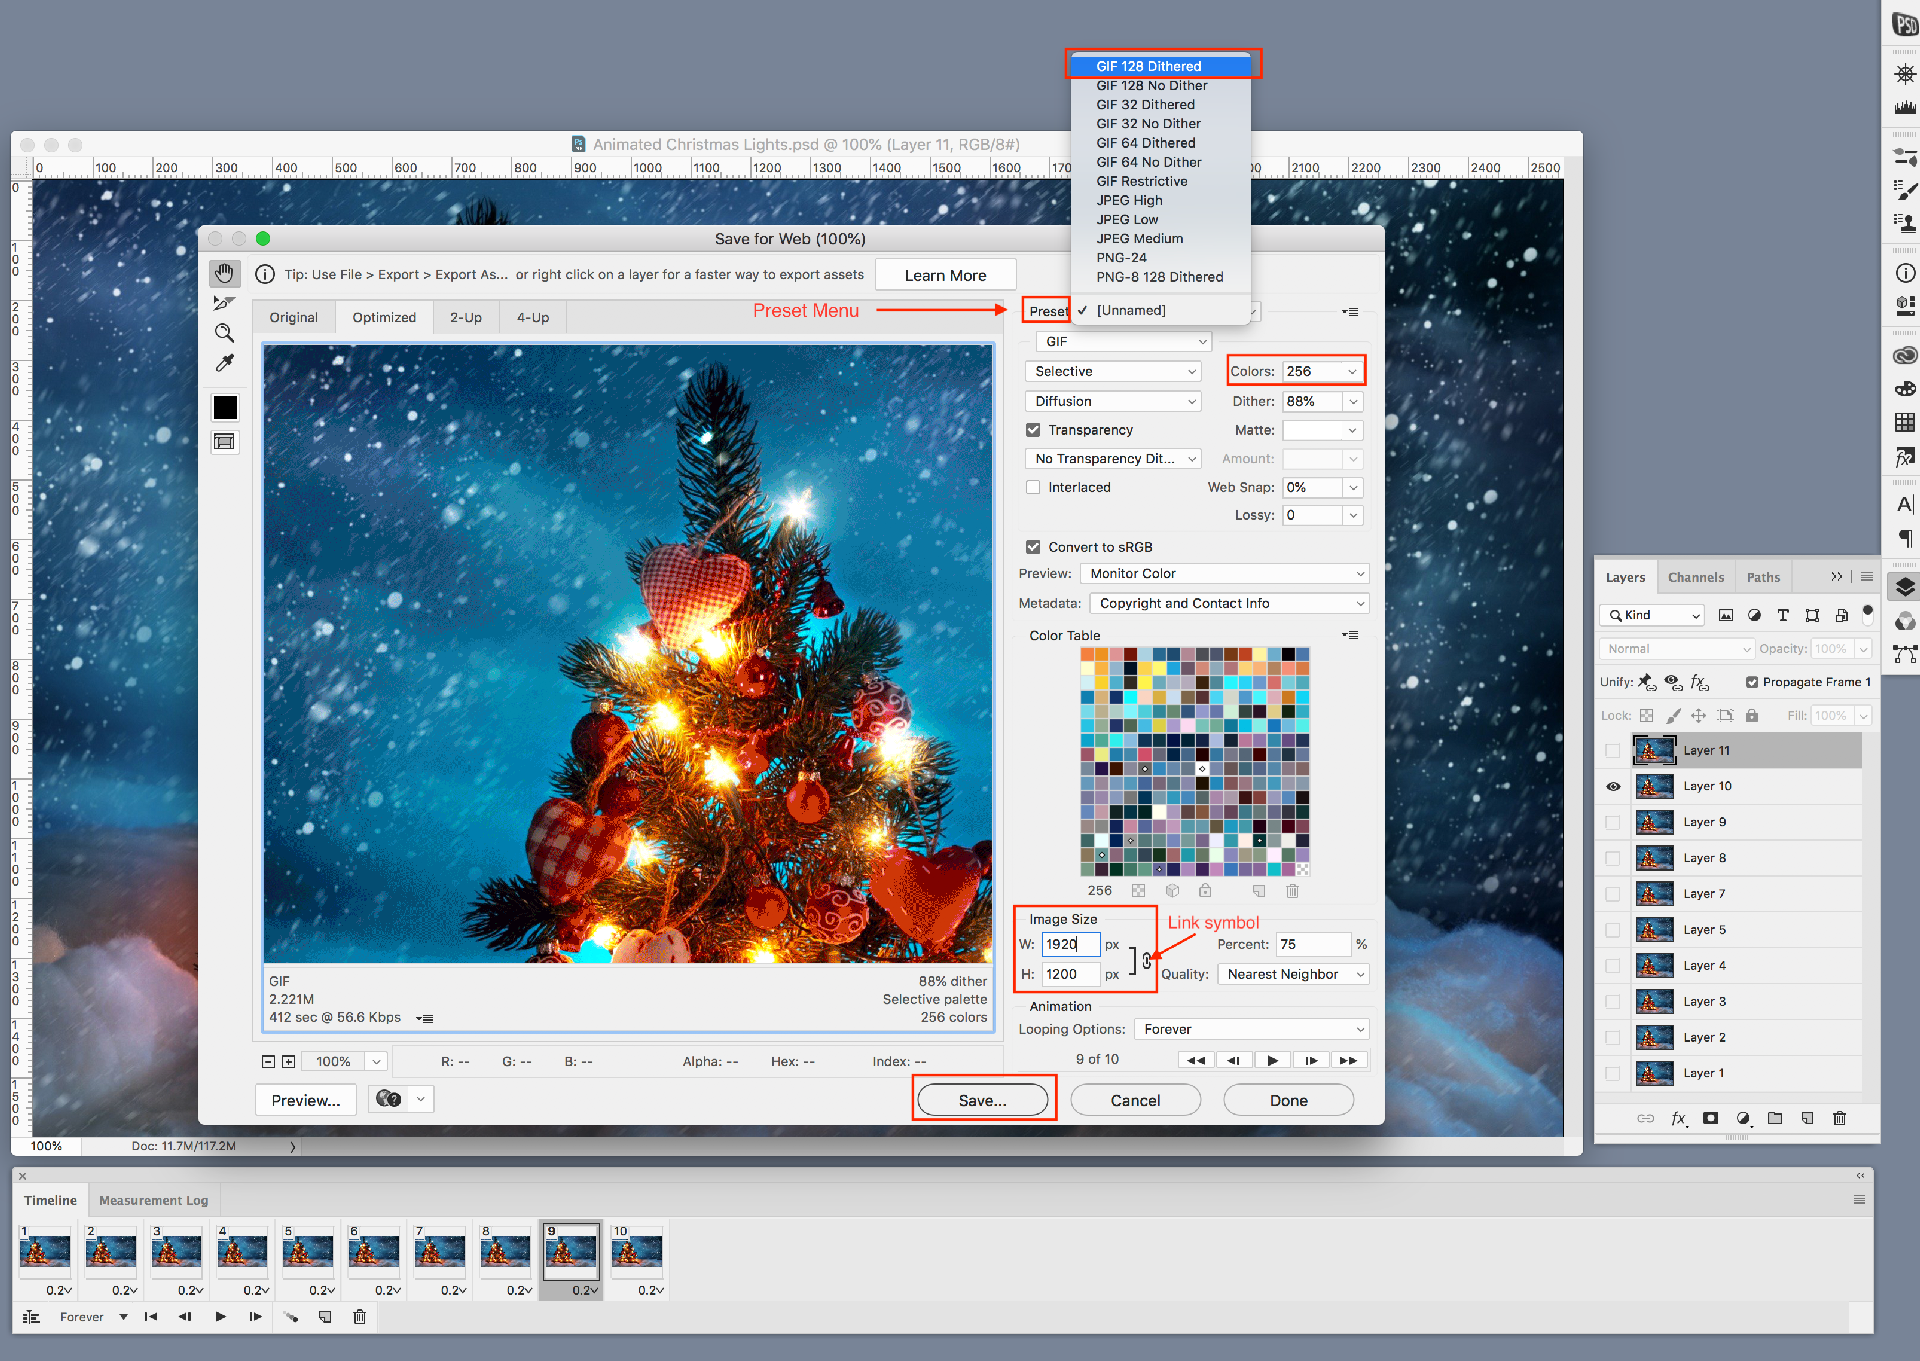
I found my animation satisfactory. Now it was time to save my animation as a GIF so that I could post it on social media.
To do that, type ⇧⌥⌘S and select GIF 128 Dithered from the Preset Menu on the top right of the Save For Web dialog box. Change the colors to 256. My file was huge, so I changed the image size to 1920 pixels wide in the Image Size area towards the bottom right of the dialog box. Be sure to verify that the link symbol is active so that your image cranes size proportionally! Finally, click the Save button at the very bottom of the dialog box. And you’re done!
Here's my final animation. I hope you like it.

Like!! I blog frequently and I really thank you for your content. The article has truly peaked my interest.