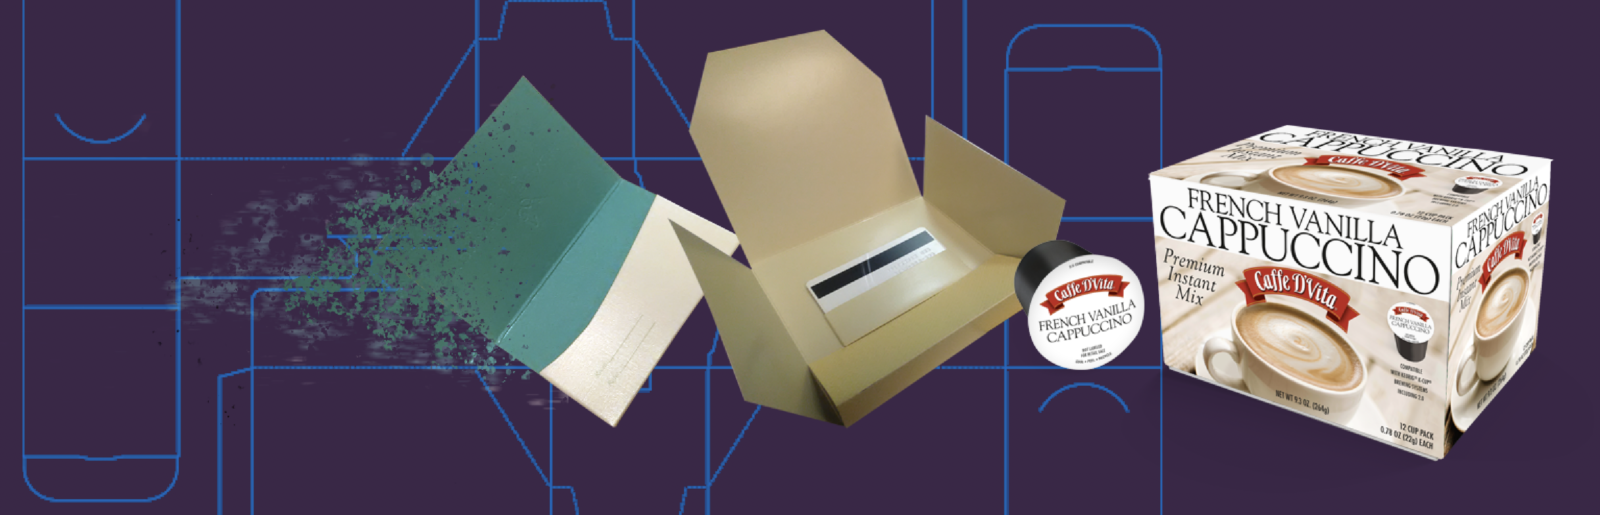
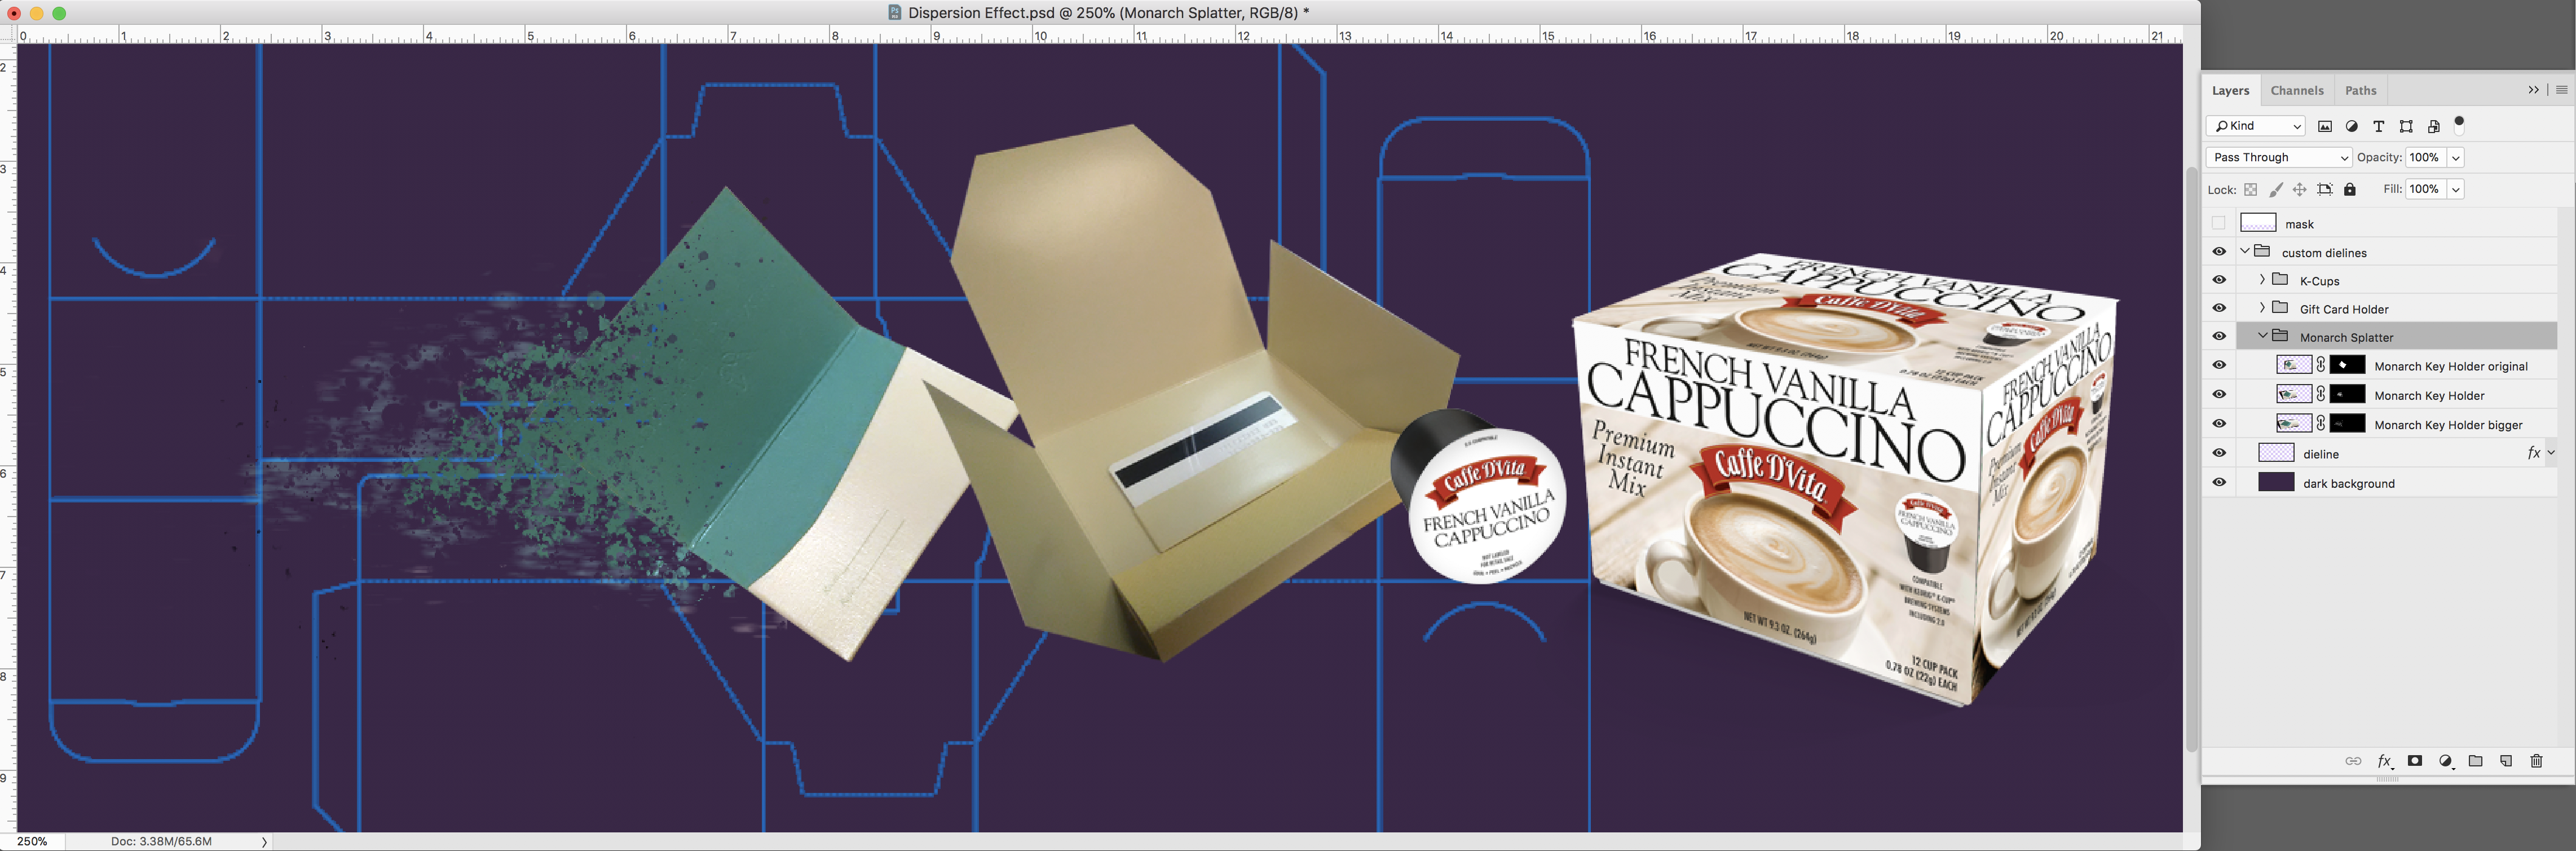
I needed to dream up an image to showcase custom dielines. A pretty boring topic. I decided the best way to illustration this topic was to show some products made with custom dielines and and have them dissolving into an actual dieline on a pretty background.
A Google search led me to dispersion effects and I found a really easy way to pull it off.
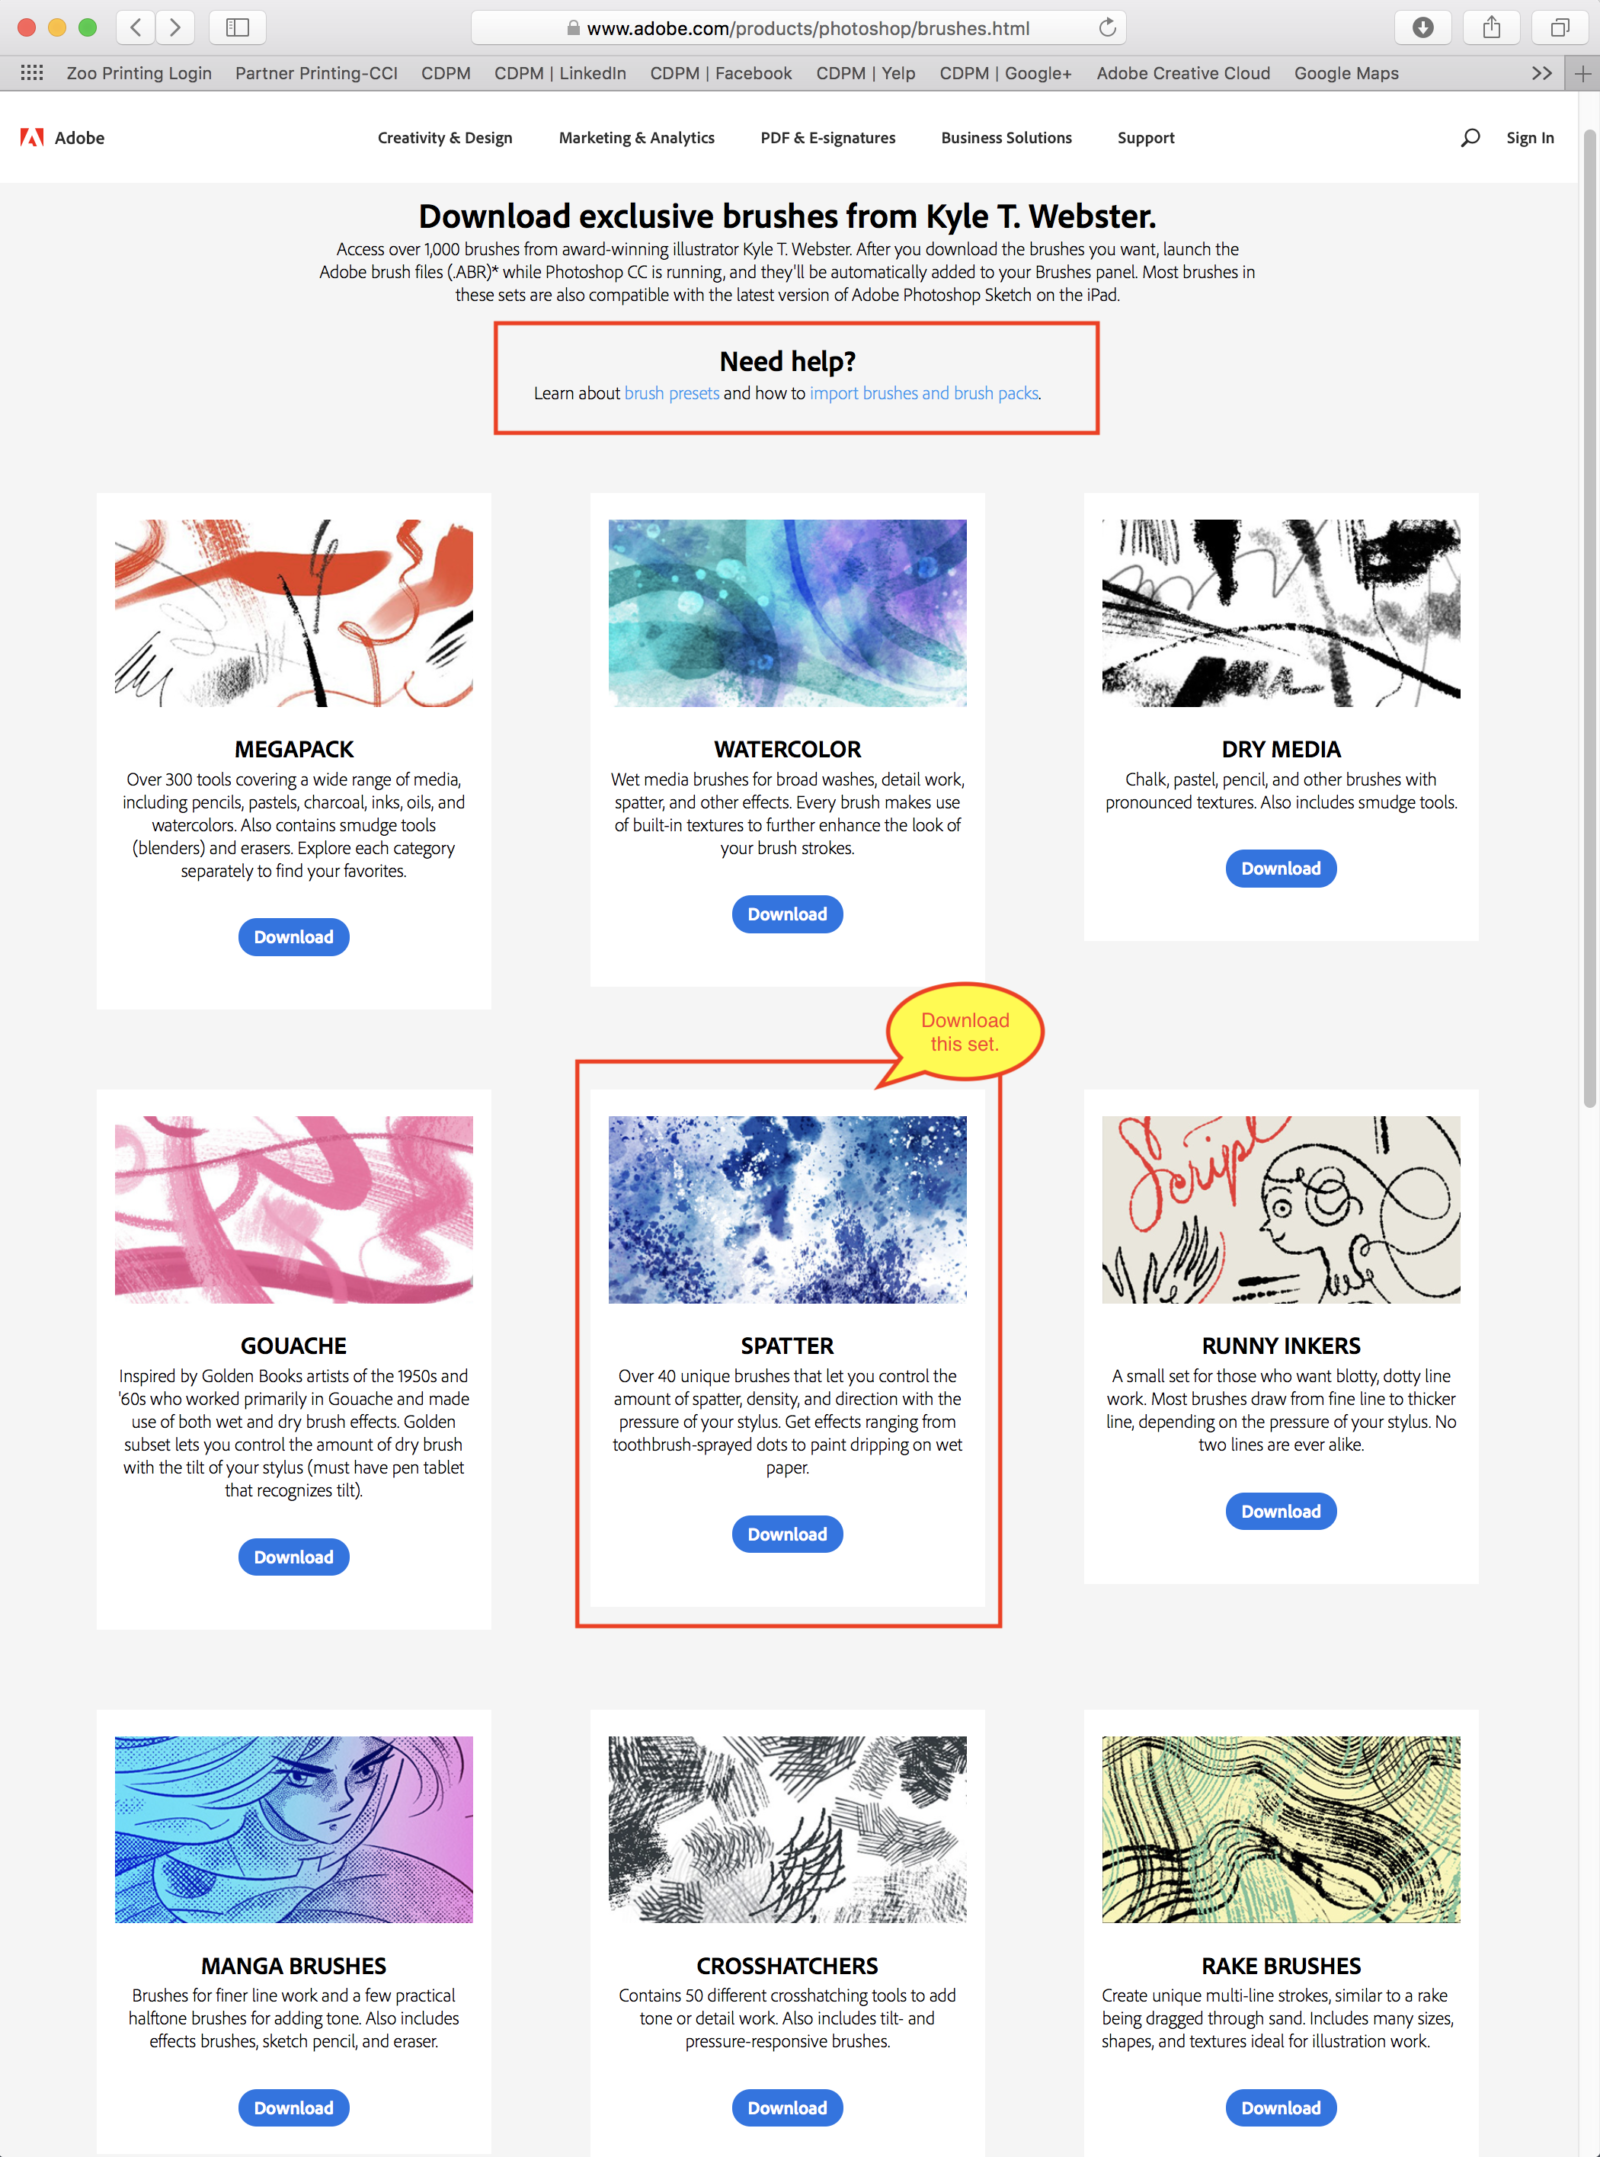
First, I went to adobe.com/products/photoshop/brushes and downloaded the free Kyle T. Webster Photoshop brushes. I selected the Splatter Brush Set and downloaded them. There is a link to show you how to load custom brushes into Photoshop, so I won’t go into those technical details here.
There are a lot of really cool brushes in the free Kyle T. Webster collection, so I recommend that you download as many as you like while you’re there.
Next, I set up my design and decided which product would be the one to receive the Dispersion Effect.
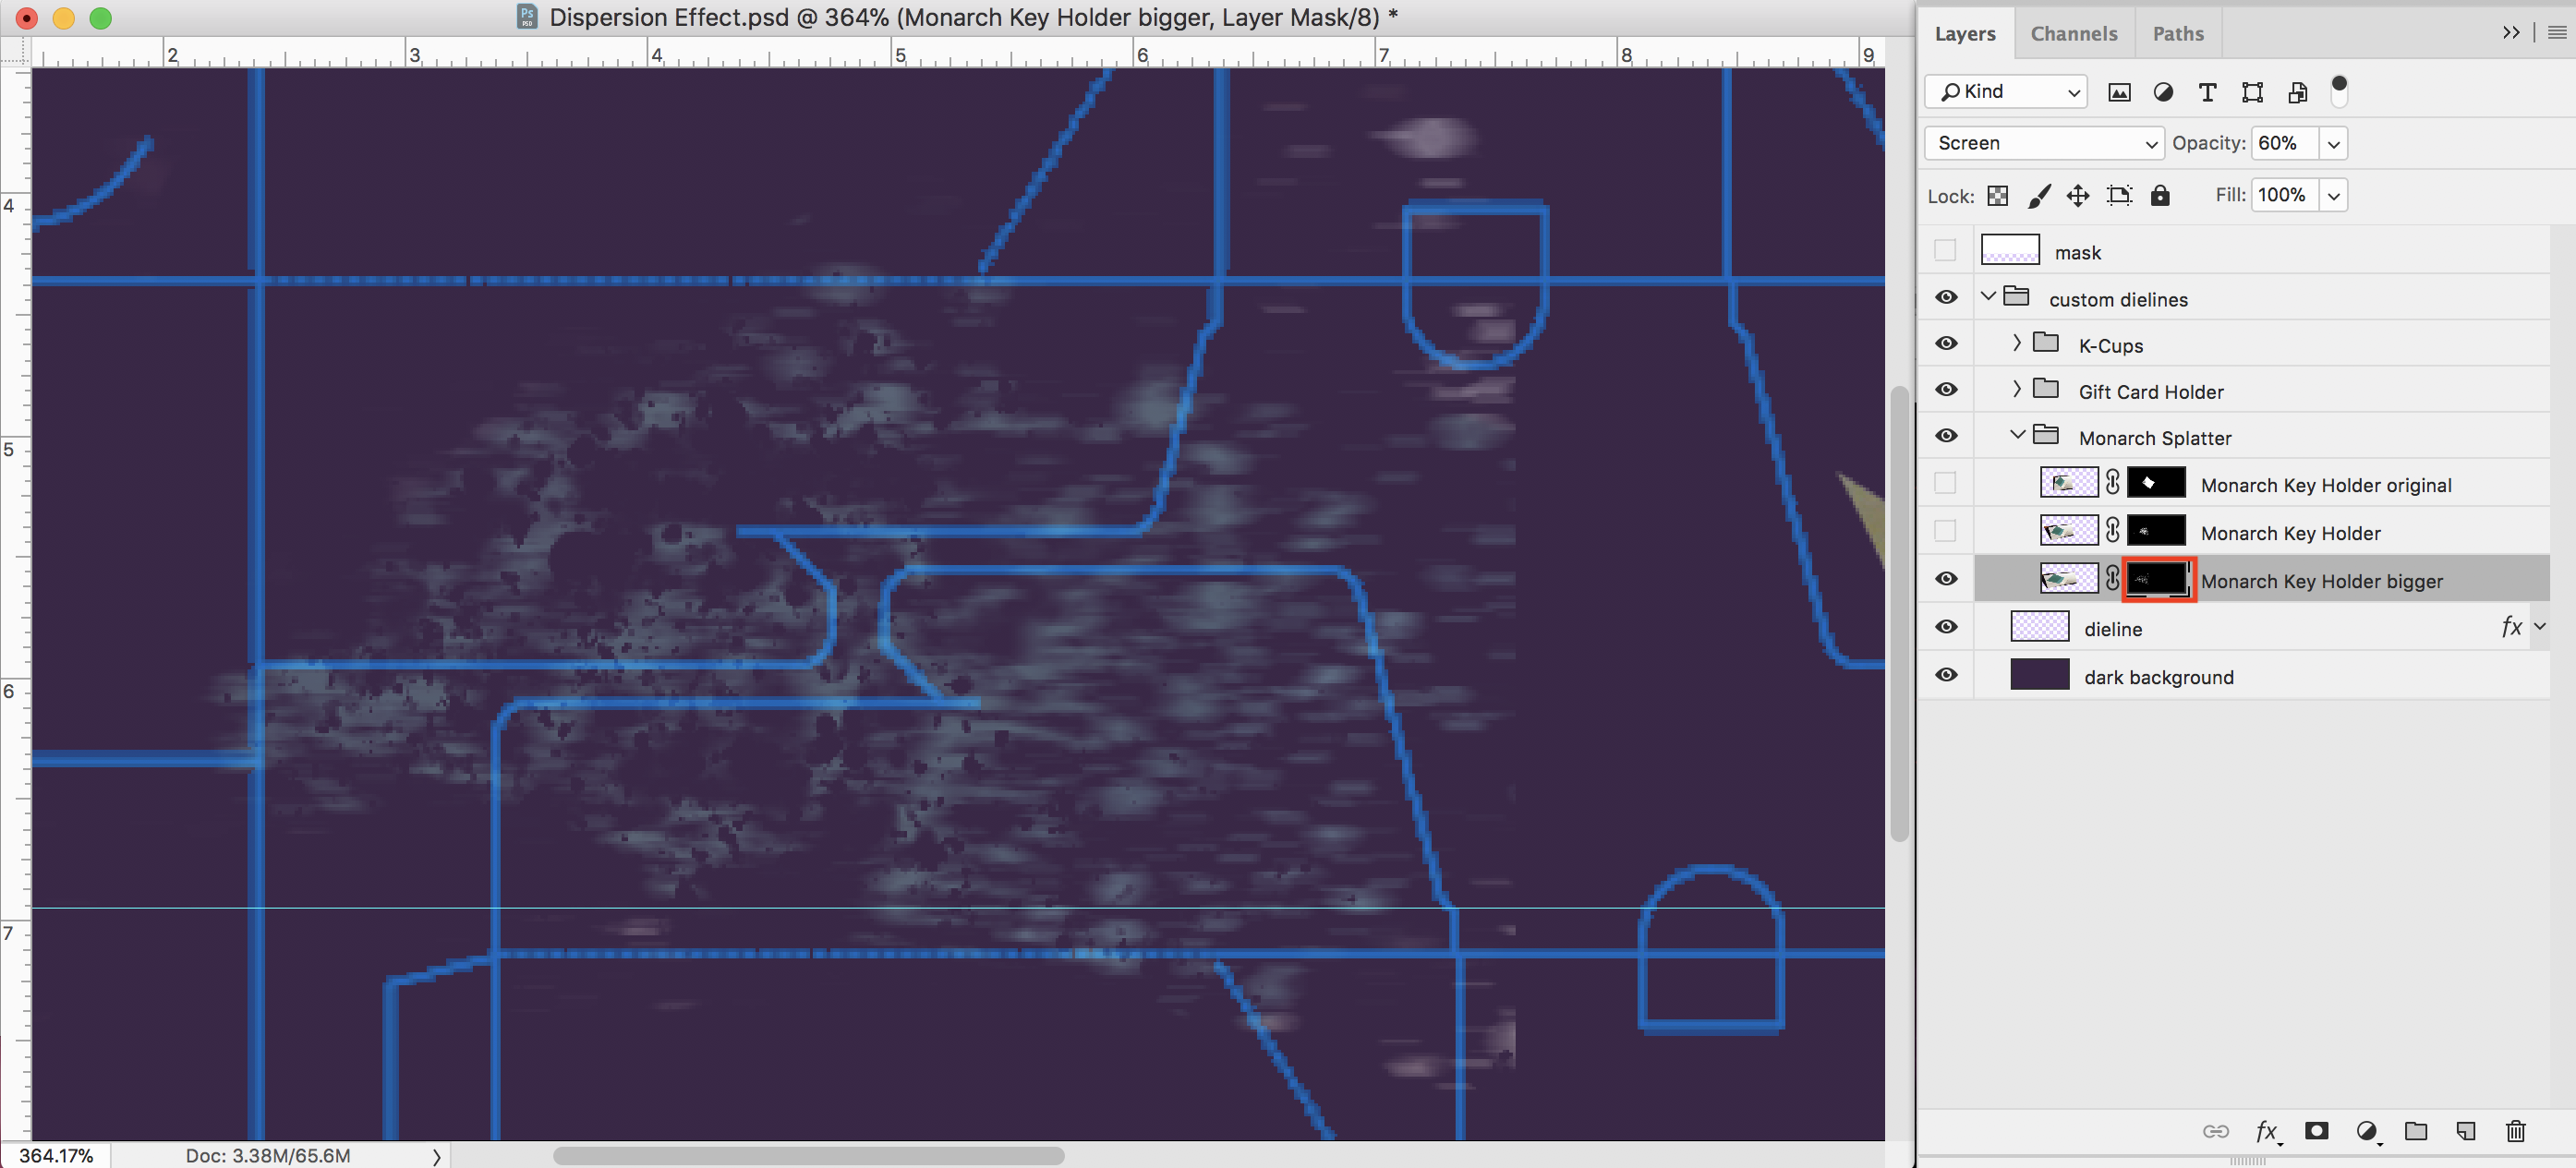
* I recommend that you save all your work as a layered file so that you can go back and make changes if you have to.* Name your layers something meaningful so that when you return to it later, you won’t have to rely on memory to figure out what is what. Grouping the layers meaningfully helps, too.
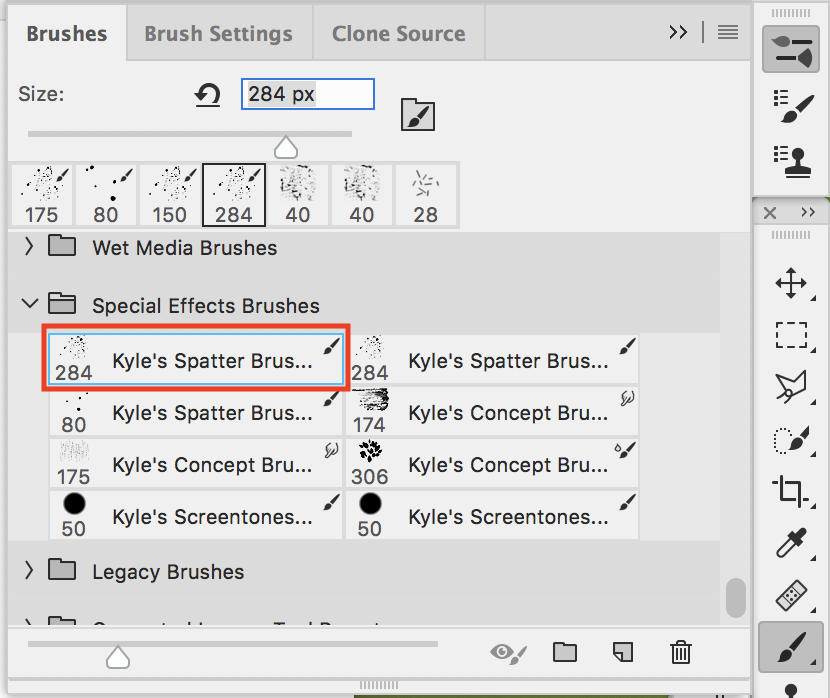
I selected the layer I wanted to dissolve into the background and carefully masked the product to remove the background from the photo. Then I copied it twice and moved the copies below the original image layer. Selecting the top layer, I chose the Kyle Splatter Brush that I liked best.
Next, I selected the mask on my top layer and added some random splatters onto the mask. If you click and hold down the button on your mouse with a Kyle Splatter Brush selected, you will see the splatters build up until you release the mouse button. You can get some interesting effects that way.
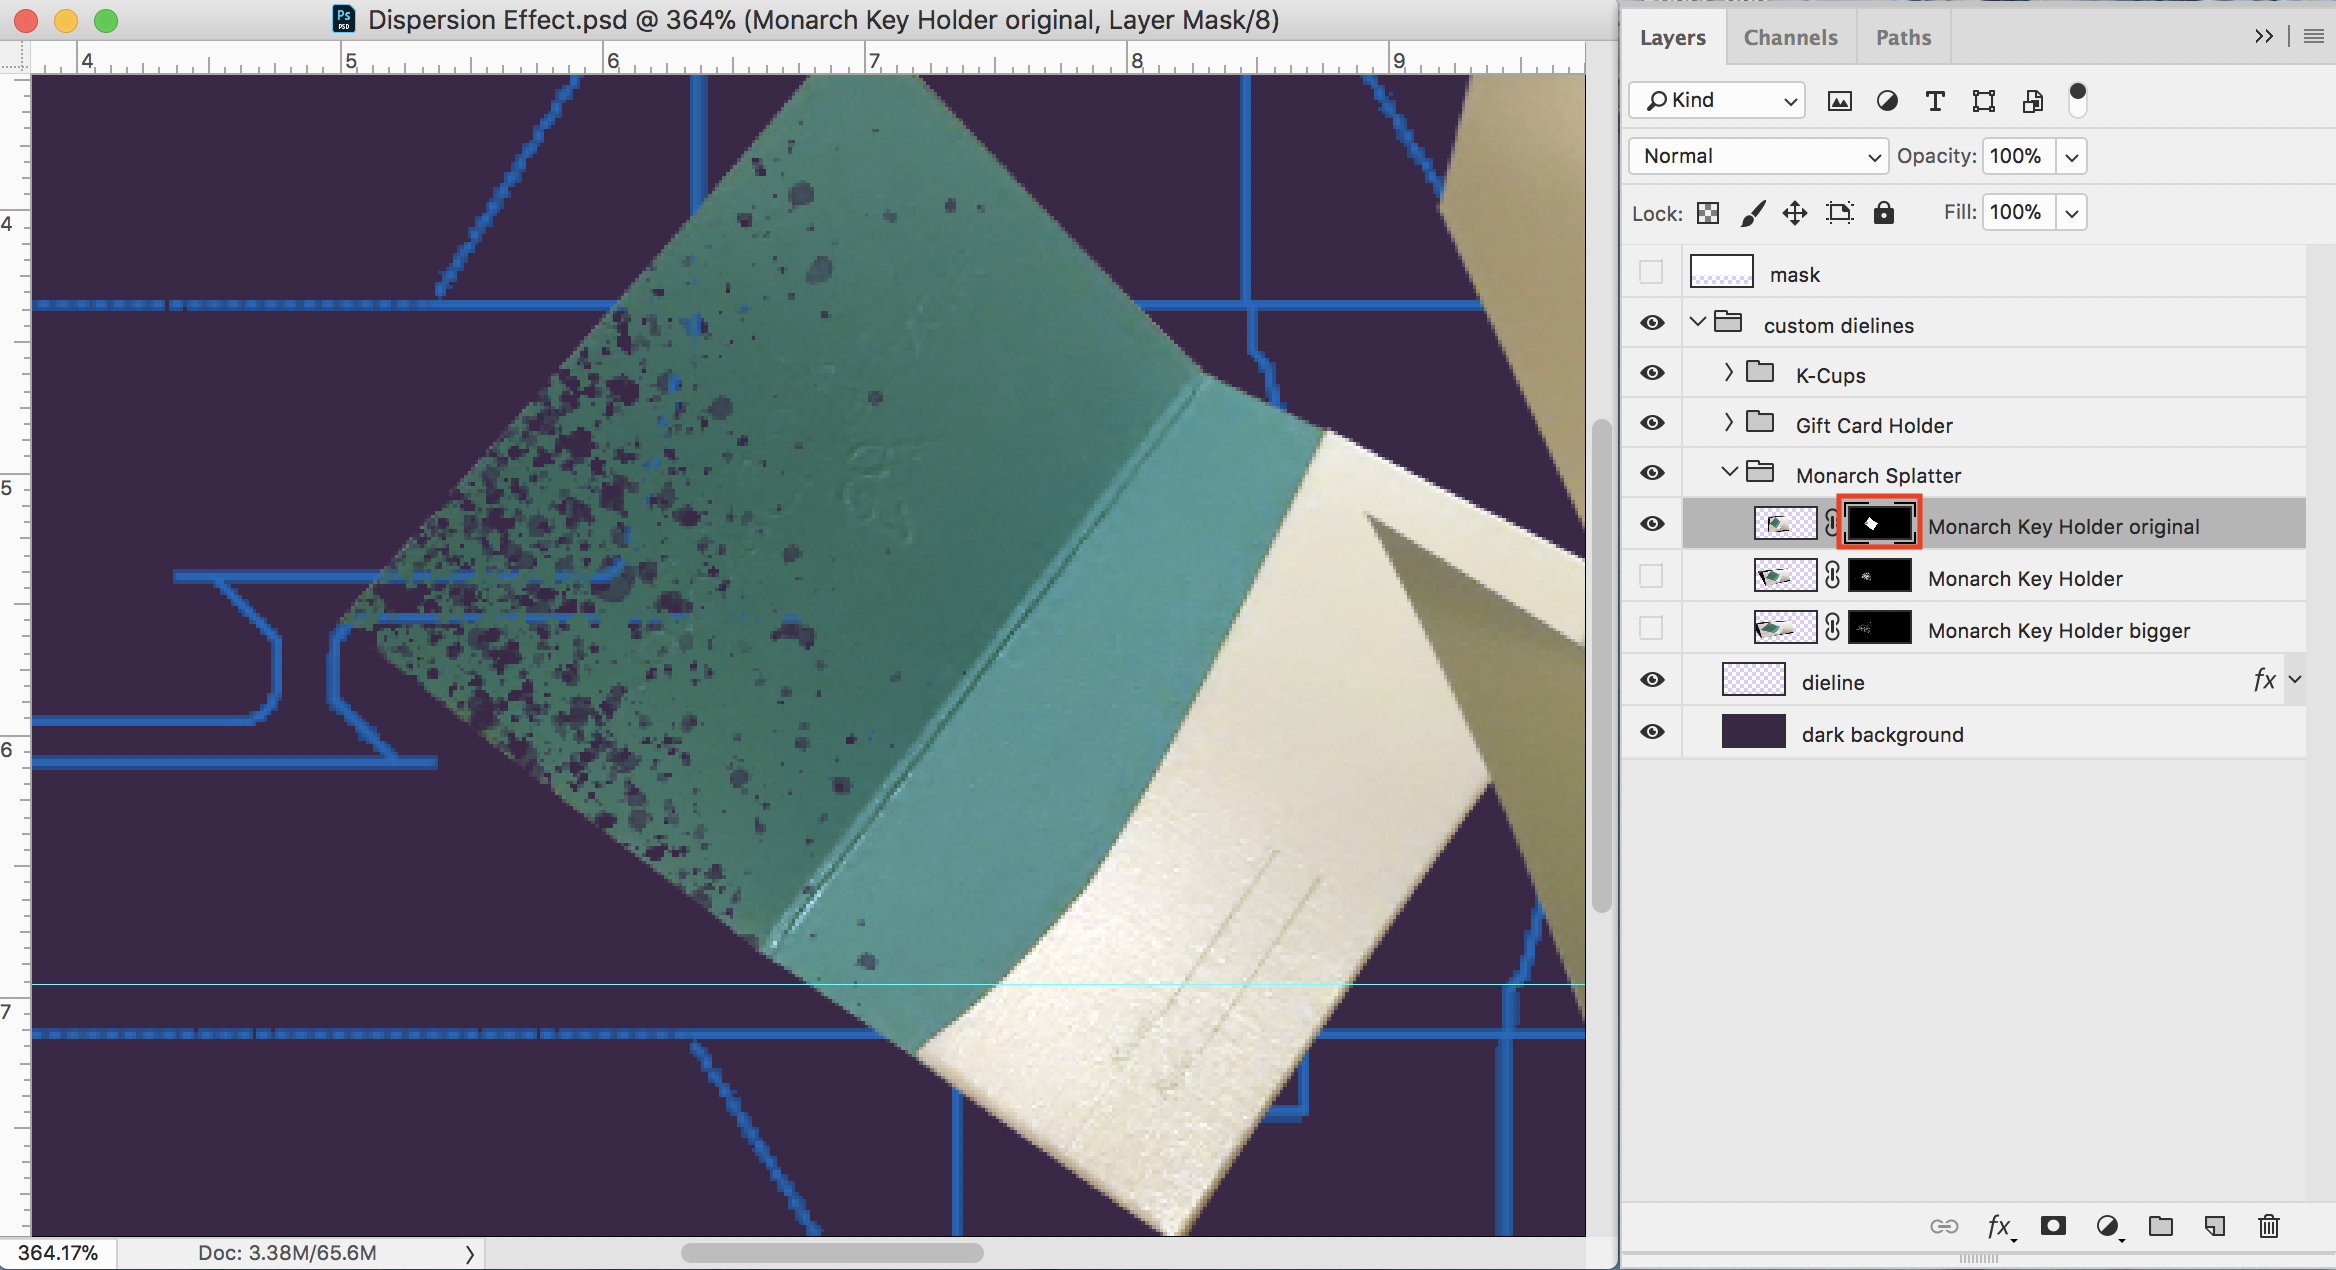
Once I had my top layer looking properly dissolved, I went to the second (middle) layer and masked out the entire product, leaving only some color splatters. I then shifted the second layer to the left to give the impression that the splatters were spreading out.

Finally, I selected the third (bottom) layer, masked out the entire product except for some color splatters. Then I enlarged the entire third layer and used the Smudge Tool on the mask to give the idea of motion. I moved the third layer a lot over to the left. I set the Blending Mode to Screen at 60%.
And below my final result. Pretty easy, don’t you think so?

I truly appreciate this article.Much thanks again. Want more.
Thank you ever so for you blog.Really looking forward to read more. Really Great.
Say, you got a nice blog article. Really Great.
Like!! Really appreciate you sharing this blog post.Really thank you! Keep writing.
Hi to every one, as I am genuinely keen of reading this
website’s post to be updated on a regular basis.
It includes pleasant data.
Enjoyed looking at this, very good stuff, thanks.
Thank you!